Found a total of 10000 related content

Tips and methods to use CSS to achieve blur effects when the mouse is hovering
Article Introduction:Tips and methods for using CSS to achieve blur effects on mouse hover. In modern web design, dynamic effects are crucial to attracting users’ attention and improving user experience. Mouseover effects are one of the common interactive effects that can make a website more vivid and eye-catching. This article will introduce how to use CSS to achieve blur effects when the mouse is hovering, and give specific code examples. Use the CSS filter attribute to set the blur effect. In CSS3, we can use the filter attribute to achieve various image effects.
2023-10-20
comment 0
690

How to implement mouse-over magnification effect on images with JavaScript?
Article Introduction:How to implement mouse-over magnification effect on images with JavaScript? Today's web design pays more and more attention to user experience, and many web pages add some special effects to pictures. Among them, the picture mouse-over magnification effect is a common special effect, which can automatically enlarge the picture when the user hovers the mouse, increasing the interaction between the user and the picture. This article will introduce how to use JavaScript to achieve this effect and give specific code examples. Idea analysis: To achieve the mouse-over magnification effect of images, we can use JavaS
2023-10-20
comment 0
2992

How to use Layui to achieve image blur effect
Article Introduction:How to use Layui to achieve image blur effect Summary: This article will introduce how to use Layui's image processing module to achieve image blur effect. We will provide a detailed code example to help readers achieve the blur effect they want. Introduction: In modern web design, image blur effect has gradually become a common design effect. The blur effect can make the picture look softer and give users a warm feeling. Layui is a very popular front-end framework that provides a wealth of components and functions, including image processing
2023-10-24
comment 0
1259

How to achieve mosaic and blur effects of images in Vue?
Article Introduction:How to achieve mosaic and blur effects of images in Vue? Mosaic and blur effects are common image processing methods that can make images more artistic and have special effects. It is relatively simple to implement these effects in Vue. We can use the HTML5 canvas element and some third-party libraries to achieve it. This article will introduce the implementation method from two aspects: mosaic and blur, and attach corresponding code examples. 1. To achieve the mosaic effect of images, install and introduce the third-party library pixi.js in the Vue project: np
2023-08-26
comment 0
1727

How to create image hover details using HTML and CSS?
Article Introduction:Using image hover effects with text details can add extra interactivity to your website. By using a small amount of HTML and CSS, you can transform a still image into an entity with explanatory wording when the user hovers over the image. This tutorial will walk you through developing a simple icon hover effect, including the HTML code and CSS decoration required to achieve the final effect. Whether you are a newbie or an experienced web page creator, this article will provide you with the details you need to enrich your website and achieve vivid photo levitation effects. :Hover Selector CSS's :hover selector is used to select and style an element when the user hovers over it. The :hover selector is used with other selectors to
2023-09-07
comment 0
1090

How to create a photo collage effect in Photoshop
Article Introduction:Click [Filter]-[Blur]-[Gaussian Blur] to slightly blur the photo. Use the [Rectangle Tool] or other polygonal tools to select the parts of the photo that you want to highlight. Double-click the rectangle layer, in the pop-up layer style, set [Fill Opacity] to 0, change the hollowing to [Light], add a white [Stroke] and a random angle [Shadow], a collage effect It is generated. Then just copy this rectangular layer and adjust the angle at will, and the collage effect of the entire photo will be presented before your eyes. What I want to say here is that you don’t have to use the Gaussian blur effect at the beginning. You can also use a fill color!
2024-04-18
comment 0
526
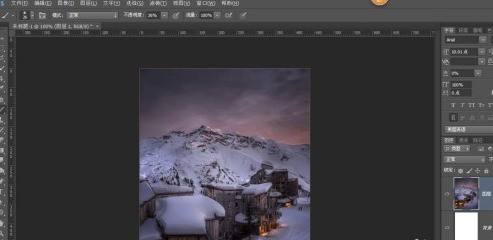
How to create snow special effects in Photoshop_Tutorial on how to create snow special effects in Photoshop
Article Introduction:1. Open a material picture of Xuexiang. 2. Create a new layer and fill it with black. 3. Select Filter, Others, and Add Noise. 4. Select Filter, Others, and Add Noise. 5. Select the threshold and adjust the corresponding parameters. 6. Select the upper and lower layers, ctrl+e to merge the layers, and then continue with filter, blur, and Gaussian blur. 7. Select Screen in the blending mode, then lower the opacity and use a mask to erase some unnecessary parts. 8. The rendering of snow is now available, come and take a look.
2024-06-02
comment 0
358
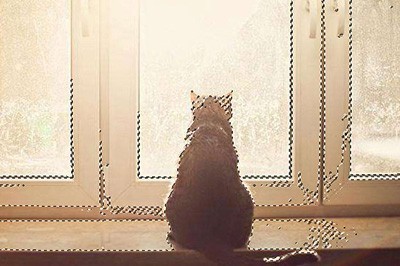
How to add lighting effects to photos in Photoshop
Article Introduction:1. After importing the photo into Photoshop, press the shortcut keys CTLR+ALT+2 to quickly select the highlight area of the picture. 2. Press CTRL+J to copy the selected content to a separate layer. 3. Use [Filter]-[Blur]-[Radial Blur]. In the options box, select Zoom for the blur method, select the best quality, and then adjust the quantity. The larger the quantity, the higher the light intensity. It is recommended not to be too high, otherwise it will affect the picture effect. 4. The final light effect comes out. 5. Of course, if other parts of the picture are also affected by blur, you can use the mask tool and then paint the areas that are not affected by light.
2024-04-01
comment 0
931

Best practices for implementing image filter effects using PHP and GD libraries
Article Introduction:Introduction to the best practices of using PHP and GD libraries to achieve image filter effects: In web development, it is often necessary to perform some special effects processing on images, among which image filter effects are a very common one. You can use PHP and GD libraries to achieve a variety of image filter effects, such as black and white, blur, mosaic, etc. This article will introduce the best practices on how to use PHP and GD libraries to achieve image filter effects, and attach code examples. Background knowledge: PHP: a general-purpose scripting language, especially useful for development
2023-07-13
comment 0
1512

How to add light effects in PS_One filter effect can be done
Article Introduction:1. First, after importing the photo into PS, press the shortcut key CTLR+ALT+2 to quickly select the highlight area of the picture. 2. Then press CTRL+J to copy the selected content into a separate layer. 3. Then we use [Filter] ]-[Blur]-[Radial Blur]. In the options box, select Zoom for the blur method, select the best quality, and then adjust the quantity. The larger the quantity, the higher the light intensity. It is recommended not to be too high, otherwise it will affect the picture effect. 4. The final light effect comes out. 5. Of course, if other parts of the picture are also affected by blur, we can use the mask tool and then paint the area that is not affected by light.
2024-06-08
comment 0
484

What CSS filters do
Article Introduction:Use CSS filters to add special effects to text, images, and other aspects of your web pages without using images or other graphics. If you are developing a website for multiple browsers, then using CSS filters may not be a good idea as it may not bring any advantages. Some CSS filters include motion blur, chroma filters, flip effects, etc.
2023-09-19
comment 0
1380
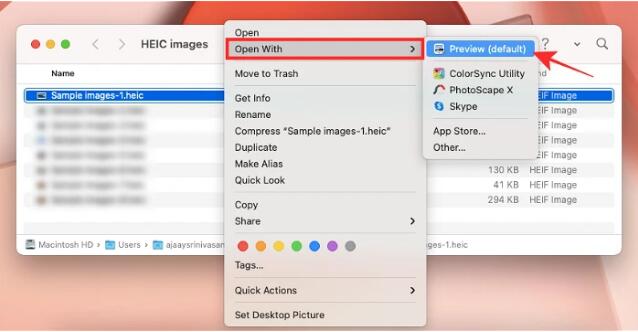
3 Ways to Convert HEIC Photos to JPG on Mac
Article Introduction:By default, iPhone takes photos from the camera in HEIC format. HEIC stands for High Efficiency Image Container and can hold more pixel data than PNG or JPG files, taking up significantly less space on iPhone storage compared to other formats. These files work best on iPhones but are not widely accepted on the internet because they often result in blurry/grainy pictures when you share them with non-Apple devices. To ensure that HEIC images are compatible on other devices, you may need to convert them to JPG format. This article will introduce how to convert HEIC images to JPG on Mac. How to Convert HEIC Photos to JPG on Mac [3 Methods] Method
2024-03-15
comment 0
1244

Detailed tutorial on how to open your hair and change your outfit in Douyin
Article Introduction:1. First open Douyin and enter the camera mode, first open Douyin 2. Secondly, select good music, which is the BGM mentioned above. 3. Then switch the speed to enter the countdown shooting, pause at 7.4 seconds, and start Shooting in extremely slow mode 4. If you are satisfied with the change of clothes during the shooting, return to the shooting page, switch to extremely slow mode, and the countdown will begin to shoot 5. After starting, directly shake your hair up, and then add a flash white effect at the connection , plus blur to clear, add flash white, blur to clear 6. Finally, let’s take a look at the final effect. There are beautiful renderings in the special effects cutout. So the above is actually a simple tutorial on flipping hair and changing outfits. Compare It’s simple and easy to use. If you are a friend who doesn’t know much about it, you can just shake it.
2024-04-18
comment 0
573
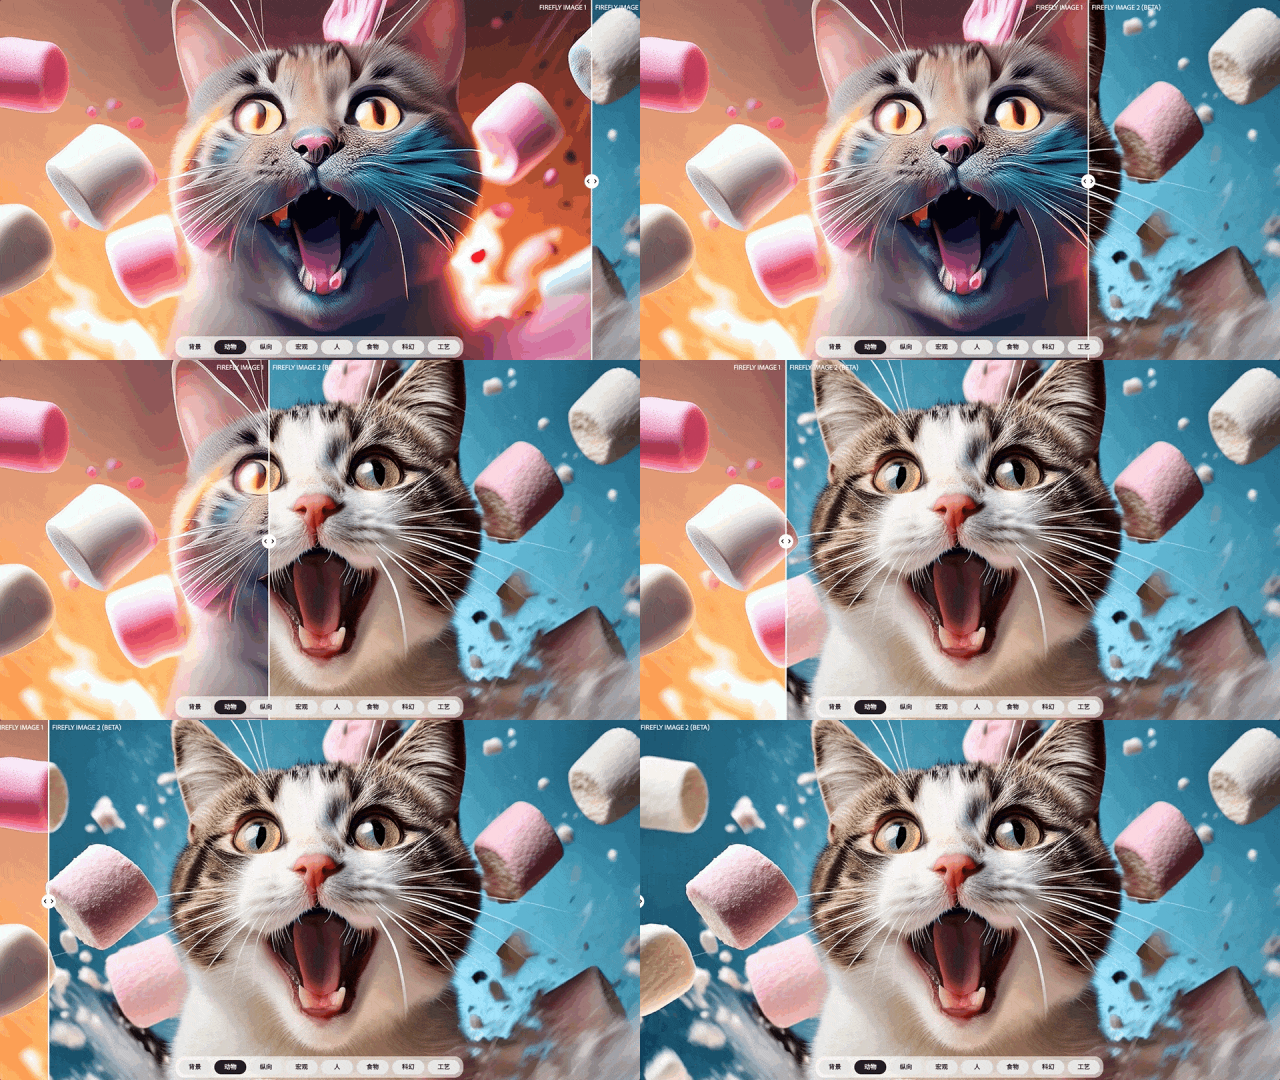
Adobe's new version of AI painting explosion, 2k resolution can be played online, netizens: the effect is stronger than DALL·E 3
Article Introduction:Firefly's new version of the graphic tool directly explodes the Adobe Spring Festival Gala! At Adobe's annual MAX conference, they unveiled a slew of exciting new features. The most eye-catching one is "Vincent Picture 2.0". FireflyImage2 not only generates better image quality, but also increases the default generated resolution to 2048×2048. Every cat hair can be seen clearly: a large number of new functions have been added to the picture. , including the "Picture to Make Picture" function, which can imitate similar styles and generate various settings adjustments, such as depth of field and motion blur effects. Most importantly, like DALL·E3, they are both newcomer-friendly: if the prompt word " "I'm stuck writing", Adobe Firefly can also give direct suggestions. The picture already exists
2023-10-11
comment 0
1425
Detailed steps for adding stars to the night sky using Photoshop
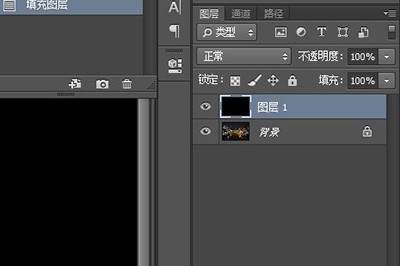
Article Introduction:1. Import the photo into Photoshop, create a new layer 1, and press ALT+DEL to quickly fill it with black. 2. Add [Filter]-[Noise]-[Add Noise] on layer 1, adjust the amount, and create the original starry sky map. 3. Add [Filter]-[Blur]-[Gaussian Blur] again, and the radius should not exceed 10 pixels. 4. Click [Create New Fill or Adjustment Layer] - [Levels] below the layer, move the black, gray, and white arrows closer to each other and modulate the left side until the black screen appears with the effect of dots of stars. 5. After making adjustments, change the blending mode of layer 1 to [Screen]. The stars in the night sky appeared. 6. Finally, create a mask on layer 1 and use the brush tool to paint other parts except the starry sky.
2024-04-01
comment 0
865
How to create a multiply effect in CorelDRAW How to create a multiply effect in CorelDRAW
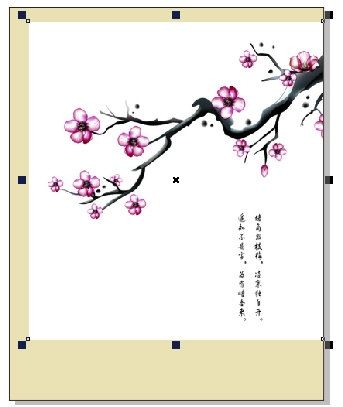
Article Introduction:In the process of designing poster images, we often use the blending mode of the image to create some special effects. Among them, Multiply is a very commonly used mode. It can make the color of the picture darker, and the result obtained by Multiplying black is still black. Multiplying any color and white will keep the original color unchanged, while Executing this mode with other colors will produce the effect of lighting in a dark room with that color. Does CorelDRAW have such a function? Let’s take a look! The specific operations are as follows: 1. First, open the CorelDRAW software, use the rectangle tool to draw a rectangle the same size as the base, and fill it with color. 2. Import an image and resize it to suit your design needs. 3. Select [
2024-05-01
comment 0
644

How to build a card component using Tailwind CSS?
Article Introduction:The card component in TailwindCSS is an important concept in web design, especially suitable for e-commerce websites, blog websites, etc. TailwindCSS is known for building attractive websites. This article will explain how to build a card component using TailwindCSS. How to add a single card component in TailwindCSS TailwindCSS provides us with a very convenient way to add card components. Card components can also contain other sub-components such as video, audio, images, etc. Furthermore, we can easily customize the overall design using the available properties. You can also use TailwindCSS to add animation and hover effects to the card component. The Chinese translation of Example is:
2023-08-20
comment 0
1215

How to add stars to the night sky in PS_A few steps to give you some stars
Article Introduction:1. First import your photo into PS, create a new layer 1, and press ALT+DEL to quickly fill it with black. 2. Add [Filter]-[Noise]-[Add Noise] on layer 1, adjust the amount, and create the original starry sky map. 3. Add [Filter]-[Blur]-[Gaussian Blur] again. It is recommended that the radius should not exceed 10 pixels. 4. Click [Create a new fill or adjustment layer]-[Levels] below the layer and change the black to gray to white. The arrows move closer and modulate the left side until the black screen appears like a starry effect. 5. After making the adjustments, we change the blending mode of layer 1 to [Screen]. The stars in the night sky appeared. 6. Finally, we create a mask on layer 1 and use the brush tool to paint other parts except the starry sky.
2024-06-10
comment 0
1107
Windows Photos app upgrade: background blur and smart search highlights
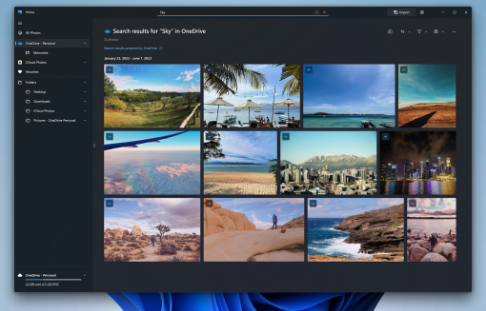
Article Introduction:Microsoft has invited members of the Canary and Dev channels in its latest Windows Insider project, where they will have the opportunity to test a range of new features and improvements, including the new Windows Photos app. This new version adds more powerful editing tools and search functions to provide users with a better photo management experience. The new Windows Photos application introduces a background blur function, and users can enable the "background blur" option in edit mode. This function can intelligently calculate the subject in the photo and highlight the subject by blurring the background, making the photo more attractive. Users can also customize the degree of blur according to personal preferences, or use the brush tool to modify specific areas to achieve more detailed editing effects. Another introduction
2023-09-19
comment 0
788


