Found a total of 36 related content

How to set Win11 network connection priority How to set Win11 network connection priority
Article Introduction:Many people who use Windows systems will adjust the priority of network connections, but there are still many people who don’t know how to set the priority of network connections in Win11. It's actually very simple, just click on the network and Internet settings under the network icon. Let’s take a look at how to set it up! Win11 network connection priority setting method 1. First, right-click the [Network Icon] in the lower right corner of the taskbar, and then select [Network and Internet Settings]. 2. In the settings window, on the left sidebar, click [Network and Internet], and on the right click [Advanced network settings (view all network adapters, network reset)]. 3. Under related settings, click [More Network Adapter Options]. 4. In the network connection window, click
2024-09-09
comment 0
240

How to add a new network connection in Win11 How to add a network on a Win11 computer
Article Introduction:Hello everyone, today I will teach you how to add a new network connection on Win11. First, we click on the network icon under the taskbar, then select "Set up a new connection" under "Network and Internet Settings", and then you can set up a new router or access point. Next, this site will introduce you in detail how to add a network connection on Win11, let’s take a look! How to add a network to a Win11 computer 1. First, right-click the network icon in the lower right corner of the taskbar, and from the opened items, select [Network and Internet Settings]. 2. Find and click [Dial-up (Set up a dial-up Internet connection)]. 3. After entering, click [Set up a new connection] above. 4. Under Settings Connection or Network, select
2024-09-13
comment 0
1012
What to do if the Win10 App Store cannot connect to the Internet
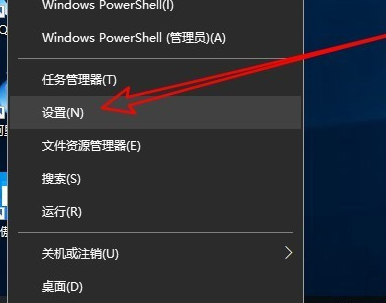
Article Introduction:When using the Win10 App Store, you find that you cannot connect to the network. Do you know what to do? For this reason, the editor provides you with a simple solution to the problem that the Win10 App Store cannot connect to the network. Here, we will solve the problem of being unable to connect based on the operations. Win10 App Store cannot connect to the network solution 1. First refresh the page to see if the problem can be solved. 2. Then click the Start function in the lower left corner, and then select the Settings function to open it. 3. Click the Network and Internet icon in the Windows 10 settings window that opens. 4. Then find the status menu item on the left side of the opened network window and click it, and continue to click the shortcut link to change connection properties in the right column.
2024-09-14
comment 0
512

What to do if win7 computer cannot access the Internet
Article Introduction:Many of us are using desktop computers with win7 system, and they connect to the Internet by plugging in network cables. However, some friends say that their computers still cannot access the Internet even though they are connected with network cables, and they don’t know what to do. This win7 tutorial will share two solutions with you. Let’s take a look at how to operate it! What to do if your win7 computer cannot access the Internet? Method 1: Right-click our network icon, open the Network Sharing Center, and check the current status of our network connection. 2. The first item in the Network Sharing Center is a diagram of our current network connection. Check where there is a problem. Generally, a yellow exclamation mark or a red cross will appear where there is a connection problem. 3. Click the yellow exclamation point or red cross and our system will automatically
2024-09-12
comment 0
491
How to solve the problem that multiple network connection icons are displayed in the lower right corner of the win7 taskbar
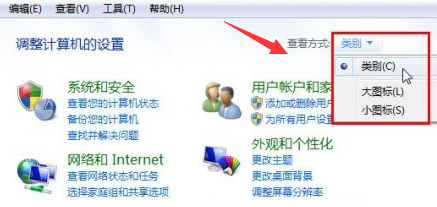
Article Introduction:Do you know? Some people have several network connection icons displayed in the lower right corner of their computer taskbar, many of which are never used. How to solve this problem? Don't worry, I'll teach you how to solve it right now. Don’t panic, after reading this win7 tutorial, I guarantee it will help more people! The solution is as follows: Method 1. Open the "Control Panel". After entering, change the viewing mode to "Categories" and click "Network and Internet". 2. Click "Local Area Connection 2" to modify the name of the desired local connection. 3. Press win+r on the keyboard to open the run function, enter cmd in the run function to open the command prompt window. Then enter: setdevmgr_show_nonpresent_devices=14, return
2024-09-09
comment 0
1057

How to set up a temporary wireless network in win7. Tutorial on setting up a temporary wireless network in win7.
Article Introduction:Recently, many friends who use win7 system want to build a temporary wireless network on their computers, but they don’t know how to do it. Today I will teach you how to set it up! The following are the detailed steps. Friends who need it can go to the PHP Chinese website to take a look! Tutorial on establishing a temporary wireless network in Windows 7 1. Open the Control Panel in the Start menu bar. 2. Click Network and Sharing Center. 3. Click Set up a new connection or network. 4. Scroll the drop-down menu to the end, click Set up a wireless temporary network, and click Next. 5. Select wireless network connection and click Next. 6. Set the network name and security key (password) according to personal needs. It is recommended to select wpa2 as the security type, and click Next. 7. In this way, a point-to-point network connection with zsj2 as the network name is established.
2024-09-13
comment 0
565

How to set up the Network and Sharing Center in Win11 How to set up the Network and Sharing Center in Win11
Article Introduction:Hello everyone, do you know how to set up the Network and Sharing Center in Win11? It’s actually very simple! Just find the dial-up option in the network and internet under the settings interface and click to open it. Next, I will teach you how to set up the Win11 Network and Sharing Center, let’s take a look! How to set up Win11 Network and Sharing Center 1. First open "Settings" through the bottom start menu. 2. Then enter "Network and Internet" in the left column. 3. Open the “Dial” option on the right. 4. Then click "Set up a new connection" at the top. 5. Finally, click "Set up a new network" and wait for the system to automatically scan the network to retrieve the win11 network connection.
2024-09-13
comment 0
288
What should I do if Win10 gets disconnected and cannot connect to the Internet after not using the Internet for a while?
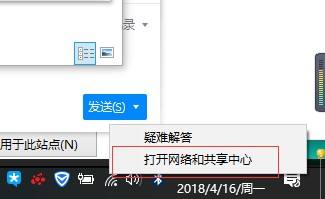
Article Introduction:What should I do if Win10 gets disconnected and unable to connect to the Internet after being used for a long time? We can go to the Network Sharing Center and click on Change Adapter Settings, and then click on the Wireless Properties under WLAN to solve the problem. Next, let’s see how this site teaches you how to solve this problem! Detailed explanation for Win10 disconnecting after not using the network for a period of time and being unable to connect to the Internet. 1. Right-click the WiFi icon in the lower right corner of the desktop and select [Open Network and Sharing Center]. 2. Then click [Change Adapter Settings] in the left column. 3. Then double-click our [WLAN]. 4. After opening this window, click [Wireless Properties]. 5. After entering the settings, check the boxes as shown in the picture below.
2024-09-09
comment 0
317

How to check the wireless network password in win11. Tutorial on how to check the wifi password in win11.
Article Introduction:Many people now use Wi-Fi to connect to the Win11 system, and some people want to check the password of the connected wireless network on their computer. Today, the editor of PHP Chinese website will share with you how to check it. Friends who are interested can check out the content of this Win11 tutorial with the editor! Win11 View WiFi Password Operation Tutorial 1. Right-click the network icon on the Win11 taskbar and select the "Network and Internet Settings" option to enter the relevant interface. 2. Click "Advanced Network Settings". 3. Then select the “More Network Adapters” option. 4. In the network connection interface, right-click WLAN, and then click the "Status" option. 5. Enter the WLAN state and select the "Wireless Properties" option. 6. Finally enter the security interface and check
2024-09-12
comment 0
317
How to add a hidden wireless network in Win10 How to add a hidden wifi in Win10
Article Introduction:Hello everyone! Today we are going to teach you how to add a hidden wireless network on Win10 system. This method is very simple, just follow the steps below! First, we need to open the "Network and Internet Settings" option. Then, select "Change adapter options" and click "Show available wireless networks." Finally, you can see all the wireless networks that can be connected!
2024-09-12
comment 0
950
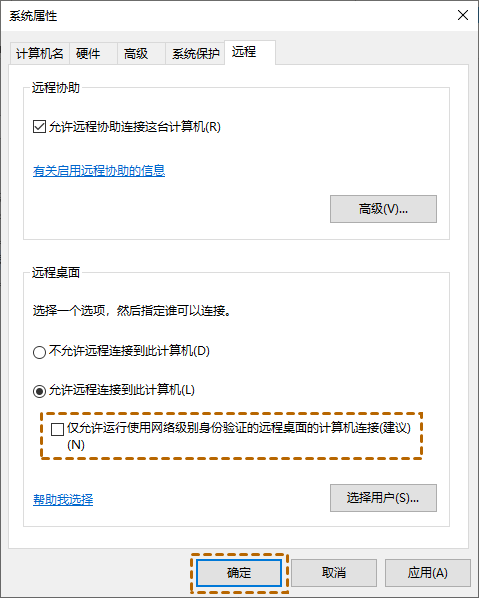
What to do if win10 remote connection prompts NLA? win10 remote connection prompts NLA detailed explanation
Article Introduction:Hello everyone, today we are going to talk about the problem of remote connection in win10. Sometimes we will encounter a prompt called NLA, which makes our operation inconvenient. But don’t worry, we can fix this problem with some simple steps. First, we need to open the system properties and then go to the remote options. This makes it easy to complete the operation. If you still don’t quite understand, you can check out the detailed tutorials provided on this site! Win10 remote connection prompts NLA detailed explanation method 1. Use properties to disable NLA. The system prompts that the remote computer requires network level authentication. We can enter the system properties to disable NLA to solve the problem that the remote desktop requires network level authentication. 1. Press "Win+R" to bring up the run dialog box, and then enter
2024-09-12
comment 0
1120

What should I do if the win10 network shows that the earth cannot access the Internet?
Article Introduction:Hello everyone, let me teach you how to solve the problem of win10 network showing that the earth cannot be connected to the Internet! In fact, it is very simple. You only need to restart the network or modify the registry to cancel network detection! The following are the specific steps~ Solution 1 for the problem of win10 network showing that the earth cannot access the Internet: Restart directly. First, check whether the network cable is not plugged in properly and whether the broadband is in arrears. The router or optical modem may be stuck. In this case, you need to restart the router or optical modem. cat. If there are no important things being done on the computer, you can restart the computer directly. Most minor problems can be quickly solved by restarting the computer. If it is determined that the broadband is not in arrears and the network is normal, that is another matter. Method 2: Modify the registry to cancel network detection 1. Right-click Start-Run-reg in the lower left corner
2024-09-09
comment 0
650
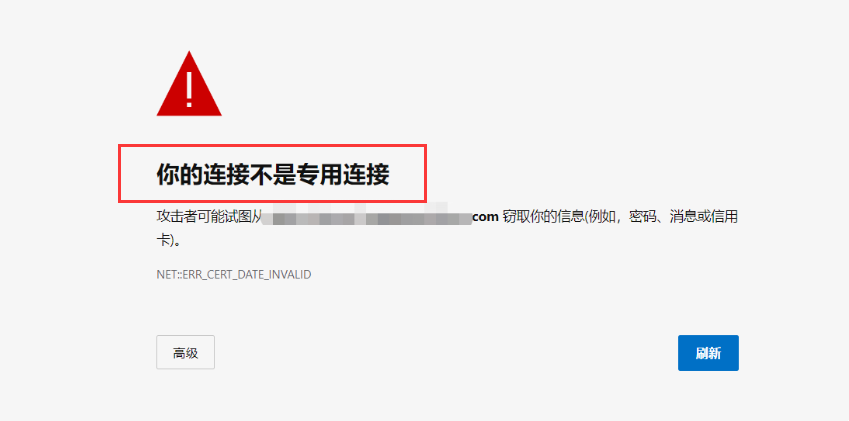
What should I do if win11 shows that your connection is not a dedicated connection?
Article Introduction:Hello everyone, today we are going to share how to solve the problem of "Your connection is not a private connection" in win11. Sometimes we encounter this problem, but the solution is actually very simple. Just open the control panel, find the Windows Defender Firewall option, and then perform some operations to solve the problem. Next, we will introduce this method to you in detail. How to solve the problem that Win11 shows that your connection is not a dedicated connection? 1. Open the Control Panel under the Computer Start option. 2. Then click System and Security. 3. Click Windows Defender Firewall Options. 4. Click to enable or disable the Windows Deferder firewall option. 5. Finally check win
2024-09-10
comment 0
985

How to connect the Logitech driver to the device How to connect the Logitech driver to the device
Article Introduction:How to connect the Logitech driver to the device? When we use the Logitech driver, we can add devices for manipulation. So how does the Logitech driver connect to the device? We only need to plug the device into the computer and wait for the driver to automatically recognize it. Let this site carefully introduce to users how to connect the Logitech driver to the device. Logitech driver connection device method 1. First, we open the Logitech driver. 2. Then click Add Device. 3. Then plug the device into the computer, and the driver will automatically recognize the device. 4. If it cannot be recognized, we can select the type and model. 5. Then click Connect and it will wait automatically.
2024-09-12
comment 0
457

How to open more network adapter options in Win11
Article Introduction:Hello everyone, today I want to teach you how to open more network adapter options on Win11. In fact, the method is very simple. Just find the relevant settings in the advanced network settings, and then find more network adapter properties, and you can easily operate. Next, let me introduce you to the specific steps in detail! How to open more network adapter options in Win11. The first step is to find the relevant settings of the advanced network settings here in Windows 11. In the second step, we can click on more network adapter properties. The third step is to view more network adapters here.
2024-09-09
comment 0
208
What should I do if win11 cannot connect to a shared printer? What should I do if win11 cannot connect to a shared printer?
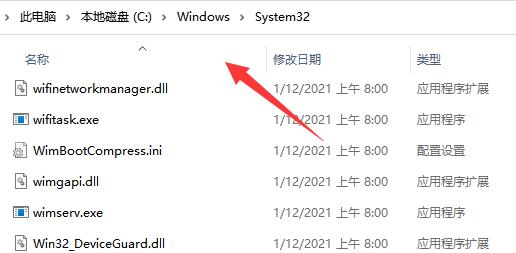
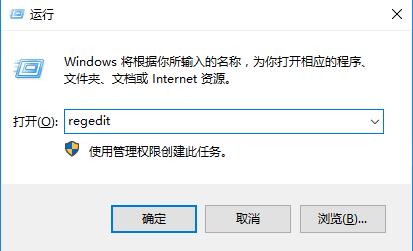
Article Introduction:Some people who use win11 need to connect to a shared printer to print some files when working, but they cannot connect after trying many times. There are many ways to solve this problem. Today the editor of PHP Chinese website will share with you three A more commonly used method, let’s take a look at the content of this win11 tutorial! Win11 cannot connect to the shared printer solution method 1. First, we enter the "C:\Windows\System32" location of the C drive. 2. Find the "win32spl.dll" file and back it up to another location. 3. Then we go to the computer connected to the printer, right-click the start menu and open "Run". 4. Enter "regedit" during operation and press Enter.
2024-09-10
comment 0
751
How to solve Win11 network access prompt error 0x800704cf Win11 network access prompt error 0x800704cf solution
Article Introduction:Some friends reported that the 0x800704cf error code was prompted when using Win11 for network access. What is going on? So how to solve the error 0x800704cf when Win11 network access is prompted? Now the editor will give you a detailed introduction to the solution to the Win11 network access prompt error 0x800704cf. Take a look if you need it! 1. Right-click Start in the taskbar below. 2. Select "Device Manager" in the option list to open. 3. In the window interface that opens, find "Network Adapter" and expand it. 4. Then click the "View" option in the top toolbar and select the option bar below
2024-09-19
comment 0
586

What should I do if win11 cannot enable the network? Win11 cannot enable the network. Detailed explanation
Article Introduction:Everyone needs to use the Internet when using a computer, but some users also encounter the problem that Win11 cannot enable the Internet. What should we do at this time? It's actually very simple. You just need to uninstall the system settings under the update and click Uninstall. Let’s talk in detail about the specific solutions to the problem that Win11 cannot enable the network! Win11 cannot enable network detailed explanation method 1. 1. Search [Uninstall updates] in the Windows search box, and then click to open the best match given by the system [Uninstall updates system settings]. 2. Find the latest system update and click [Uninstall]. Method 2. 1. Search [Settings] in the Windows search box, and then click to open the best matching [Settings application] given by the system. 2. The settings window opens
2024-09-12
comment 0
1014
What to do if Win10 remote connection prompts a function error? Win10 remote connection prompts a function error. How to solve it?
Article Introduction:When Win10 is connected remotely, a function error message appears, resulting in the inability to connect directly. So what should I do if Win10 remote connection prompts a function error? The editor below will give you a detailed introduction to the solution to the Win10 remote connection prompt function error. If necessary, let’s take a look! 1. Use the "win+R" shortcut key to start running, enter "regedit" and press Enter to open it. 2. Enter the registry editor and change "ComputerHKEY_LOCAL_MACHINESOFTWAREMicrosoftWindowsCurrentVersionPoliciesSystemCr
2024-09-19
comment 0
793

How to block port connection in Win7
Article Introduction:When you use a Win7 computer, you can set up to block port connections, which can effectively prevent the intrusion of malicious viruses. So how to do it? The editor below will give you a detailed introduction to the method of blocking port connections in Win7. For those who are interested, Come and take a look with the editor. How to block port connections in Win7: 1. Click Start in the taskbar below and select "Control Panel" in the menu to open it. 2. Click the "Windows Firewall Panel" option in the new interface. 3. Then click the "Advanced Settings" option. 4. Click "Inbound Rules" on the left and select "New&
2024-09-14
comment 0
785
