Found a total of 10000 related content

Beginner's article: How to use PS to create a technological background (share)
Article Introduction:In the previous article "Techniques: How to use PS to create a creative poster effect with an ancient paper background (5 steps in total)", I introduced you to a small technique for quickly creating a poster background. The following article will introduce to you how to use PS to create a technological background. Let’s see how to do it together.
2021-09-14
comment 0
9266

Tips: How to use PS to create a cool technological background (Collection)
Article Introduction:In the previous article "Teach you how to use PS to create lightning effects (share)", I introduced you to a technique on how to use PS to create lightning effects. The following article will introduce to you how to use PS to create a cool technological background. Let’s see how to do it together.
2021-09-06
comment 0
7893

PS Beginner's Article: How to add a transparent glass text effect to the background material (share)
Article Introduction:In the previous article "Teach you step by step how to use PS to make a beautiful starry sky creative avatar poster (detailed pictures and texts)", I introduced you how to use PS to make a starry sky creative avatar poster. The following article will introduce to you how to use PS to add a transparent glass text effect to background materials. Let’s see how to do it together.
2021-08-16
comment 0
3797

How to create a honeycomb background material in CorelDRAW with just a few simple steps
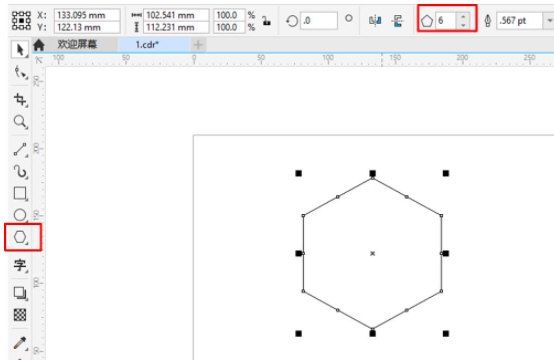
Article Introduction:CorelDRAW is a very easy-to-use design software. During the design process, we sometimes produce some background materials in advance for convenience to make subsequent production more convenient and faster. Today we will take a look at how to use CorelDRAW to create a beautiful honeycomb background! In this process we mainly use the color change and copy splicing functions. The specific operations are as follows: 1. Open CorelDRAW software and draw a regular hexagon 2. Use the [2-point line tool] to connect the vertices 3. Use the [virtual segment deletion tool] to delete some lines to form a cube 4. Use the fill tool to fill Appropriate colors, pay attention to color differences to make the cube more three-dimensional. 5. Right-click [Component]. 6. Copy the combined graphics.
2024-02-12
comment 0
1287

How to import picture materials into PS and use them as layers or backgrounds
Article Introduction:Recently, the editor has received a lot of private messages in the background. Many friends have come to ask the editor how to import picture materials into layers in PS on the computer. In order to help everyone, the editor has collected relevant information online and finally found out how to create a new canvas in PS. The details of the method of importing pictures as background are in the article below. If you need it, please come to this site to take a look. How to import picture materials into layers in computer PS? The specific steps are as follows: 1. You can choose to use the Open command in the file; 2. In the Open command, find the location of the corresponding picture, and then click Open; 3. In this way, the entire picture will be It will be opened in PS; 4. You can also select the picture with the mouse and drag it directly to PS, and the entire picture will be displayed; 5. Drag the selected picture to the top of PS
2024-01-06
comment 0
2298

How to use PS to change the background of pictures
Article Introduction:The method to use PS to change the background of a picture is: 1. Open the picture and background material whose background needs to be changed; 2. Close the background material layer; 3. Click the [Magic Wand Tool] to select the background that needs to be replaced; 4. Create a selection Click [Mask] on the basis of the background material layer and turn on the background material layer.
2020-05-30
comment 0
4125

How to set the background of TikTok topic pictures? Where did the topic pictures come from?
Article Introduction:As a short video social platform, Douyin’s powerful topic function has attracted many users to participate. In Douyin, the background of the topic picture is particularly important. It can not only attract the user's attention, but also make the topic more distinctive. So, how to set the background of the pictures on Douyin topics? 1. How to set the background of pictures on Douyin topics? 1. Choose a background material First, you need to choose a background material for the topic picture. The background material can be a solid color or a picture with patterns, textures, gradients and other effects. You can choose a background material that fits the topic according to your needs and preferences. 2. Adjust the size and position of the background. After selecting the background material, you need to adjust the size and position of the background so that it completely covers the background of the topic picture.
2024-06-21
comment 0
399

Edius steps for using brightness key effects to create keying
Article Introduction:1. To use the Edius brightness key to key, first place the foreground material used for keying on the upper track of the background material. (The foreground material is also the material to be highlighted.) If the foreground material is also a video and audio material, remember to place it on the material. Right-click the mouse, ungroup, and then delete the audio. This will avoid mixing the sounds of the foreground material and background material. 2. Open the special effects panel, click [Key], you will see the [Brightness Key] special effect on the right, add it to the foreground material. 3. In the information panel, double-click [Brightness Key] to open the brightness key setting interface. 4. While looking at the preview window, you can adjust the upper and lower brightness limits on the right side to select the keying range, and preview the desired keying effect in real time until you adjust to a satisfactory keying effect.
2024-04-17
comment 0
881

How to replace photo background in PS
Article Introduction:How to replace the background of a photo in PS: First prepare the character material and background material and open them in PS; then use the magic wand tool and click on the white area to form an ant line; then select all the white areas and execute the Delete command; Finally, copy the prepared replacement background material to one layer and drag it below the character layer.
2019-08-19
comment 0
11578


