Home > Web Front-end > PS Tutorial > Photoshop打造流星划过夜空动画

Photoshop打造流星划过夜空动画

PHP中文网
Release: 2016-06-01 14:34:33
Original
1658 people have browsed it

本教程介绍简单流星动画的制作方法。大致分为两个部分来制作。首先是流星的制作,方法比较简单,用画笔,滤镜即可做好。然后就是动画的制作,需要根据真实的流行效果设置动画。 

 最终效果

Photoshop打造流星划过夜空动画

1、新建一个500 * 500像素的文档,具体设置如下图。

Photoshop打造流星划过夜空动画
 
2,3、背景填充黑色。新建一个图层,用白色画笔点上一个小白点,如下图。

Photoshop打造流星划过夜空动画

4、执行:滤镜 > 风格化 > 风,参数设置如下图。确定后按Ctrl + F 加强两次。

Photoshop打造流星划过夜空动画
 
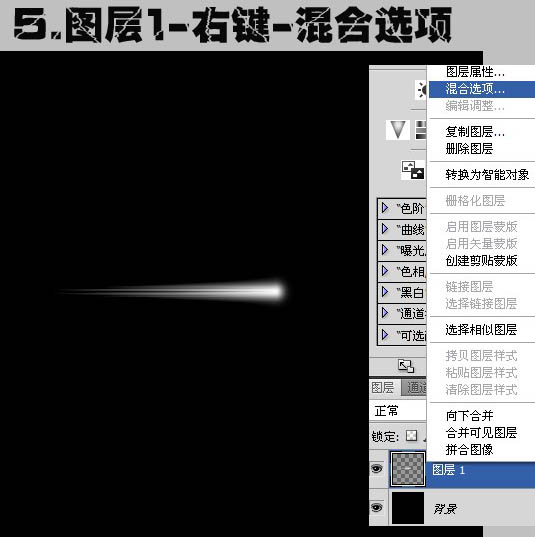
5、在图层1缩略图上右键,选择“混合选项”。

Photoshop打造流星划过夜空动画

设置外发光,参数设置如下图。

Photoshop打造流星划过夜空动画

6、复制图层1,命名为“2”,混合模式改为“溶解”,不透明度改为:21%。

Photoshop打造流星划过夜空动画
 
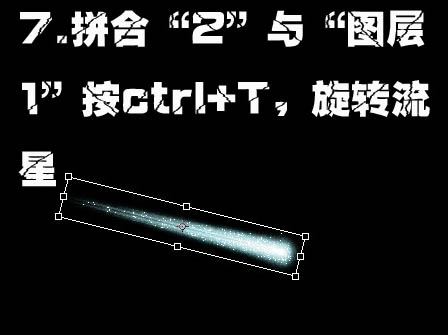
7、拼合“2”与“图层1”,按Ctrl + T ,稍微旋转一下。

Photoshop打造流星划过夜空动画

8、为保证流星的跑到是一条直线,可以用钢笔拉一条路径。

Photoshop打造流星划过夜空动画

9、用移动工具将流星拖到直线的上一端。

Photoshop打造流星划过夜空动画
 
10、复制一帧动画。

Photoshop打造流星划过夜空动画

11、点到第二帧,将流星拖到路径的下面一端。

Photoshop打造流星划过夜空动画

12、删除路径。

Photoshop打造流星划过夜空动画
 
13、点到第二帧,设置过渡属性,具体参数设置如下图。

Photoshop打造流星划过夜空动画

最后导出GIF动画即可,最终效果如下图:

Photoshop打造流星划过夜空动画

Related labels:
Sky
source:php.cn
Statement of this Website
The content of this article is voluntarily contributed by netizens, and the copyright belongs to the original author. This site does not assume corresponding legal responsibility. If you find any content suspected of plagiarism or infringement, please contact admin@php.cn
Latest Articles by Author
Popular Tutorials
More>
Latest Downloads
More>
Web Effects
Website Source Code
Website Materials
Front End Template