


This article is the final version of how to use the jquery UI Datepicker time control. It can be said to be the sublimation of technology. The implemented function has a limited start time and end time span of no more than three days, and is configured with a clearing time and reselection. Time, etc. Interested friends can refer to the date control used in recent projects. It feels good. I wrote it down and shared it with everyone. The start time and end time span of my limit should not exceed three days. , and configured with clearing time, reselection time and other functions, share with everyone:
Let me show you two renderings first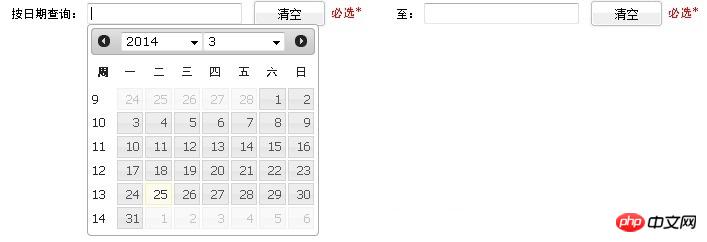
##In the example, the start time and end time I control are three days, that is, the span between the start time and the end time cannot exceed three days. 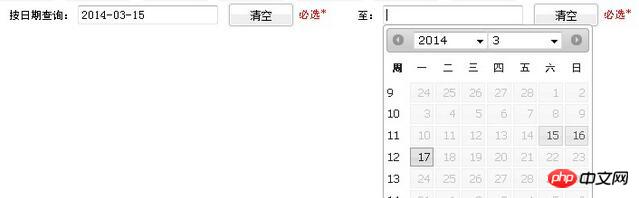
<script type="text/javascript" src="js/jquery.js"></script>
<script type="text/javascript" src="js/jquery-ui-datepicker.js"></script>
<link rel="stylesheet" type="text/css" href="css/jquery-ui.css" />
<td width="35%">
    <label>开始时间:</label>
    <input type="text" name="start" id="start" value="${params.start}" readonly="true" title="日期范围不能大于3天"/>
    <input type="button" class="formButton" value="清空" onclick="cleaPrevInput(this);"/>
    <font color="red">必选*</font>
   </td>
   <td width="35%">
    <label>结束时间:</label>
    <input type="text" name="end" id="end" value="${params.end}" readonly="true" title="日期范围不能大于3天"/>
    <input type="button" class="formButton" value="清空" onclick="cleaPrevInput(this);"/>
    <font color="red">必选*</font>
</td>$(function(){
// 获取调用控件的对象
var dates = $("#start,#end");
var option;
//设置目标时间,因为例子中的开始时间和结束时间是有时间限制的
var targetDate;
var optionEnd;
var targetDateEnd;
dates.datepicker({
showButtonPanel:false,
//当选择时间的时候触发此事件
onSelect: function(selectedDate){
if(this.id == "start"){
// 如果是选择了开始时间
option = "minDate";
//getTimeByDateStr 这个方法的代码下面会贴出来的,就是处理时间的代码
var selectedTime = getTimeByDateStr(selectedDate);
var minTime = selectedTime;
targetDate = new Date(minTime);
//设置结束时间
optionEnd = "maxDate";
targetDateEnd = new Date(minTime+2*24*60*60*1000);
}else{
// 如果是选择了结束时间
option = "maxDate";
var selectedTime = getTimeByDateStr(selectedDate);
var maxTime = selectedTime;
targetDate = new Date(maxTime);
//设置开始时间
optionEnd = "minDate";
targetDateEnd = new Date(maxTime-2*24*60*60*1000);
}
//设置时间框中时间,比如根据选择的开始时间,限制结束时间的不可选项,dates.not(this)是js选择器使用,
//datepicker("option", option, targetDate),这个就是日期控件封装的api了
dates.not(this).datepicker("option", option, targetDate);
dates.not(this).datepicker("option", optionEnd, targetDateEnd);
}
});
});//根据日期字符串取得其时间
function getTimeByDateStr(dateStr){
var year = parseInt(dateStr.substring(0,4));
var month = parseInt(dateStr.substring(5,7),10)-1;
var day = parseInt(dateStr.substring(8,10),10);
return new Date(year, month, day).getTime();
}. This is very simple to implement:
//清空日历控件
function cleaPrevInput(objs){
 //清空输入框中的值,但是仅仅是清空了值而已,时间控件的选值限制还在的
 $(objs).prev().val("");
 //如果开始时间和结束时间都清空了,这时应该是你选择的那个框中是没有时间限制的,也就是说可以随便选择日期
 if($('#start').val()=="" && $('#end').val()==""){
 var dates = $("#start,#end");
 //调用datepicker封装的api,使刚刚设置的开始时间和结束时间为空,这样就可以选择任意日期了
 dates.datepicker("option", "minDate", null);
 dates.datepicker("option", "maxDate", null);
 }
}About how to use the JS component Bootstrap navigation bar
Analysis of jQuery file upload control Uploadify
How to use bootstrap time control daterangepicker
The above is the detailed content of Analysis on how to use jquery UI Datepicker time control. For more information, please follow other related articles on the PHP Chinese website!


![[Web front-end] Node.js quick start](https://img.php.cn/upload/course/000/000/067/662b5d34ba7c0227.png)


