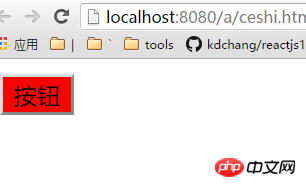
Cette fois, je vais vous apporter une explication détaillée de l'utilisation de l'instruction scopel d'angular Quelles sont les précautions d'utilisation de l'instruction scopel d'angular Voici un cas pratique, jetons un coup d'oeil.
Créons une directive personnalisée
<!DOCTYPE html><html lang="en"><head>
<meta charset="UTF-8">
<title>Document</title>
<style>
.primary{ background: red;
} </style></head><body ng-app="myApp">
<div ng-controller="mainCtrl">
<my-btn></my-btn>
</div>
<script src="node_modules/angular/angular.min.js"></script>
<script>
var myApp = angular.module('myApp',[]);
myApp.controller('mainCtrl',['$scope',function($scope){
$scope.myClass = 'primary';
}]);
myApp.directive('myBtn',function(){ return {
template:'<input type="button" value="按钮" class="{{myClass}}">'
}
}); </script></body></html>
C'est vraiment bien d'utiliser une directive personnalisée comme celle ci-dessus, Mais si vous souhaitez personnaliser les boutons rendus par chaque commande, cela ne semble pas possible. Par exemple, ci-dessous, nous créons un tas de commandes personnalisées, et elles se ressemblent exactement :
<!DOCTYPE html><html lang="en"><head>
<meta charset="UTF-8">
<title>Document</title>
<style>
.primary{ background: red;
} </style></head><body ng-app="myApp">
<div ng-controller="mainCtrl">
<my-btn></my-btn>
<my-btn></my-btn>
<my-btn></my-btn>
<my-btn></my-btn>
</div>
<script src="node_modules/angular/angular.min.js"></script>
<script>
var myApp = angular.module('myApp',[]);
myApp.controller('mainCtrl',['$scope',function($scope){
$scope.myClass = 'primary';
}]);
myApp.directive('myBtn',function(){ return {
template:'<input type="button" value="按钮" class="{{myClass}}">'
}
}); </script></body></html>
<. 🎜>
<!DOCTYPE html><html><head>
<meta charset="UTF-8">
<title>Document</title>
<style>
.primary{ background: red;
} .success{ background: green;
} .default{ background: gray;
} </style></head><body ng-app="myApp">
<div ng-controller="aCtrl">
<my-btn></my-btn>
</div>
<div ng-controller="bCtrl">
<my-btn></my-btn>
</div>
<div ng-controller="cCtrl">
<my-btn></my-btn>
</div>
<script src="node_modules/angular/angular.min.js"></script>
<script>
var myApp = angular.module('myApp',[]);
myApp.controller('aCtrl',['$scope',function($scope){
$scope.myClass = 'primary';
}]);
myApp.controller('bCtrl',['$scope',function($scope){
$scope.myClass = 'success';
}]);
myApp.controller('cCtrl',['$scope',function($scope){
$scope.myClass = 'default';
}]);
myApp.directive('myBtn',function(){ return {
template:'<input type="button" value="按钮" class="{{myClass}}">'
}
}); </script></body></html><!DOCTYPE html><html lang="en"><head>
<meta charset="UTF-8">
<title>Document</title>
<style>
.primary{ background: red;
} .success{ background: green;
} .default{ background: gray;
} </style></head><body ng-app="myApp">
<div ng-controller="Controller">
<my-btn b="className1"></my-btn>
<my-btn b="className2"></my-btn>
<my-btn b="className3"></my-btn>
</div>
<script src="node_modules/angular/angular.min.js"></script>
<script>
var myApp = angular.module('myApp',[]);
myApp
.controller('Controller', ['$scope', function($scope) {
$scope.className1 = 'primary';
$scope.className2 = 'success';
$scope.className3 = 'default';
}])
.directive('myBtn',function(){ return {
scope:{
a:'=b'
},
template:'<input type="button" value="按钮" class="{{a}}">'
}
}); </script></body></html>Bien sûr, le signe = ci-dessus est une liaison de données bidirectionnelle :
<!DOCTYPE html><html lang="en"><head>
<meta charset="UTF-8">
<title>Document</title>
<style>
.primary{ background: red;
} .success{ background: green;
} .default{ background: gray;
} </style></head><body ng-app="myApp">
<div ng-controller="Controller">
<my-btn a="className1"></my-btn>
<my-btn a="className2"></my-btn>
<my-btn a="className3"></my-btn>
</div>
<script src="node_modules/angular/angular.min.js"></script>
<script>
var myApp = angular.module('myApp',[]);
myApp
.controller('Controller', ['$scope', function($scope) {
$scope.className1 = 'primary';
$scope.className2 = 'success';
$scope.className3 = 'default';
}])
.directive('myBtn',function(){ return {
scope:{
a:'='
},
template:'<input type="button" value="按钮" class="{{a}}">'
}
}); </script></body></html>Si uniquement Si vous souhaitez une communication de données unidirectionnelle, vous pouvez utiliser le symbole @ :
<!DOCTYPE html><html lang="en"><head>
<meta charset="UTF-8">
<title>Document</title>
<style>
.primary{ background: red;
} .success{ background: green;
} .default{ background: gray;
} </style></head><body ng-app="myApp">
<div ng-controller="Controller">
<my-btn a="abc"></my-btn>
</div>
<script src="node_modules/angular/angular.min.js"></script>
<script>
var myApp = angular.module('myApp',[]);
myApp
.controller('Controller', ['$scope', function($scope) {
$scope.abc = '我是初始内容';
}])
.directive('myBtn',function(){ return {
scope:{
a:'='
},
template:'<input type="text" ng-model="a"><span>{{a}}</span>'
}
}); </script></body></html>Si vous souhaitez utiliser la classe ng, vous pouvez également l'utiliser :
<!DOCTYPE html><html lang="en"><head>
<meta charset="UTF-8">
<title>Document</title>
<style>
.primary{ background: red;
} .success{ background: red;
} .default{ background: red;
} </style></head><body ng-app="myApp">
<div ng-controller="Controller">
<my-btn a="primary"></my-btn>
</div>
<script src="node_modules/angular/angular.min.js"></script>
<script>
var myApp = angular.module('myApp',[]);
myApp
.controller('Controller', ['$scope', function($scope) {
$scope.mm = 'primary';
}])
.directive('myBtn',function(){ return {
scope:{
a:'@'
},
template:'<input type="button" value="按钮" class="{{a}}">'
}
}); </script></body></html>Enfin, il existe une portée qui peut être définie : Méthodes de référencement des portées externes
<!DOCTYPE html><html lang="en"><head>
<meta charset="UTF-8">
<title>Document</title>
<style>
.primary{ background: red;
} .success{ background: red;
} .default{ background: red;
} </style></head><body ng-app="myApp">
<div ng-controller="Controller">
<my-btn a="primary"></my-btn>
</div>
<script src="node_modules/angular/angular.min.js"></script>
<script>
var myApp = angular.module('myApp',[]);
myApp
.controller('Controller', ['$scope', function($scope) {
$scope.mm = true;
}])
.directive('myBtn',function(){ return {
scope:{
a:'@'
},
template:'<input type="button" value="按钮" ng-class="{primary:a}">'
}
}); </script></body></html>Je pense que vous maîtrisez la méthode après avoir lu le cas dans cet article. Pour des informations plus intéressantes, veuillez prêter attention aux autres. articles connexes sur le site Web PHP chinois !
<!DOCTYPE html><html lang="en"><head>
<meta charset="UTF-8">
<title>Document</title>
<style>
.primary{ background: red;
} .success{ background: red;
} .default{ background: red;
} </style></head><body ng-app="myApp">
<div ng-controller="Controller">
<my-btn fn2="fn()"></my-btn>
</div>
<script src="node_modules/angular/angular.min.js"></script>
<script>
var myApp = angular.module('myApp',[]);
myApp
.controller('Controller', ['$scope', function($scope) {
$scope.fn = function(){
alert(11);
}
}])
.directive('myBtn',function(){ return {
scope:{
fn1:'&fn2'
},
template:'<input type="button" value="按钮" ng-click="fn1()">'
}
}); </script></body></html>Explication détaillée de l'utilisation du matériau angulaire
Quelles sont les règles de dénomination des sélecteurs d'identifiant dans css
La méthode impopulaire de centrage des éléments horizontalement et verticalement
Ce qui précède est le contenu détaillé de. pour plus d'informations, suivez d'autres articles connexes sur le site Web de PHP en chinois!
 La différence entre tas et pile
 Comment ouvrir le fichier iso
 Quel est le système qad ?
 Quels plug-ins sont nécessaires pour que vscode exécute du HTML ?
 Quelle est la différence entre php7 et php8
 Commande de fermeture du port CMD
 Quelles sont les méthodes d'appel de la réflexion Java
 Comment résoudre le problème des 400 requêtes incorrectes lorsque la page Web s'affiche