
In Revit, layers are an important tool for organizing and managing elements in architectural models. Properly setting layers can help improve image quality and efficiency. In view of the complexity of Revit output layer settings, PHP editor Xinyi has specially compiled detailed setting steps to help everyone easily master layer management skills. Please continue reading the following content to understand the specific operation process of Revit export layer setting to improve the efficiency of your architectural design work.
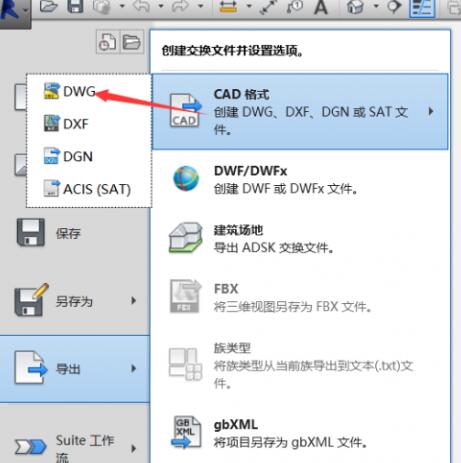
Click the Revit icon in the upper left corner and choose to export cad drawings in dwG format
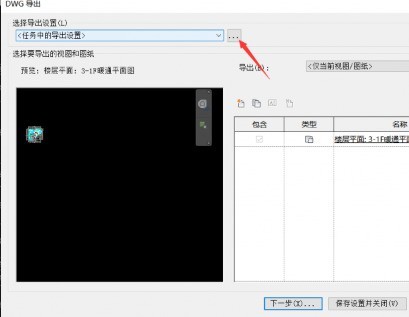
In the pop-up page, click the [...] button behind the export settings,
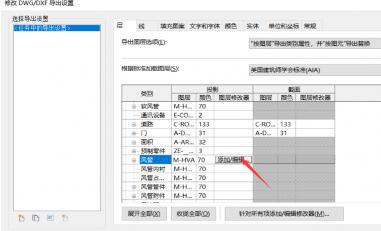
Here we take the export settings of air duct drawings as an example. Find the air duct on the page, click the [Add/Edit] button in the layer modifier,
Select the system type and add it to the right,
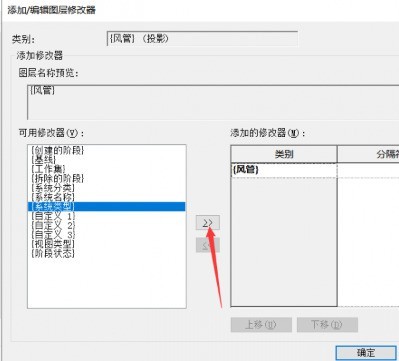
Add the separator [-] in the separator position of the air duct column on the right and click OK to complete the export settings for the air duct to distinguish layers by system type,
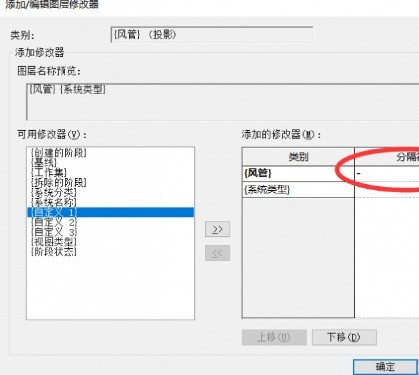
Significance: In actual projects, CAD drawings can be divided into layers according to different systems for easy viewing. Then other electrical and piping can also use the above method to set layers.
The above is the detailed content of Detailed steps for setting up drawing layers in Revit. For more information, please follow other related articles on the PHP Chinese website!


