Christmas is coming, do you want to use excel to draw a Christmas tree to add to the festive atmosphere? PHP editor Zimo brings you a detailed tutorial on how to draw a Christmas tree in Excel. This tutorial will guide you step-by-step on how to build a realistic Christmas tree using cell and fill techniques. Through simple and easy-to-understand steps, even excel novices can easily learn it. Come and learn and light up this holiday with your excel Christmas tree!
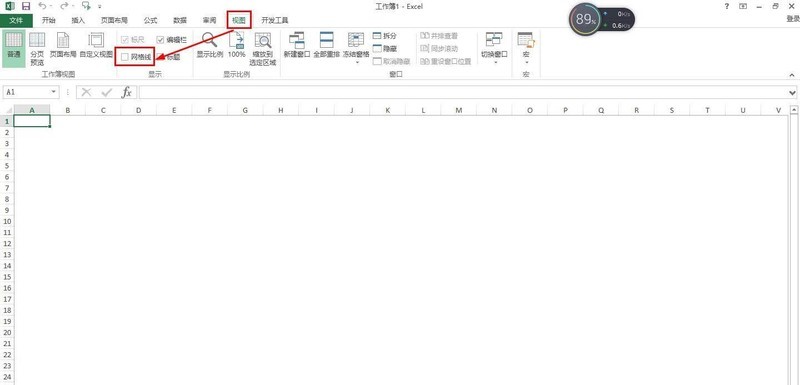
1. Create a new blank spreadsheet document - click View - remove the check grid, so that it becomes a blank area.

2. Click Insert - Shape - Select Curve on the menu - Draw the outer outline of the Christmas tree in the blank area.

3. Then click Format - Shape Fill - Fill the Christmas tree with green.

4. Then click Insert - Shape, select Cylindrical - and then select gold fill in the shape fill of Format.

5. Right-click the cylindrical shape - Send to Back - Send to Back, move and adjust the position of the cylindrical shape.

6. Finally, select the stars in the inserted shape and draw them on the Christmas tree and fill them with yellow. Also draw some circles on the tree.

The above is the detailed content of How to draw a Christmas tree in excel_Tutorial introduction to drawing a Christmas tree in excel. For more information, please follow other related articles on the PHP Chinese website!


