
Many friends want to know how to draw ice cream fonts in Photoshop. PHP editor Strawberry will introduce it to you in detail. I hope it can help you!
1. New or Ctrl N, create a new file with a size of 2000x 1600 pixels, a resolution of 72 pixels/inch, RGB color, 8 bits, and a white background content. The size can also be set as needed.
2. Set the foreground color to #96f6e4 and the background color to #22ba9e. Select the Zigzag Tool (G) and use radial Zigzag to pull a Zhejiang color on the canvas.

3. Go to the Type Tool (T) and enter the text you need on the canvas. Note: Type each letter on a separate layer.
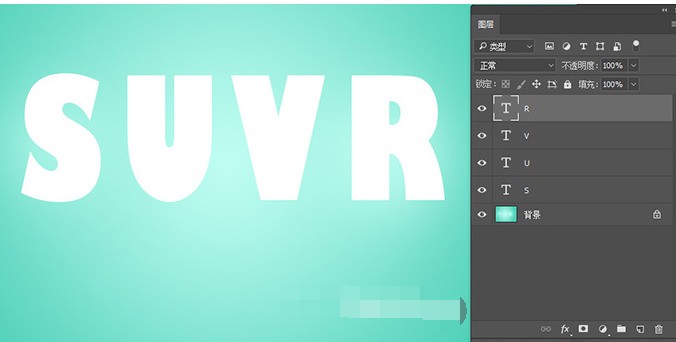
4. Here we will tell you how to create the first letter, S. The process is the same for the other letters, so once you learn how to create the first ice cream word, you will be able to implement all of them. Double-click the text S layer, open the layer style, and use the following settings for color overlay: Add a light red (#fd5e74) color overlay.

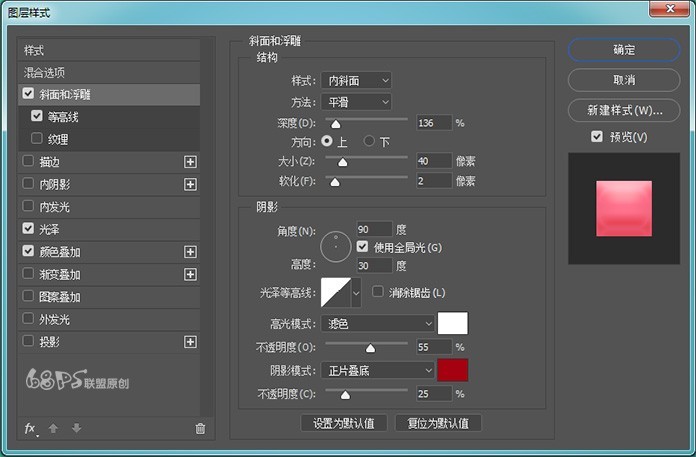
Use the following settings for bevel and relief:
Use the following settings for contours:
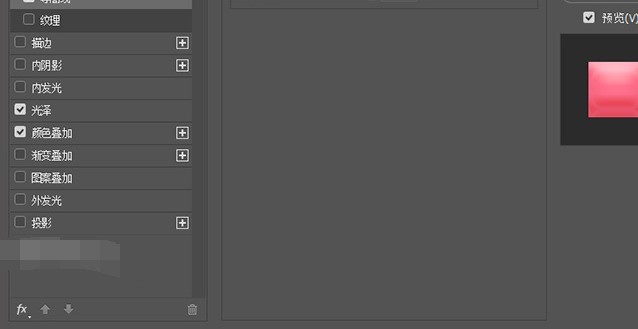
Use the following settings for gloss:

5. To make the ice cream/letters more realistic, we can use textures. Open the ice pattern and drag it over the document. Ctrl + T activate the Free Transform tool and resize the image.
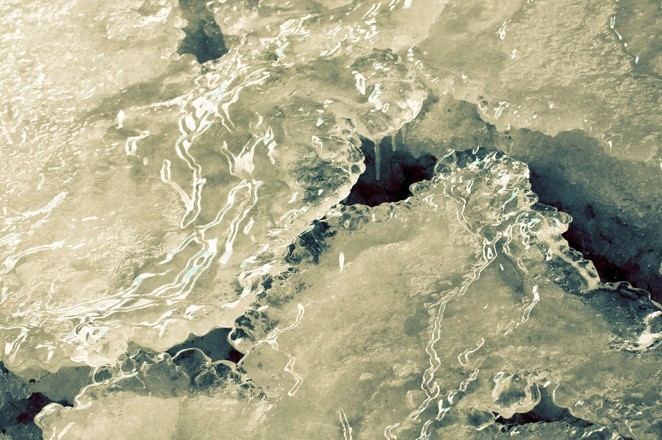
6. Go to the Layers panel and set the opacity of the ice texture layer to 10%.
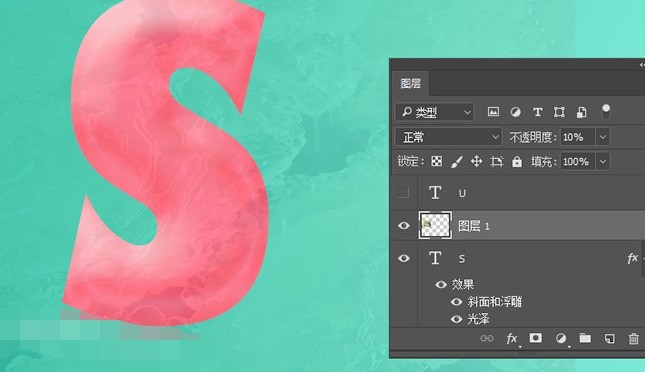
7. With the texture still selected, ctrl-click the letter (layer thumbnail) to select its pixels and add a layer mask. By doing this, you will remove the textured area beyond the letters. To add a layer mask, just click the Add Layer Mask button at the bottom of the layers window.

8. Select the texture and letter layers, then press Alt Ctrl E to merge them into a new layer. This image will be used from now on. Now let's add a noise effect. Press the shortcut key D, make sure to use white and black as the foreground and background colors, go to the Layers panel, create a new layer and fill it with black.

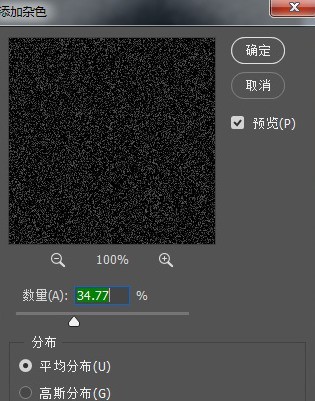
9. Go to Filter>Noise>Add noise, the number of noise is 34.77, evenly distributed.

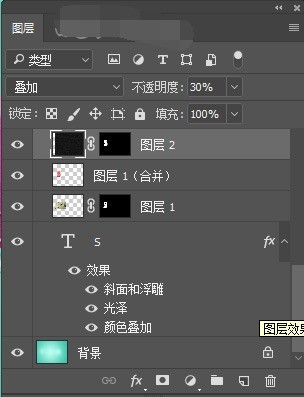
10. Ctrl-click the letter (layer thumbnail) to get its selection and add a layer mask. Change the layer mode to Overlay and set the opacity to 30%.
The above is the detailed content of How to draw ice cream font in photoshop. For more information, please follow other related articles on the PHP Chinese website!
 How to make charts and data analysis charts in PPT
 Android voice playback function implementation method
 AC contactor use
 The difference between vscode and visual studio
 The difference between Java and Java
 Introduction to hard disk interface types
 nagios configuration method
 How to delete a folder in linux


