
php Editor Xinyi will teach you how to turn off the hard disk encryption function in Windows 11 system. Windows 11 system has launched a new hard disk encryption function to improve the security of the system and data. However, sometimes users may wish to turn off this feature, which we can do with simple setup steps. In this article, we will introduce how to turn off the hard drive encryption function in Windows 11 system, allowing you to easily manage system security settings.
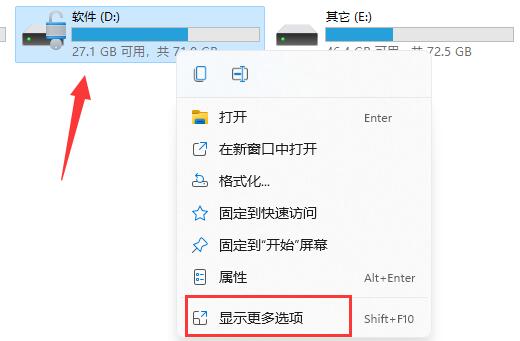
1. Double-click to enter "This PC", find the encrypted hard disk, right-click and select "Show more options" in the option list.
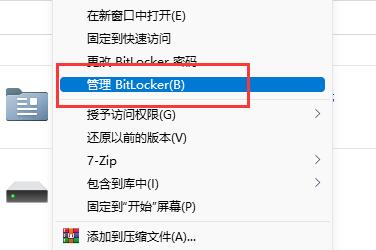
#2. Then select "Manage Bitlocker".
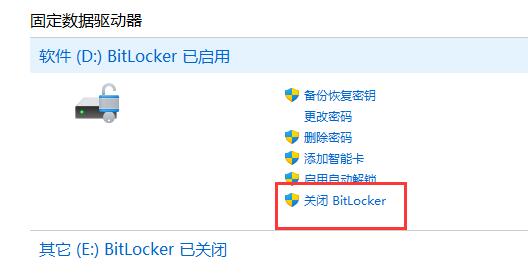
#3. Then click "Close Bitlocker" in the window that opens.
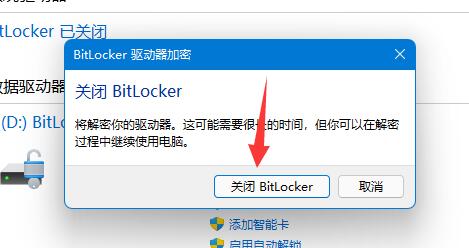
#4. Then click "Close Bitlocker" in the pop-up prompt window.
#5. Finally, just wait until the decryption is completed.

| Disk problem | |||
| Only the method to add D drive to C drive | D drive cannot be read | storsvc.dll | win11 disk partition |
| c drive data recovery | |||
The above is the detailed content of How to turn off hard drive encryption in Windows 11. For more information, please follow other related articles on the PHP Chinese website!
 How to repair lsp
 There is no WLAN option in win11
 How to skip online activation in win11
 Win11 skips the tutorial to log in to Microsoft account
 How to open win11 control panel
 Introduction to win11 screenshot shortcut keys
 Windows 11 my computer transfer to the desktop tutorial
 Solution to the problem of downloading software and installing it in win11


