php editor Zimo will take you to explore the detailed steps of creating stairs in Revit. As a professional Building Information Modeling (BIM) tool, Revit software is very powerful in creating stairs, but it may be a little complicated for novices. Through the detailed operation guidance in this article, you will easily master the techniques of creating various types of stairs and improve your modeling capabilities and efficiency in Revit software.
1. Regarding the relationship between the number of risers and the height of the stairs
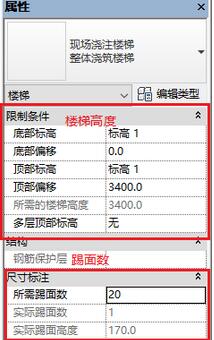
The height of the stairs = the number of risers*the actual height of the question surface (for example, 3400=20*170).

Number of risers and stair height attributes
The height of the stairs needs to be set by ourselves, the number of risers is also set by ourselves, and the actual depth of risers It is a calculated value, no need to set it yourself. Therefore, when we want to draw, we must calculate in advance how many risers there are and how high the stairs are.
2. How to calculate the number of risers
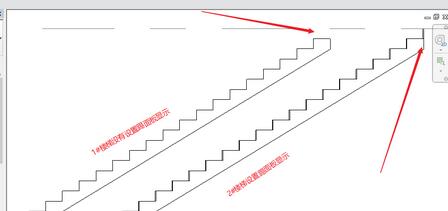
It is generally easy to misunderstand the number of risers. The number of risers is based on the number of pedals. The number of pedals is determined by the number of pedals. There are several riser numbers. This is a method used to calculate the height of the riser. Generally, the question will give a clear riser height. However, due to the calculation error of the riser number, the riser height calculation is incorrect. Next, please pay attention to the two observations. Display of pictures.

View the riser display
It is clear from these two pictures that there is actually a riser height hidden on the last pedal, which is this hidden riser The height affects our calculation of the actual height of the stairs, leading to errors. Generally, when drawing, the last step will be connected to the floor or platform, thus hiding this condition. If it is drawn separately, you need to pay attention to the calculation here.
3. The composition of the stairs
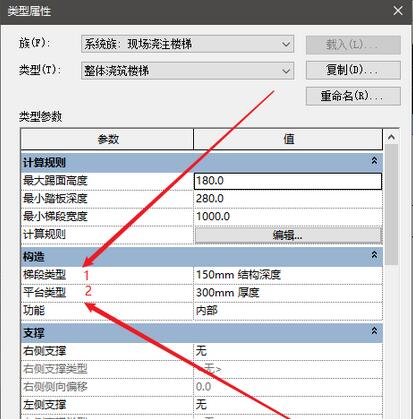
The composition of the stairs can be understood as two parts:
①: Stair section
②: Platform.

Stairs and platforms
When these two parts are set, they do not affect each other, but they are inextricably linked. You can also set some separately in the stair properties. Type attributes, such as material, riser panels, treads, etc., so when paying attention to this, the overall material of the staircase must be set separately for the steps and the platform. If only one is set, the other will not be associated.
4. Supplementary introduction to railings and handrails
The railings and handrails are generated along with the creation of the stairs. The railings and handrails are rarely drawn separately.
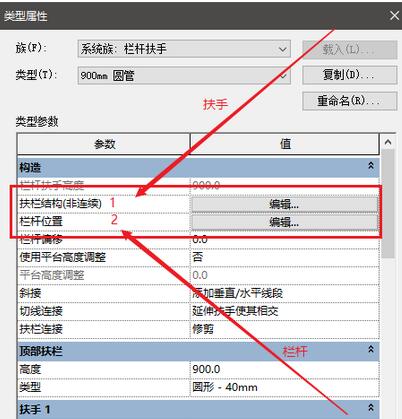
The handrail is also composed of two parts:
①: Handrail, the handrail is divided into top handrail and handrail structure (the following handrails are collectively referred to as handrail structure)
②: Railings, railings are divided into main style (middle part) and pillars (starting pillar, corner pillar, end point pillar).

According to the detailed operation process of creating stairs in Revit described above, you should all understand it!
The above is the detailed content of Detailed steps for creating stairs in Revit. For more information, please follow other related articles on the PHP Chinese website!


