


How to use Dreamweaver CMS to create a personalized website

In today's era of information explosion, having a personalized website has become an essential need for many businesses and individuals. As a powerful and easy-to-use website construction tool, Dreamweaver CMS can help us achieve this goal. This article will introduce in detail how to use DreamWeaver CMS to create a personalized website and provide specific code examples.
1. First introduction to Dreamweaver CMS
Dreamweaver CMS is a content management system developed based on PHP MySQL. It has rich plug-ins, templates and other resources, which can help users quickly build websites. and achieve personalized customization. First, we need to download and install Dreamweaver CMS from the official website http://www.dedecms.com/.
2. Choose a suitable theme
After launching DreamWeaver CMS, we need to choose a suitable theme as the appearance of the website. You can choose from the official theme library or customize a theme. In the "Template Management" in the management background, click "Theme Style", select a favorite theme and apply it.
3. Modify the website logo
The first step to personalize the website is to replace the default logo with your own logo. You can upload your own designed logo in the "System Settings" - "Site Basic Information" in the management background, or you can upload it to the corresponding theme directory in the "templets" folder through FTP.
4. Customized navigation bar
The navigation bar of the website is crucial to the user experience. We can add a navigation bar above or to the side of the website to allow users to browse the website content more conveniently. In "Column Management" you can create new columns and add them to the navigation bar.
5. Beautify the website style
By modifying the CSS style sheet file, we can easily change the style of the website, such as modifying the font color, background color, border style, etc. The "style.css" file in the theme folder can be found via FTP for editing.
6. Adding personalized functions
In addition to basic appearance customization, we can also use plug-ins provided by DreamWeaver CMS or self-developed plug-ins to increase the functionality of the website. For example, add message boards, recommended articles, social sharing, etc. The following takes adding a message board as an example to introduce the relevant code.
To add a message board in Dreamweaver CMS, you must first create a new "Message Board" column, click "New Column" in "Column Management", fill in the relevant information and save it. Then set the relevant configurations of the message board in "System Settings" - "Message Board Settings", such as message content length limit, message review, etc.
Next, find the relevant location in the front-end template file and add the following code:
{dede:guestbook}
<div class="guestbook">
  <ul>
      {dede:gblist}
      <li>
        <p>留言人:{field:uname}  留言时间:{field:gbtime}</p>
        <p>留言内容:{field:body}</p>
      </li>
      {/dede:gblist}
  </ul>
  <div class="guestbook-form">
    <form action="/plus/dedeguestbook.php" method="post">
      <input type="text" name="uname" placeholder="您的姓名" required>
      <textarea name="body" placeholder="请输入留言内容" required></textarea>
      <input type="submit" value="提交留言">
    </form>
  </div>
</div>
{/dede:guestbook}In the above code, {dede:guestbook} is used to call the relevant information of the message board, {dede:gblist } is used to display the message list in a loop, and {field:} is used to retrieve the value of the corresponding field. In the message board form, users can enter their name and message content and submit their message.
Through the above steps, we can add a personalized message board function to DreamWeaver CMS to improve the interactivity and user experience of the website.
In actual operation, we can further customize the website as needed, such as adding article recommendation functions, optimizing SEO settings, etc. Using Dreamweaver CMS, it is no longer difficult to create a personalized website. I hope this article can help you.
The above is the detailed content of How to use Dreamweaver CMS to create a personalized website. For more information, please follow other related articles on the PHP Chinese website!

Hot AI Tools

Undresser.AI Undress
AI-powered app for creating realistic nude photos

AI Clothes Remover
Online AI tool for removing clothes from photos.

Undress AI Tool
Undress images for free

Clothoff.io
AI clothes remover

AI Hentai Generator
Generate AI Hentai for free.

Hot Article
Hot Tools

Notepad++7.3.1
Easy-to-use and free code editor

SublimeText3 Chinese version
Chinese version, very easy to use

Zend Studio 13.0.1
Powerful PHP integrated development environment

Dreamweaver CS6
Visual web development tools

SublimeText3 Mac version
God-level code editing software (SublimeText3)
Hot Topics
 1378
1378
 52
52

 Unable to open Win10 personalization options
Jan 11, 2024 pm 04:06 PM
Unable to open Win10 personalization options
Jan 11, 2024 pm 04:06 PM
Many friends have found that after the win10 system is updated, the personalized settings cannot be opened. It keeps showing that the file does not have a program related to it to perform the operation. Please install a program. What is going on? Use winR to open "Run" , right-click to delete the entire ms-seeting, and you can open it. Let’s take a look at the details together. How to open personalization in win10 1. First, we press "Win+R" to call out the run, click and enter "services.msc", and then press Enter to confirm. 2. Then we click to open "windowsupdate" in the pop-up window and set the startup type to "disabled". 3. Then we put SoftwareDist in C:\Windows
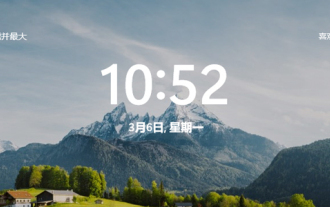 Beautiful pictures change every day! A complete guide to focusing on desktop and lock screen settings in Windows 11
Mar 25, 2024 am 09:01 AM
Beautiful pictures change every day! A complete guide to focusing on desktop and lock screen settings in Windows 11
Mar 25, 2024 am 09:01 AM
Windows 11’s Focus feature can automatically update your desktop wallpapers, themes, and lock screen interface, presenting you with a selection of beautiful pictures of landscapes, cities, animals, etc. every day. These images are all sourced from Bing search, which not only makes the user experience more personalized, but also occasionally displays practical suggestions and tips on the lock screen, bringing additional surprises and help to users. Method 1 to use Windows 11 Focus Desktop: Set Windows Focus Desktop Wallpaper 1 Press the Windows+I shortcut key to open "Settings" and select "Personalization" > "Background". 2 In the "Personalize background" drop-down list, select the "Windows Focus" option. Select Windows Spotlight Wallpaper
 Seven Cats Novel How to Personalize Books
Mar 02, 2024 am 10:40 AM
Seven Cats Novel How to Personalize Books
Mar 02, 2024 am 10:40 AM
During the process of using Mao Mao Novel, the software will recommend some books of interest to us. How to set up personalized book recommendations? The following will introduce you to the specific operation method. After opening the "Seven Cats Free Novels" application on your phone, find the "My" option in the lower right corner of the page and look for the "Settings" function at the bottom of the page. Click to open the "Settings" option. 2. After coming to the settings page, there is a "Privacy Settings". When you see it, click on it to enter. 3. Next, find "Personalized Book Recommendations" on the privacy settings page. There is a switch button displayed behind it. Click the slider on it to set it to a colored state to turn on the function. The software will based on your reading preferences to recommend books that may be of interest.
 ECShop platform analysis: detailed explanation of functional features and application scenarios
Mar 14, 2024 pm 01:12 PM
ECShop platform analysis: detailed explanation of functional features and application scenarios
Mar 14, 2024 pm 01:12 PM
ECShop platform analysis: Detailed explanation of functional features and application scenarios ECShop is an open source e-commerce system developed based on PHP+MySQL. It has powerful functional features and a wide range of application scenarios. This article will analyze the functional features of the ECShop platform in detail, and combine it with specific code examples to explore its application in different scenarios. Features 1.1 Lightweight and high-performance ECShop adopts a lightweight architecture design, with streamlined and efficient code and fast running speed, making it suitable for small and medium-sized e-commerce websites. It adopts the MVC pattern
 Where is the personalization switch for Tomato Novels?
Feb 27, 2024 pm 04:58 PM
Where is the personalization switch for Tomato Novels?
Feb 27, 2024 pm 04:58 PM
In the era of digital reading, personalized recommendations have become one of the core functions of many reading software. Tomato Novel is a popular novel reading software, and its personalized recommendation function brings users a new reading experience. So many users may not know how to turn on the personalized recommendation function of Tomato Novels, so if you don’t know yet, please continue reading below. Where is the personalization switch for Tomato Novels? Answer: [Tomato Novels]-[My]-[Settings Icon]-[About Tomato]-[Understand and Manage Advertising Push]. Specific steps: 1. First open the Tomato Novel software. After entering the homepage, we click [My] in the lower right corner; 2. Then after coming to the My page, you can open the computer and there are many functions that can be used. Here I
 Solve the problem that win10 cannot open the associated program with personalization options
Jan 03, 2024 pm 07:04 PM
Solve the problem that win10 cannot open the associated program with personalization options
Jan 03, 2024 pm 07:04 PM
When using our win10 system, we often use the right-click menu to perform some operations. However, many users said when using it that when selecting personalize the right-click menu, it was prompted that the file did not have a program associated with it, resulting in the inability to For normal operation, you can actually solve this problem through the command prompt. Win10 right-click personalization cannot be opened, prompting that the file does not have a program associated with it. Solution: 1. Press the key combination "win+r" to open and run, enter: Powershell, run as administrator. 2. Then enter the following command: Get-AppxPackage-all*ImmersiveControlPanel*|%{Add-Appx
 Sharing project experience in data processing and data warehouse through MySQL development
Nov 03, 2023 am 09:39 AM
Sharing project experience in data processing and data warehouse through MySQL development
Nov 03, 2023 am 09:39 AM
In today's digital era, data is generally considered to be the basis and capital for corporate decision-making. However, the process of processing large amounts of data and transforming it into reliable decision support information is not easy. At this time, data processing and data warehousing begin to play an important role. This article will share a project experience of implementing data processing and data warehouse through MySQL development. 1. Project background This project is based on the needs of a commercial enterprise's data construction and aims to achieve data aggregation, consistency, cleaning and reliability through data processing and data warehouse. Data for this implementation
 Discussion on project experience using MySQL to develop real-time data synchronization
Nov 03, 2023 am 08:39 AM
Discussion on project experience using MySQL to develop real-time data synchronization
Nov 03, 2023 am 08:39 AM
Discussion on the project experience of using MySQL to develop real-time data synchronization Introduction With the rapid development of the Internet, real-time data synchronization has become an important requirement between various systems. As a commonly used database management system, MySQL has a wide range of applications in realizing real-time data synchronization. This article will discuss the project experience of using MySQL to achieve real-time data synchronization during the development process. 1. Requirements analysis Before developing a data synchronization project, it is first necessary to conduct a requirements analysis. Clarify data synchronization between data source and target database
