php editor Youzi will introduce you to the detailed steps of creating a child account in Win10. First, select Family & other people in Windows Settings and click Add family members. Next, select Add child, enter the child's email address or mobile phone number, and click Next. Finally, set your child's permissions and monitoring settings, and complete account creation. With these steps, you can create a secure Win10 account for your children, allowing them to have a better learning and entertainment experience on the computer.
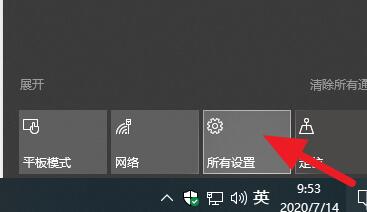
1. First, you need to open the computer settings. You can click the [Notification] icon on the taskbar, and then click the [All Settings] button.

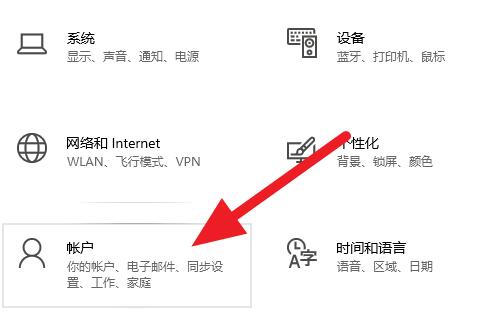
2. After entering the settings, click and enter the [Account] button.

3. After entering the account setting interface, click the [Family and Other Users] button in the right column.

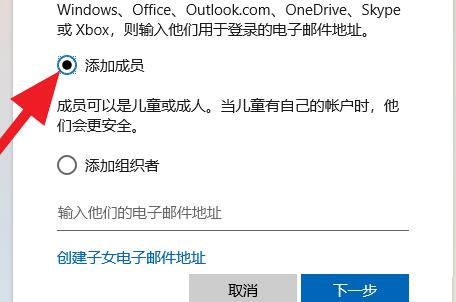
4. After clicking the above button, click [Add Family Members] on the right interface
5. Then the Add Family Members window will pop up. We follow the steps on the page. The prompts will complete adding the child account.

6. On the account settings page that opens, click the [Family and Other People] tab in the left navigation menu, and click the small box in front of [Add Family Members] on the sub-page on the right. Click [ ] in the box to add a child account.
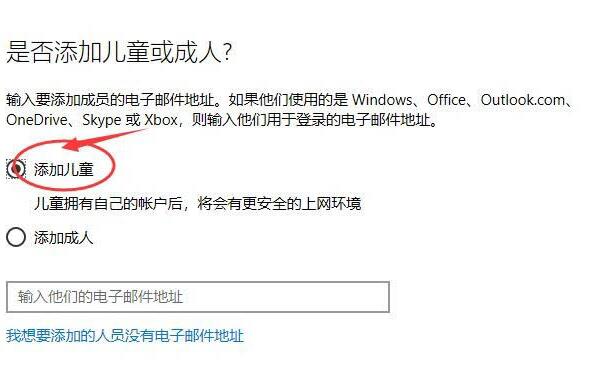
7. In the pop-up window, click the [Add Child] option. If there is a child's email address, fill in the child's email address in the input box. Of course, you can also select [I want to add The person does not have an email address] option. If you select this option, the win system will automatically connect to the Internet to create an email account for you.

8. Please fill in the registered user information according to the requirements on the page. After completing the input, click the [Next] button at the bottom and fill in the requirements step by step until the registration steps are completed. Finally, click [Close] 】.
9. Return to the current page. Under the family account, you can see that our new child account has been added, indicating that the child account mode has been added successfully. When children go online in the future, they can use this newly added child account to log in to the Internet.
10. After adding a child account, parents can control the child account and protect their children's online safety.

The above is the detailed content of Detailed steps to create a child account in WIN10. For more information, please follow other related articles on the PHP Chinese website!
 win10 bluetooth switch is missing
 Why do all the icons in the lower right corner of win10 show up?
 The difference between win10 sleep and hibernation
 Win10 pauses updates
 What to do if the Bluetooth switch is missing in Windows 10
 win10 connect to shared printer
 Clean up junk in win10
 How to share printer in win10


