php editor Xigua will introduce you how to add watermarks to PPT. In PPT, watermarks can beautify and protect documents. The operation is simple, just open the PPT document, select "Watermark" in the "Design" tab, and then select "Insert Watermark" to select text or pictures as the watermark, and you can also customize the transparency and position of the watermark. After adding a watermark, you can protect the PPT document and make the document more professional. Now, try adding watermarks to your PPT documents!
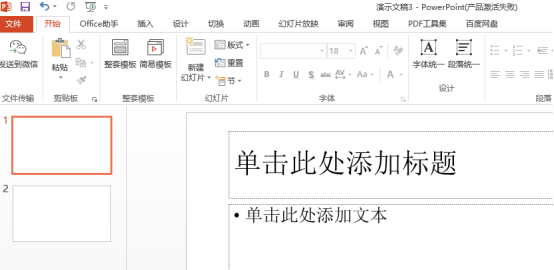
First, start the PPT software and open the file. Find the "Start" option in the top menu bar, find the slide you want to add a watermark on the left side of the page, and use the blank slide as the presentation. Just follow the diagram.

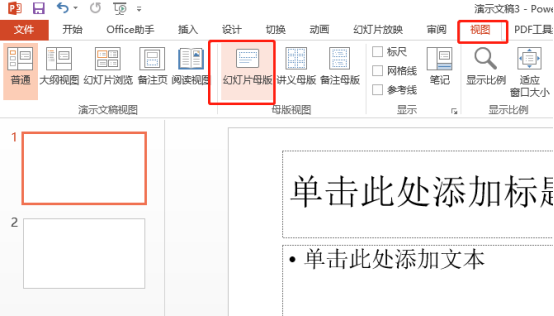
2. If we want to add a watermark, we need to add the slide master first. Find "View" and click "Slide Master". as the picture shows.

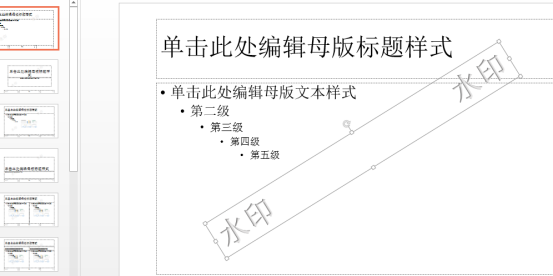
3. Select the first slide on the slide, find and click "Insert" on the toolbar, and select one of your favorite "WordArts" as the watermark That’s it. as the picture shows.

4. Name the added word art "Watermark". Here you can use the mouse to drag the watermark to the position and angle you want, as shown in the picture. as the picture shows.

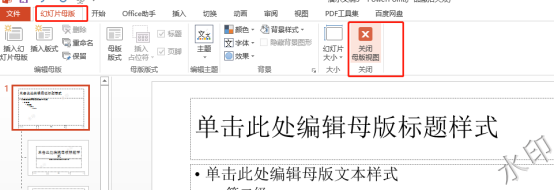
5. After that, find the slide master in the toolbar and click "Close". as the picture shows.

6. After closing, you will find that each of our original blank slides has the word "watermark" and cannot be selected. In other words, this The watermark has been added successfully. as the picture shows.

The above is the operation method of adding watermark to ppt brought by the editor today. You must keep in mind that in the future when studying ppt, friends must do more by themselves. Operate, think more, study more, and don’t give up easily when you encounter difficulties in the learning process. We can use the knowledge we have learned to solve the problems encountered in work and study. Okay, that’s it for today’s sharing.
The above is the detailed content of How to add watermark to ppt. For more information, please follow other related articles on the PHP Chinese website!