php editor Zimo will introduce you in detail how to automatically generate serial numbers in Excel. In Excel, you can realize the function of automatically generating serial numbers by using formulas, filling sequences, etc. Whether it's cell dragging, shortcut keys, or formula filling, it can help you generate the required serial numbers quickly and easily. Next, let’s take a look at the specific steps!
Another way to add serial numbers is to use Excel’s AutoFill feature. You just need to enter the starting serial number in the cell where you want to add the serial number, and then select the cell. Then, move the mouse pointer to the lower right corner of the selected cell, wait until the cursor changes into a cross shape, then hold down the left mouse button and drag to the range where you need to add a serial number. Release the mouse and Excel will automatically fill in the range of numbers. This method quickly and accurately adds serial numbers to your data, saving the time and effort of manual entry.

At this time, hold down the left mouse button and drag the mouse downward (the serial number is in the column) or right (the serial number is in the row) to the end of the column or the end of the row. The serial number will be added automatically.

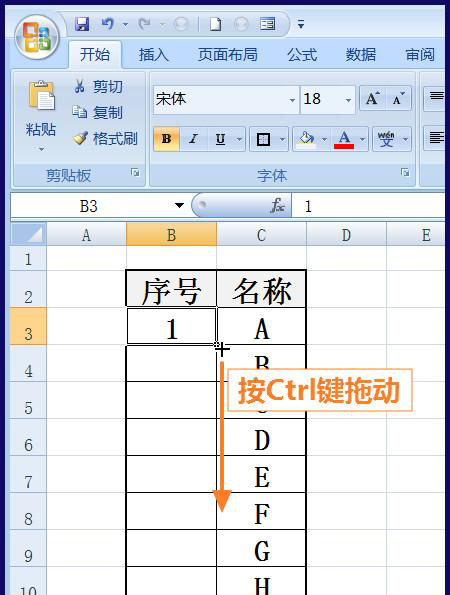
#The second method is to enter the first digit of the serial number and then use the Ctrl key with the fill handle to add the serial number. First enter the first digit of the serial number in the first cell where you want to add the serial number, then point the mouse pointer to the lower right corner of the cell. When the mouse pointer changes to a cross shape, then hold down the Ctrl key on the keyboard. Then hold down the left mouse button and drag the mouse to the last cell where you want to add a serial number.

The above is the detailed content of How to automatically generate excel serial numbers. For more information, please follow other related articles on the PHP Chinese website!