
win10How to cancel the power-on password? When we use win10 system, we will find that we have to enter the password every time we enter the system, which feels very troublesome. So is there any way to cancel the power-on password? Users can directly click on the account under Windows Settings, and then find the changes under the login options to perform the operation. Let this site carefully introduce to users how to cancel the power-on password in Win10.
How to cancel the power-on password in win10
Method 1: Use the Windows Settings application to cancel the power-on password
1. Press the [Win I] key to open the Windows Settings application.
2. In the Windows Settings application window, select [Account].
3. In the left menu, select [Login Options], find [Password], and click [Change].
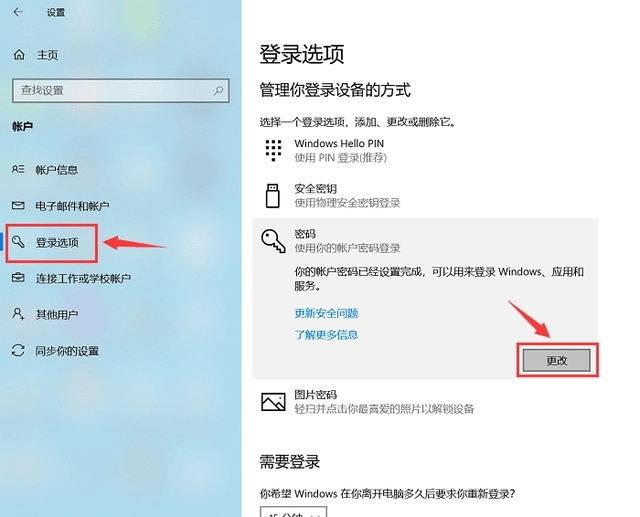
#4. Enter your user account password. In the password setting window, click [Next] without filling in any text. After restarting the computer, the password will be canceled.
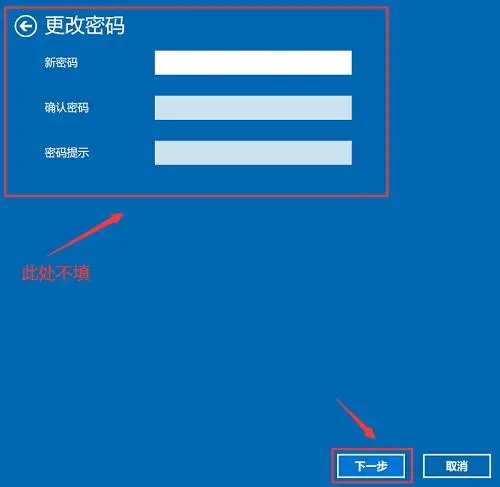
Method 2: Use the control panel to cancel the power-on password
1. Press the [Win S] key and search for [Control Panel].
2. In the control panel window, click [User Account], then click [Manage Account] after entering.
3. Click [Change Account] in the interface and select [Manage Other Accounts].

#4. Enter the originally set password in [Change Password], leave nothing else in, and click [Change Password] to cancel the power-on password.
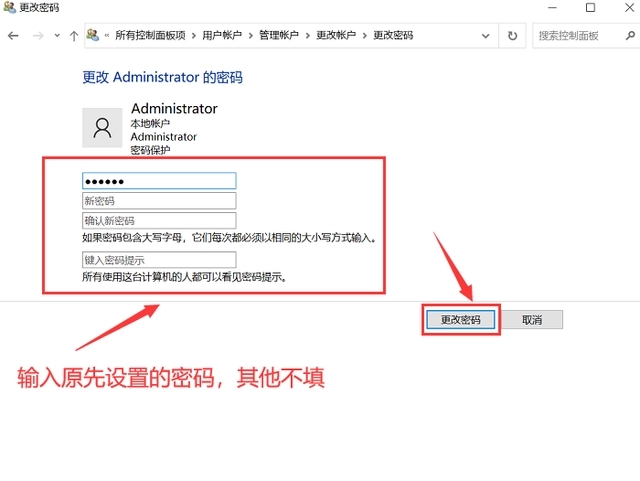
Method 3: Use the user account to cancel the power-on password
1. Press the [Win R] key to open the run dialog box,
2. Enter [netplwiz] and click [OK].
3. Uncheck the [To use this computer, users must enter a username and password] checkbox.
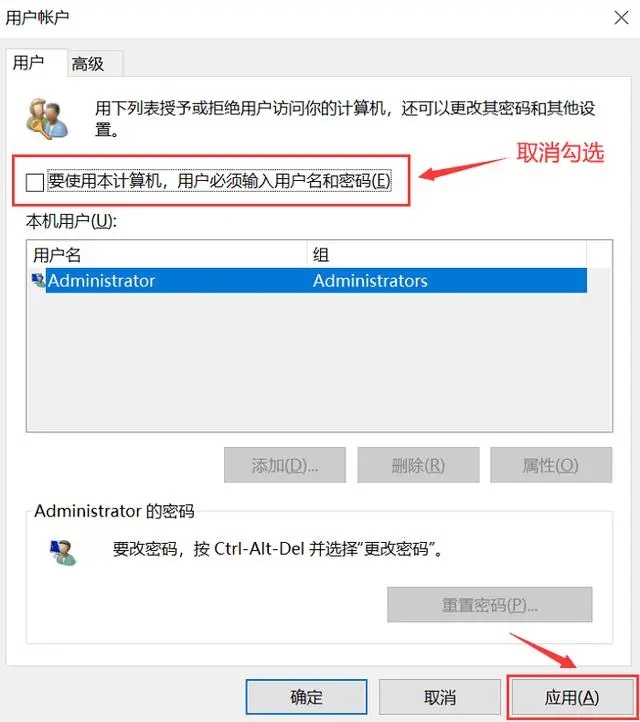
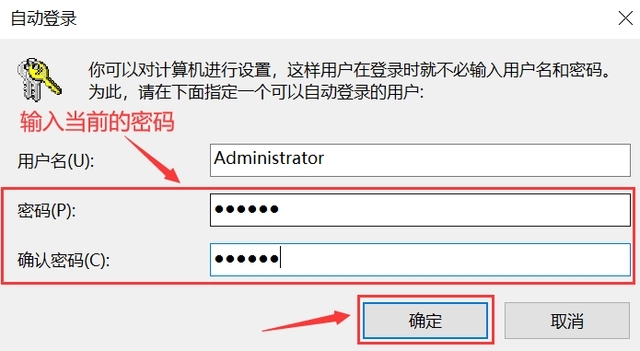
#4. Enter the current password and click [OK].
The above is the detailed content of How to cancel the power-on password in win10? How to cancel the power-on password in win10. For more information, please follow other related articles on the PHP Chinese website!
 win10 bluetooth switch is missing
 Why do all the icons in the lower right corner of win10 show up?
 The difference between win10 sleep and hibernation
 Win10 pauses updates
 What to do if the Bluetooth switch is missing in Windows 10
 win10 connect to shared printer
 Clean up junk in win10
 How to share printer in win10


