When using the Windows 10 operating system, sometimes we may encounter the problem of being unable to perform ping operations. However, don’t worry, PHP editor Shinichi has brought you a solution. The setting method to allow ping in win10 firewall is very simple, just follow the steps below.
How to set up the win10 firewall to allow ping
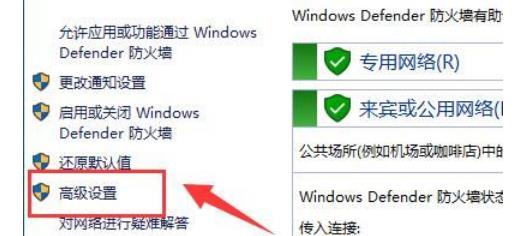
1. First, open the control panel interface, change the "View By" to "Large Icons", and click to enter the "Windows Defender Firewall" settings, as shown in the figure shown.

#2. Next, click "Advanced Settings" on the left, as shown in the picture.

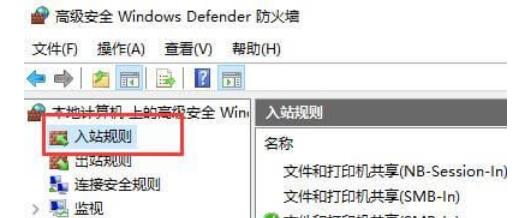
#3. Then, in the opened interface, click "Inbound Rules" in the upper left corner, as shown in the figure.

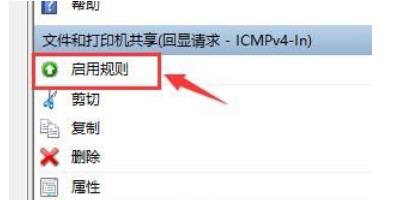
#4. At this time, find "File and Printer Sharing (ICMPv4)" in the corresponding list on the right, as shown in the figure.

#5. Finally, click "Enable Rules" to allow ping, as shown in the figure.

The above is the detailed content of Where to set the win10 firewall to allow ping? How to set up win10 firewall to allow ping. For more information, please follow other related articles on the PHP Chinese website!
 win10 bluetooth switch is missing
 Why do all the icons in the lower right corner of win10 show up?
 The difference between win10 sleep and hibernation
 Win10 pauses updates
 What to do if the Bluetooth switch is missing in Windows 10
 win10 connect to shared printer
 Clean up junk in win10
 How to share printer in win10


