
How to set user permissions in Win11? How to set user permissions in Win11 is an important issue that many users encounter on the new operating system. The setting of user permissions can help us better manage and protect our computer data and privacy. In Win11, setting user permissions can be achieved through system settings and user account management. Through these methods, we can flexibly control each user's access and operation permissions in the system. This article will introduce in detail how to set user permissions in Win11, helping you easily complete permission settings and protect the security of personal information.
How to set user permissions in Win11
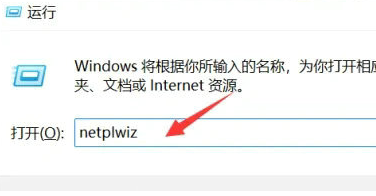
1. Directly create the running function by combining the shortcut key [win R], then enter [netplwiz] in the search box and click OK.
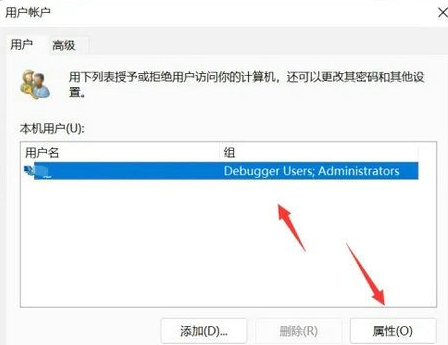
#2. Click on the account you want to modify, and then click on the properties function in the lower right corner.
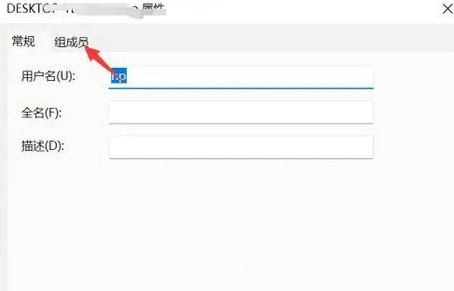
#3. In the properties window that opens, click Group Members in the upper menu bar.
#4. Then modify the user's permission level according to your own needs, and then click Apply to save the settings.
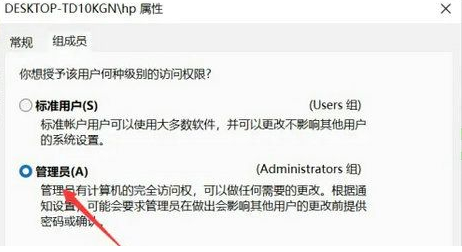
#5. A window prompt will appear. Click [Yes] to log out and restart the account to complete the settings.

The above is the detailed content of How to set user permissions in Win11? How to set user permissions in Win11. For more information, please follow other related articles on the PHP Chinese website!
 There is no WLAN option in win11
 How to skip online activation in win11
 Win11 skips the tutorial to log in to Microsoft account
 How to open win11 control panel
 Introduction to win11 screenshot shortcut keys
 Windows 11 my computer transfer to the desktop tutorial
 Solution to the problem of downloading software and installing it in win11
 How to skip network connection during win11 installation


