
Some users want to install the iTab plug-in in the Edge browser to customize labels and improve efficiency. So how do they install the iTab plug-in in the Edge browser? The editor below will bring you a tutorial on installing the iTab plug-in for Edge browser. Friends who need it can take a look.
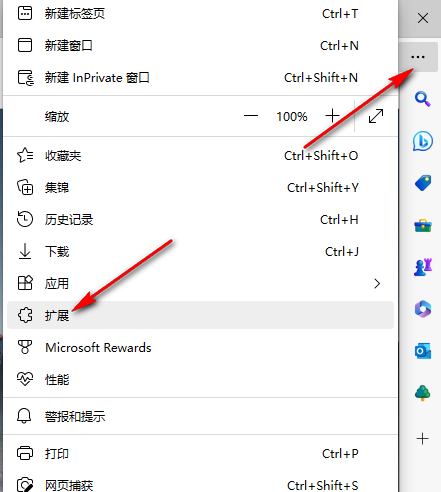
1. Double-click to enter the software, click the "..." button in the upper right corner, and select "Extension" in the option list below.
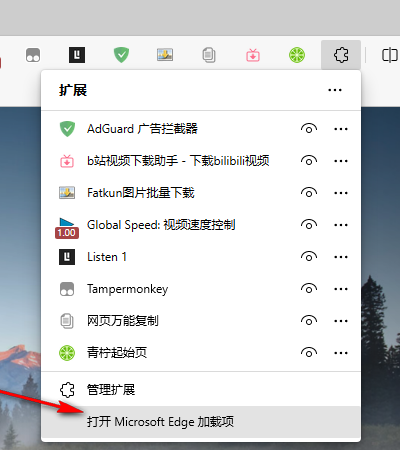
2. Then click the "Open Microsoft Edge add-on" option.
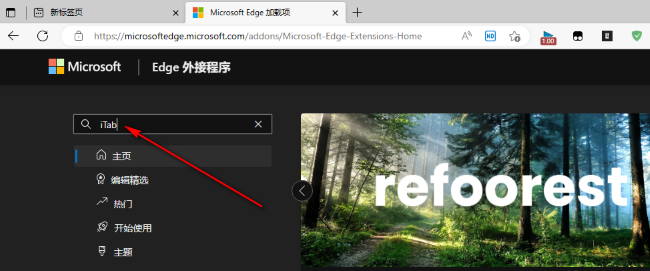
3. After entering the new window interface, enter "iTab" in the search box in the upper left corner and press Enter to search.
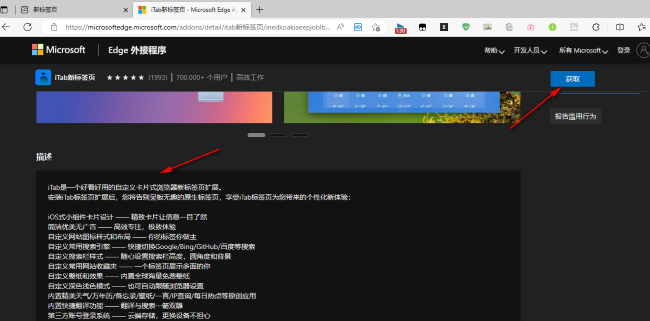
4. In the search results given on the right, find the "iTab" option. You can click the name to enter the details page to view it, or you can directly click the "Get" button .
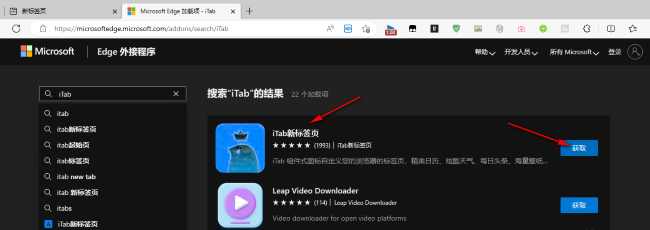
5. Click the "Get" button in the upper right corner.
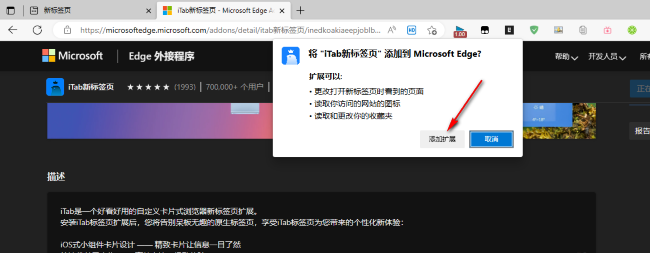
6. Then in the pop-up prompt window, click the "Add Extension" option.
7. After the addition is completed, click the plug-in icon in the upper right corner and click "Manage Extensions" in the option list below.
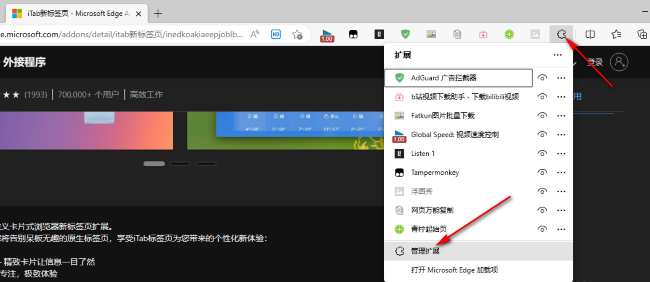
8. Finally, find the "iTab" plug-in and turn on all the option switch buttons related to the plug-in.

The above is the detailed content of How to install iTab plugin in Edge browser. For more information, please follow other related articles on the PHP Chinese website!
 Usage of RAC in Oracle
 The difference between workbook and worksheet
 The difference between win10 sleep and hibernation
 How to solve the problem that wlan does not have a valid ip configuration
 What are the commonly used instructions in vue?
 What are the python artificial intelligence libraries?
 Introduction to the plug-ins required for vscode to run java
 What software is soul?


