When we use the win10 system for image backup, we sometimes encounter unexpected backup failures. Don’t worry, today the editor will share with you three effective solutions! Before we explain each solution step by step, let us first familiarize ourselves with the applicable scenarios and operation steps of these three solutions!
Method 1: Activate system protection
1. Click the "Search" button in the lower left corner of the computer desktop and enter "Control Panel" Keywords and open the corresponding interface.
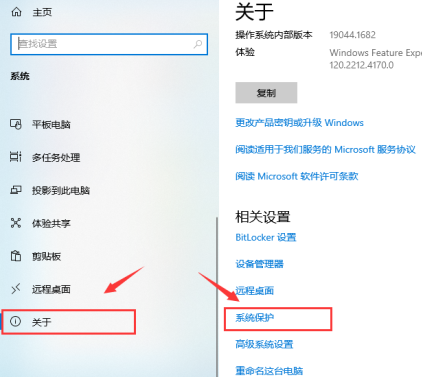
2. In the list of options presented, select and enter the "System and Security" column, and then browse to the "System" section.

3. Select the option named "About", click to enter "System Protection", and select the "Configuration" button below.

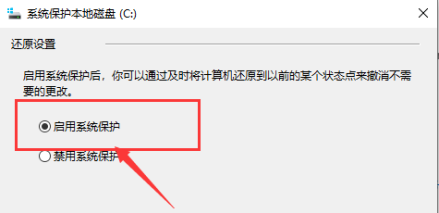
4. In the new page that opens, check the "Enable system protection" option and click Confirm. Finally, just restart the backup.
Method 2: Delete the WindowsImageBackup folder
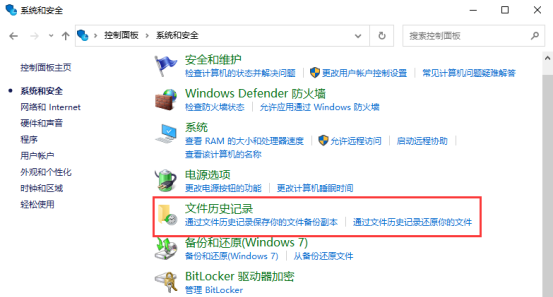
1. Similarly, return to the previous level menu, select "System and Security", find and click "File History".
2. In the "System Image Backup" column at the bottom of the left side, click the left mouse button to expand its submenu and display the path of the file.

3. Right-click the WindowsImageBackup folder, select "Delete" and confirm. After the test is correct, back up again.
Strategy 3: Use the CHKDSK command to repair the storage device
1. Press the operation shortcut key "Win X", and then select "Windows PowerShell (Administrator)" in the drop-down menu.

2. In the pop-up command window, enter "chkdsk /r X:" (the letter X represents the key partition number where you store the backup),
3. After confirming that the input is accurate, press "Enter" to run. Wait for the above tasks to complete successfully before trying the backup again.
The above is the detailed content of What to do if the backup image of Windows 10 Home Edition fails. For more information, please follow other related articles on the PHP Chinese website!
 How to configure jsp virtual space
 Two-way data binding principle
 How to check deleted call records
 Comparative analysis of iqooneo8 and iqooneo9
 How to solve tomcat startup crash
 How to deal with blocked file downloads in Windows 10
 How to solve the problem of slow server domain name transfer
 Today's Toutiao gold coin is equal to 1 yuan


