
Recently, the editor has received a lot of private messages in the backend. Many friends have come to this site to ask me how to take WPS screenshots on my computer. The editor was not clear at first, so I collected relevant information online and finally found wps. For an introduction to where the built-in screenshot function is, the editor will introduce to you the method I found. If you need it, please come to this site to take a look.

The specific steps are as follows:
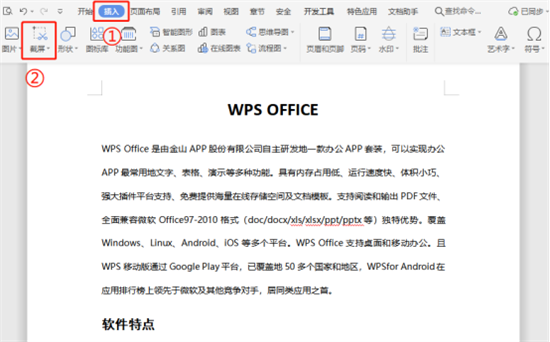
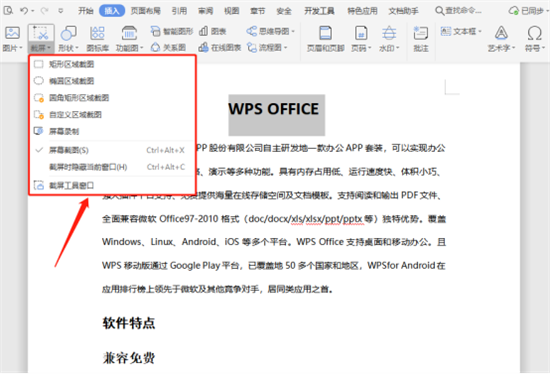
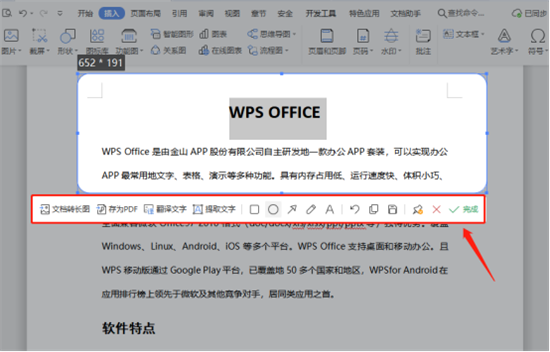
1. Use WPS Office to open or create a new document, and click " Insert" - "Screenshot" (Note: the shortcut key for taking a screenshot is Ctrl Alt The screenshot method will be explained one by one here;
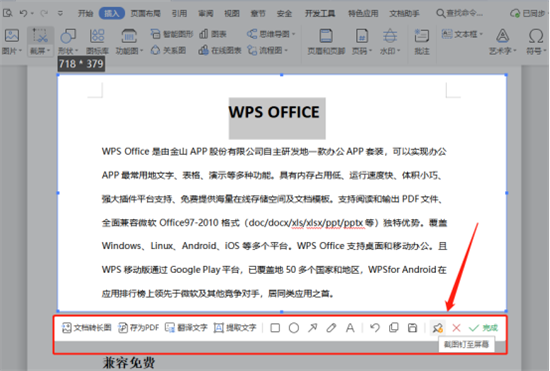
3. Select "Rectangular area screenshot" to bring up the rectangle, select the area to take the screenshot as needed, and take the screenshot in the rectangle Just make adjustments or settings below the area;
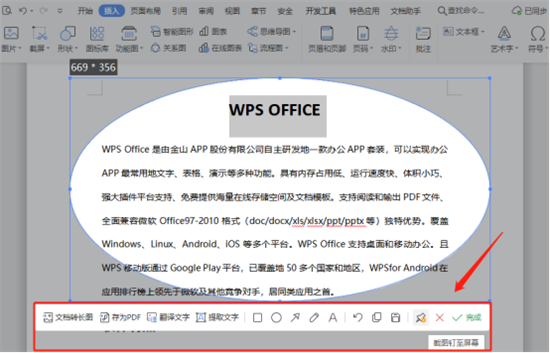
4. Select "Oval Area Screenshot", the ellipse will be brought up, select the area to take a screenshot as needed, and Just make adjustments or settings below the oval screenshot area;
5. Select "Rounded rectangular area screenshot", the rounded rectangle will be brought up, and you can select the area as needed Take a screenshot and make adjustments or settings below the rounded rectangular screenshot area;
6. After selecting "Custom area screenshot", call up the screenshot tool. Draw the screenshot area as needed (left-click the mouse to select the drawing point and double-click to complete the screenshot). After confirming the area, adjust or set it below the custom screenshot area.
The above is the detailed content of How to use the built-in screenshot function of WPS to take computer screenshots. For more information, please follow other related articles on the PHP Chinese website!
 What are the data storage methods?
 How to register a Bitcoin wallet
 Is the success rate of railway 12306 standby ticket high?
 Flutter framework advantages and disadvantages
 How to set up linux firewall
 What to do if the computer desktop icon cannot be opened
 What to do if the CPU usage is too high
 What are the differences between spring thread pool and jdk thread pool?


