


In the previous part of this series, we designed and implemented an interface to create blog posts with titles and posts. In this part, we'll see how to get a saved blog post in Firebase and render it on our welcome page.
We start by cloning the previous part of this tutorial from GitHub.
git clone https://github.com/jay3dec/AngularJS_Firebase_Part4.git
After cloning the source code, navigate to the project directory and install the required dependencies.
cd AngularJS_Firebase_Part4
npm install
After installing the dependencies, start the server
npm start
Point your browser to http://localhost:8000/app/#/home and the application should be running.
Previously when we were inserting data into Firebase we were just pushing the data to the Firebase URL and it would be randomly listed in Firebase. However, when the data grows and everything is pushed to Firebase, maintaining the data becomes difficult. So we'll try to organize the data in a way that will make Firebase queries easier.
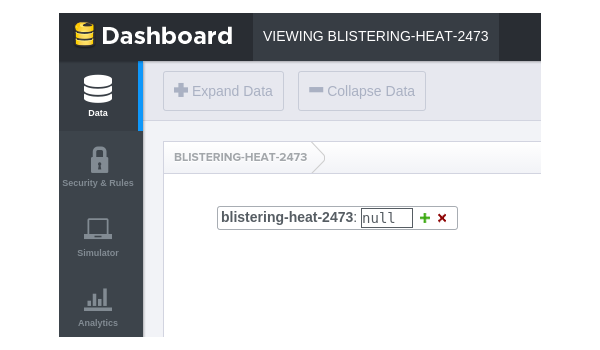
Log in to Firebase and go to Manage Apps. You should see the Firebase URL on the dashboard screen like this:
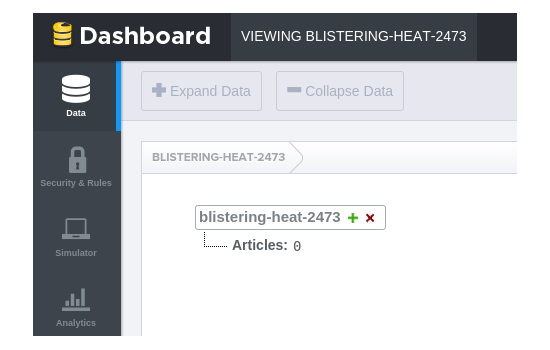
Click the plus icon next to URL and create a child node named Articles with a value of 0 and click Add. After adding the child nodes, you should see something similar to the following:
As you can see, we have separately classified the article data, which makes it easier to query and obtain data.
Now, navigate to addPost.js and change the Firebase URL to https://blistering-heat-2473.firebaseio.com/Articles. We also add the email ID of the user associated with the blog post. We can get the email ID from the CommonProp service we wrote earlier. Just inject the CommonProp service in the AddPostCtrl controller.
.controller('AddPostCtrl', ['$scope','$firebase','CommonProp',function($scope,$firebase,CommonProp) {
When pushing data, also include the email ID parameter. Here is the modified AddPost function:
$scope.AddPost = function() {
    var title = $scope.article.title;
    var post = $scope.article.post;

    var firebaseObj = new Firebase("https://blistering-heat-2473.firebaseio.com/Articles");
    var fb = $firebase(firebaseObj);

    fb.$push({
        title: title,
        post: post,
        emailId: CommonProp.getUser()
    }).then(function(ref) {
        console.log(ref);
    }, function(error) {
        console.log("Error:", error);
    });

}
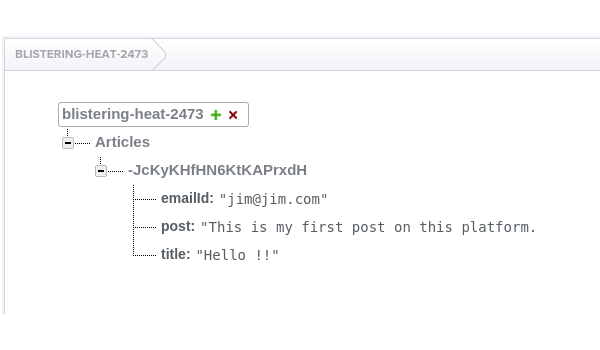
Save all changes and restart the server. Try logging in with a valid email address and password and creating a blog post. Now, if you look at the Firebase dashboard, you should see the post details in the Articles child node, like this:
Next, let’s add a Bootstrap list group component to display user-created posts. Navigate to app/welcome/welcome.html and in a div with class container, add a list group component after the welcome message like this:
<div class="list-group">
    <a href="#" class="list-group-item active">
        <h4 class="list-group-item-heading">Title Heading</h4>
        <p class="list-group-item-text">Blog post content </p>
    </a>
</div>
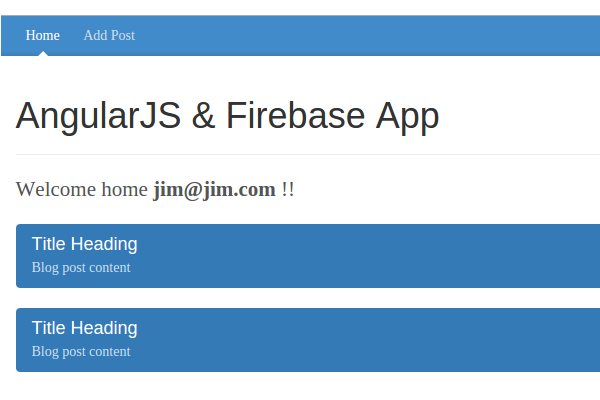
Save changes and restart the server. Try logging in with a valid email address and password. On the welcome page, you should see something similar to the following:
Next, we query the data from Firebase using the URL https://blistering-heat-2473.firebaseio.com/Articles.
Open welcome.js and create a Firebase object with the above URL inside the WelcomeCtrl controller.
var firebaseObj = new Firebase("https://blistering-heat-2473.firebaseio.com/Articles");
We will use $firebase to get data from Firebase. According to official documentation:
$firebase Wrapper used to synchronize Firebase data with Angular applications. It contains helper methods for writing data to Firebase, as well as tools for reading data into a synchronized collection or object. var sync = $firebase(firebaseObj);
To get data from a Firebase URL as a synchronized array, AngularFire provides a method called $asArray. Let's call the $asArray method on the sync object and assign it to another $scope variable.
$scope.articles = sync.$asArray();
Also add a paragraph element to the welcome page like this:
<p>{{articles}}</p>
Save all changes and restart the server. Log in using a valid email address and password. After entering the welcome page, you should get the query results in the form of JSON data in the $scope.articles binding element.
[{
    "emailId": "jim@jim.com",
    "post": "This is my first post on this platform.",
    "title": "Hello !!"
}, {
    "emailId": "jim@jim.com",
    "post": "Good night for tonight",
    "title": "GoodBye"
}]
由于我们在 $scope.articles 变量中拥有从 Firebase 查询的数据,因此我们可以将数据绑定到欢迎页面列表元素。我们将使用 AngularJS 指令 ngRepeat 在 Bootstrap 列表组中重复数据。以下是列表组 HTML:
<div class="list-group">
    <a href="#" class="list-group-item active">
        <h4 class="list-group-item-heading">Title Heading</h4>
        <p class="list-group-item-text">Blog post content </p>
    </a>
</div>
将 ngRepeat 指令添加到主 div 中,如图所示。
ng-repeat="article in articles"
ngRepeat 指令迭代articles 变量并在列表组div 中为每个项目创建HTML。因此,修改显示的 HTML 代码:
<div class="list-group" ng-repeat="article in articles">
    <a href="#" class="list-group-item active">
        <h4 class="list-group-item-heading">{{article.title}}</h4>
        <p class="list-group-item-text">{{article.post}}</p>
    </a>
</div>
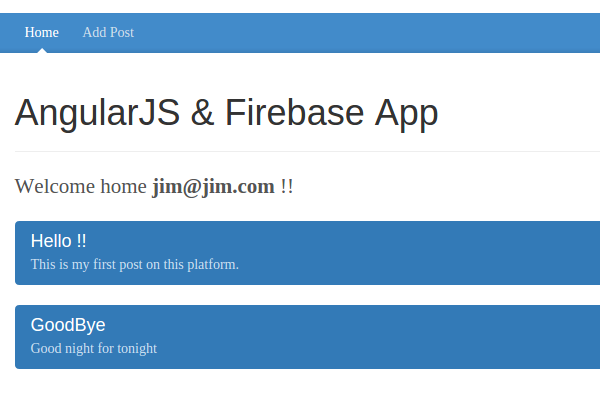
保存更改并重新启动服务器。使用电子邮件地址和密码登录,进入欢迎页面后,您应该会看到从“添加帖子”页面添加的文章列表。
现在导航至 http://localhost:8000/app/#/addPost 并添加另一篇帖子。由于我们在创建帖子后尚未添加到欢迎页面的重定向,因此请手动导航到 http://localhost:8000/app/#/welcome,您应该会在列表中看到它。
添加帖子后,我们需要将用户重定向到欢迎页面。打开 app/addPost/addPost.js 并在 AddPostCtrl 控制器中注入 $location 。在 fb.$push 成功回调中,添加重定向到 welcome 页面。
fb.$push({
    title: title,
    post: post,
    emailId: CommonProp.getUser()
}).then(function(ref) {
    console.log(ref);
    $location.path('/welcome');
}, function(error) {
    console.log("Error:", error);
});
打开 app/welcome/welcome.html 并修改添加帖子链接 href 重定向到添加帖子页面,如图所示:
<a class="blog-nav-item " href="#/addPost">Add Post</a>
保存所有更改并重新启动服务器。使用有效的电子邮件地址和密码登录并尝试创建帖子,您应该能够在欢迎页面列表中查看该帖子。
在本教程中,我们了解了如何使用 AngularFire 查询 Firebase 中存储的数据。我们创建了一个界面,将用户创建的博客文章呈现为欢迎页面上的列表。我们还修复了一些小问题。
在本系列的下一部分中,我们将通过实现更多功能(例如编辑和删除博客文章)将其提升到新的水平。
本教程的源代码可在 GitHub 上获取。请在下面的评论中告诉我们您的想法!
The above is the detailed content of Building web applications with AngularJS and Firebase: Part 5. For more information, please follow other related articles on the PHP Chinese website!


![[Web front-end] Node.js quick start](https://img.php.cn/upload/course/000/000/067/662b5d34ba7c0227.png)


