
If you’re one of those people who installs WordPress multiple times a month, you’re probably as tired as I am when it comes to installing the five or six plugins you use with each installation.
Fortunately, there is a plugin that makes this even easier.
The idea behind Wp Favs is to organize all plugins in a list to be able to install them all at once - or with just a few simple clicks. Okay, so this all sounds great, but how does it actually work?
The first thing we need to do is install the plugin on the desired WordPress website. As of this writing, the plugin is only available through the WordPress plugin repository, so grab a copy.
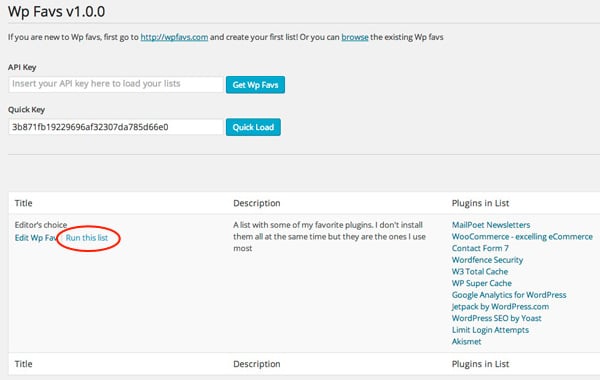
Once installed, you need to go to Tools > Wp Favs and you will see something similar to:

As you can see, we have two options here:
Either way, once it finishes loading, you will get the Wp Fav details including a small description written by the listing author and the included plugins. If you'd like to continue, just click "Run List".
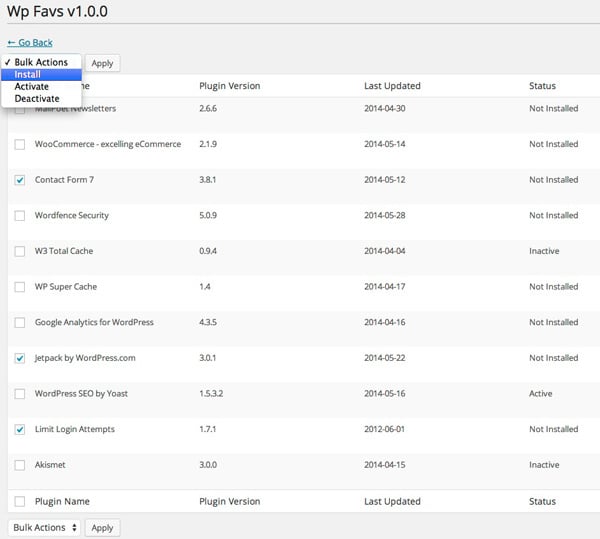
Now you will see a new screen with all the plugins in the list where you can select the one you want to install or activate. You can do this one by one or using the bulk action drop-down menu.
In this plugin list, you will also see the current plugin version in the WordPress repository, when it was last updated, and the status of the plugin on your site.
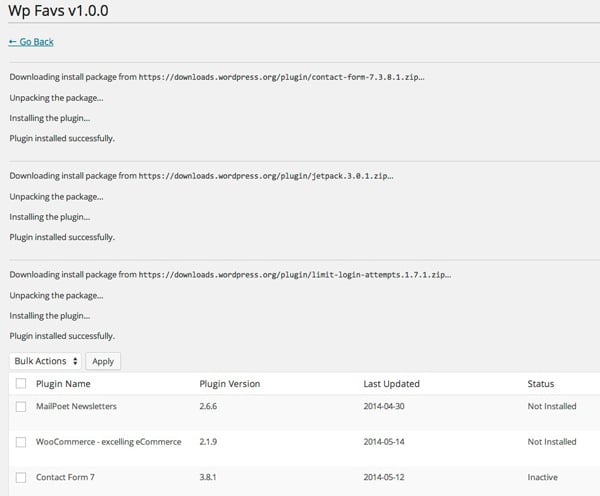
After you click Install, the process is the same as WordPress uses to install individual plugins. It will download all plugins from the WordPress repository and then change the status to inactive (installed but not active yet).
As the Wp Favs blog said, the site is currently in beta (lunch a few days ago) and there are plans to add a lot of features in the future, such as a more powerful search system, polls, etc. But now let us focus on how to create our own Wp Favs.
The first thing you need to do is create a new account. Once created, you will be given a password via email, just like in any other WordPress website. You can also log in/register using your wordpress.com account.
After logging in for the first time, you will receive another email with a newly generated API key that you can use with the plugin.
Now it’s time to create your Wp Favorites list, so go to the My Wp Favorites page and click on the Create Wp Favorites button. You'll get something like:
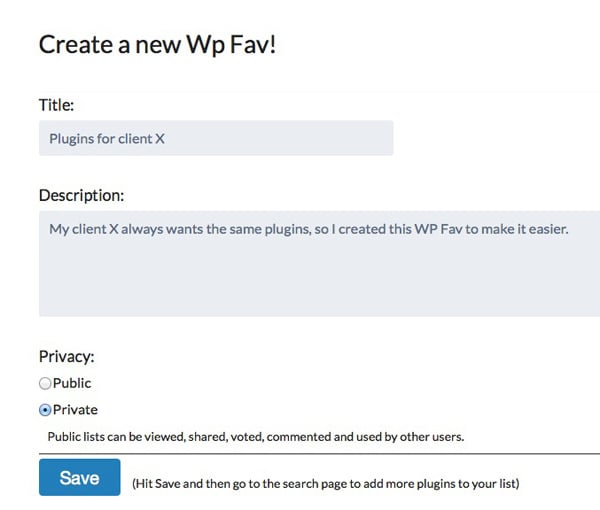
In the example above, I am creating a private list for one of my clients. After filling in all the details, I selected Private. This means other users will not be able to browse my lists or use the quick access keys.
Okay, now that we have the list saved, it’s time to add some plugins to it. Go to the Search Plugins page and enter the name of the desired plugin.
After finding it, click the heart-shaped icon on the right, and then click again on the list name of the plug-in you want to add.
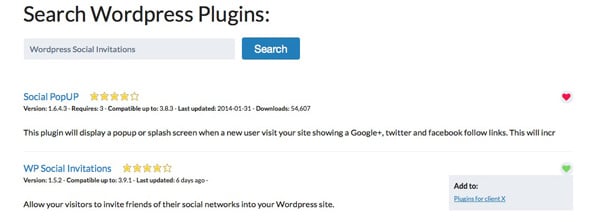
that's all!
If you go back to the plugins and use the API key, you will get the newly created list with all the plugins on it. Cool, right?
I hope you find Wp Favs as useful as I do. I personally think that the WordPress repository should be updated as soon as possible because plugins are a very important part of any WordPress website and the functionality it provides is still very limited.
If you have any questions, comments, or other feedback, please let me know in the comments below!
The above is the detailed content of Easily install multiple WordPress plugins in just a few clicks. For more information, please follow other related articles on the PHP Chinese website!


