In the previous article in this series, we started working with the latest version of the WordPress Media Uploader to get a clearer idea of how to start incorporating it into our projects.
The difficulty with using this new feature (well, new since 3.5) is that it is not as well documented as other features. This obviously leaves many developers - especially beginners - scratching their heads as to how to get started with it. Add to that a complete overhaul of the underlying system, and you've got a lot to do.
Based on the feedback from the first article, we will consider further expanding the scope of this series. In this article we will put into practice the functionality introduced in the previous article. Then, in a follow-up article (or maybe more than one follow-up article), we'll go over the details of how the media uploader works.
In a previous post we started developing a plugin that would introduce a "Featured Footer Image" at the bottom of every post if an image was selected. This meta box is available for Post and Page post types.
So far we have successfully added the meta box, launched the WordPress media uploader and selected an image to use as our featured image, but we haven’t actually done anything with the information returned to us from media Uploader.
In this post, we will continue to implement the functionality so that we display images at the bottom of the post. After that, we'll turn our attention to more technical details of the APIs available to us.
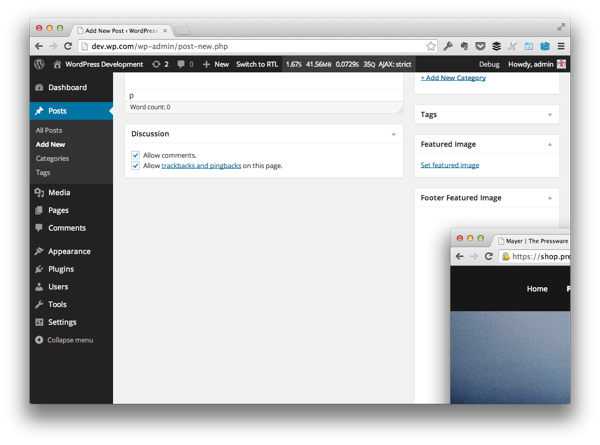
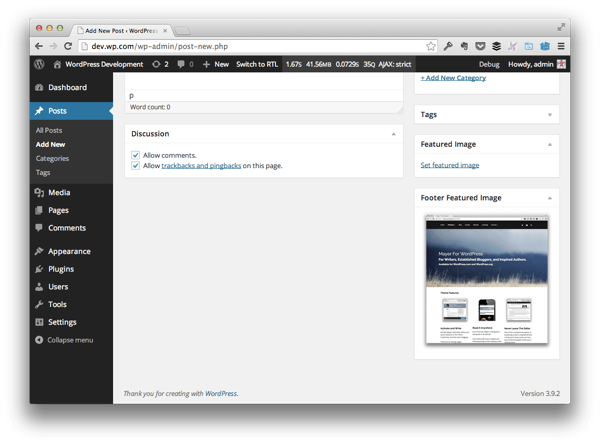
In order to continue where we left off, we need to be able to replicate the functionality provided by the standard "Featured Image" meta box. To do this:
Obviously, we've done our job.
Before we do anything make sure to update the renderMediaUploader function to accept $ as a parameter so we can use jQuery throughout the example.
The function declaration should look like this:
function renderMediaUploader( $ ) { ... }
The call to the function should now look like this:
renderMediaUploader( $ );
Now, let's get started.
After selecting an image from the media uploader, the data will be returned to you in JavaScript. Specifically, the data will be returned to us in the form of JSON. This will allow us to parse various properties of the image so that we can render and save it with our post.
But first, let's update our code. Find the following line of code in admin.js:
file_frame.on( 'insert', function() {

    /**
     * We'll cover this in the next version.
     */

});
and replace it with:
file_frame.on( 'insert', function() {

    // Read the JSON data returned from the Media Uploader
    json = file_frame.state().get( 'selection' ).first().toJSON();

});
Obviously, this isn't anything terribly complicated; however, remember to add json as a variable defined at the top of the file, along with file_frame and image_data.
If you're curious about what's returned, feel free to dump the contents of json into your favorite console debugger. We won’t do that in this particular article, but we may do more in a future in-depth article.
In order for us to display the selected image, we need to make sure that our meta box has an image element accessible via JavaScript so that we can update its properties when the image is selected.
In views/admin.php we add the following code to our template. It contains the empty image element that we will use to render the image.
<p class="hide-if-no-js">
    <a title="Set Footer Image" href="javascript:;" id="set-footer-thumbnail">Set featured image</a>
</p>

<div id="featured-footer-image-container" class="hidden">
    <img src="" alt="" title="" />
</div><!-- #featured-footer-image-container -->
Please note that we utilize the WordPress CSS class hidden to hide the container. Using JavaScript, we would remove this class to show the image (and basically do the opposite to hide the image and show the anchor to select the image again).
Now we can revisit the JavaScript and render the image when it is selected. We need to do two things:
To do this, let’s review the JavaScript code introduced earlier in this article. After retrieving the JSON data, make sure we have the URL of the image before continuing.
file_frame.on( 'insert', function() {

    // Read the JSON data returned from the Media Uploader
    json = file_frame.state().get( 'selection' ).first().toJSON();

	// First, make sure that we have the URL of an image to display
	if ( 0 > $.trim( json.url.length ) ) {
		return;
	}

	// After that, set the properties of the image and display it
	$( '#featured-footer-image-container' )
		.children( 'img' )
			.attr( 'src', json.url )
			.attr( 'alt', json.caption )
			.attr( 'title', json.title )
                        .show()
		.parent()
		.removeClass( 'hidden' );

	// Next, hide the anchor responsible for allowing the user to select an image
	$( '#featured-footer-image-container' )
		.prev()
		.hide();

});
Obviously, the code is commented to explain what's going on, but we rely heavily on jQuery to ensure that elements are shown and hidden correctly.
First, we check the URL property of json to make sure its length is greater than zero. I like to use $.trim as a defensive coding practice. If it's equal to zero, then we're going to return because we don't have an image to display.
After that, we leverage the new div element we created in the previous step. We get the image element through the children() function, and then set its src, alt and title attributes all based on the json Properties accessed by the object.
从那里,我们选择图像的父容器,然后删除隐藏类。
毕竟,我们使用 featured-footer-image-container 元素作为访问锚点的点 - 在本例中,它是前一个元素 - 然后我们将其隐藏。
此时,图像应该出现在帖子元框中。

但是我们有一个明显的问题:图像对于容器来说太大了。这意味着我们需要引入一些 CSS。
为此,我们需要添加一个 CSS 文件并更新核心插件文件,以便它将样式表排入队列。
首先,在插件文件夹中创建一个 css 目录,然后将 admin.css 添加到该目录中。在该文件中,添加以下代码:
#featured-footer-image-container img {

    width:  100%;
    height: auto;

}
然后在插件的 run() 函数中添加以下钩子:
add_action( 'admin_enqueue_scripts', array( $this, 'enqueue_styles' ) );
最后添加以下函数:
/**
 * Registers the stylesheets for handling the meta box
 *
 * @since 0.2.0
 */
public function enqueue_styles() {

    wp_enqueue_style(
        $this->name,
        plugin_dir_url( __FILE__ ) . 'css/admin.css',
        array()
    );

}
如果您已正确设置选择器并且已正确注册样式表并将其排入队列,您应该会看到如下内容:

好多了,不是吗?
正如我们添加一个元素来显示图像一样,我们也需要添加一个允许我们删除图像的元素。
为此,请重新访问 views/admin.php 并添加以下代码:
<p class="hide-if-no-js hidden">
    <a title="Remove Footer Image" href="javascript:;" id="remove-footer-thumbnail">Remove featured image</a>
</p><!-- .hide-if-no-js -->
接下来,我们需要编写一些额外的 JavaScript,以便在显示图像时显示上面的锚点。为此,请重新访问 admin.js 并将其添加到本文前面添加的代码下方:
// Display the anchor for the removing the featured image
$( '#featured-footer-image-container' )
    .next()
    .show();
就像我们对初始锚点所做的那样,我们需要设置一个事件处理程序,以便当单击“删除”锚点时,图像将被删除并恢复“设置特色图像”锚点。
为此,首先重新访问 DOM 加载后立即触发的函数并添加以下代码:
$( '#remove-footer-thumbnail' ).on( 'click', function( evt ) {

	// Stop the anchor's default behavior
	evt.preventDefault();

	// Remove the image, toggle the anchors
	resetUploadForm( $ );

});
现在我们需要定义 resetUploadForm 函数,所以现在就开始吧。请记住,这需要删除图像,隐藏“删除链接”容器,并恢复“设置图像”链接锚点。
/**
 * Callback function for the 'click' event of the 'Remove Footer Image'
 * anchor in its meta box.
 *
 * Resets the meta box by hiding the image and by hiding the 'Remove
 * Footer Image' container.
 *
 * @param    object    $    A reference to the jQuery object
 * @since    0.2.0
 */
function resetUploadForm( $ ) {
    'use strict';

	// First, we'll hide the image
	$( '#featured-footer-image-container' )
		.children( 'img' )
		.hide();

	// Then display the previous container
	$( '#featured-footer-image-container' )
		.prev()
		.show();

	// Finally, we add the 'hidden' class back to this anchor's parent
	$( '#featured-footer-image-container' )
		.next()
		.hide()
		.addClass( 'hidden' );

}
此时,我们已获得选择图像、删除图像以及继续执行此操作所需的一切。
仍有工作要做,但我们将在下一篇文章中介绍这一点。同时,不要忘记在 GitHub 上查看相关存储库以获取该项目源代码的当前版本。
显然,我们已经处理了很多后端工作,因为它涉及选择图像、显示图像和删除图像,但我们仍然缺少一个关键的功能:保存图像,以便它与帖子相关联。
为了将网站访问者看到的内容与我们在后端指定的内容联系起来,我们需要做一些工作,将 JSON 数据保存到数据库,对其进行清理、检索,然后显示它在前面。
在本系列的下一篇文章中,我们将看看如何做到这一点。同时,请随时在下面的提要中留下任何评论或问题。
The above is the detailed content of Add and remove images using WordPress media upload tool. For more information, please follow other related articles on the PHP Chinese website!


