

The stunning performance of large models represented by chatgpt this year has completely ignited the field of AICG. Various gpt and AI mapping products are springing up like mushrooms after a rain. Behind every successful product are exquisite algorithms. This article will give you a detailed introduction to the process and code of how to use a mobile phone to take several photos of the same scene, then synthesize new perspectives and generate videos. The technology used in this article is NeRF (Neural Radiance Fields), which is a 3D reconstruction method based on deep learning that has emerged since 2020. It can generate high-quality images by learning the light transmission and radiation transfer of the scene. Scene rendering images and 3D models. Regarding its principles and literature, I have a reference list at the end for everyone to learn from. This article mainly introduces it from a new perspective of code usage and environment construction.
The hardware environment used in this article is GPU RTX3090, and the operating system is Windows 10. The software used is open source NeRF implementation (https://github.com/cjw531/nerf_tf2). Since RTX 3090 requires the support of CUDA 11.0 and above, and TensorFlow-gpu requires support of 2.4.0 and above, we did not choose the official https://github.com/bmild/nerf because the bmild environment uses tensorflow. -gpu==1.15, the version is too old. There will be the following problem when running https://github.com/bmild/nerf/issues/174#issue-1553410900. I also replied in this tt that I need to upgrade to 2.8. But even if you use https://github.com/cjw531/nerf_tf2, its environment is somewhat problematic. First of all, because it is connected to the foreign conda channel, the speed is very slow. Secondly, its environment uses tensorflow==2.8 and does not specify the version of tensorflow-gpu. for these two questions. We have modified environment.yml.
# To run: conda env create -f environment.ymlname: nerf_tf2channels:- https://mirrors.tuna.tsinghua.edu.cn/anaconda/cloud/conda-forge/- conda-forgedependencies:- python=3.7- pip- cudatoolkit=11.0- cudnn=8.0- numpy- matplotlib- imageio- imageio-ffmpeg- configargparse- ipywidgets- tqdm- pip:- tensorflow==2.8- tensorflow-gpu==2.8- protobuf==3.19.0- -i https://pypi.tuna.tsinghua.edu.cn/simple
Open cmd and enter the following command.
conda env create -f environment.yml
Add nerf_tf2 to jupyter, so that jupyter can easily view the running results of the system.
// 安装ipykernelconda install ipykernel
//是该conda环境在jupyter中显示python -m ipykernel install --user --name 环境名称 --python -m ipykernel install --user --name 环境名称 --display-name "jupyter中显示名称"display-name "jupyter中显示名称"
//切换到项目目录cd 到项目目录//激活conda环境activate nerf_tf2//在cmd启动jupyterjupyter notebook
Now the conda environment and jupyter are ready.
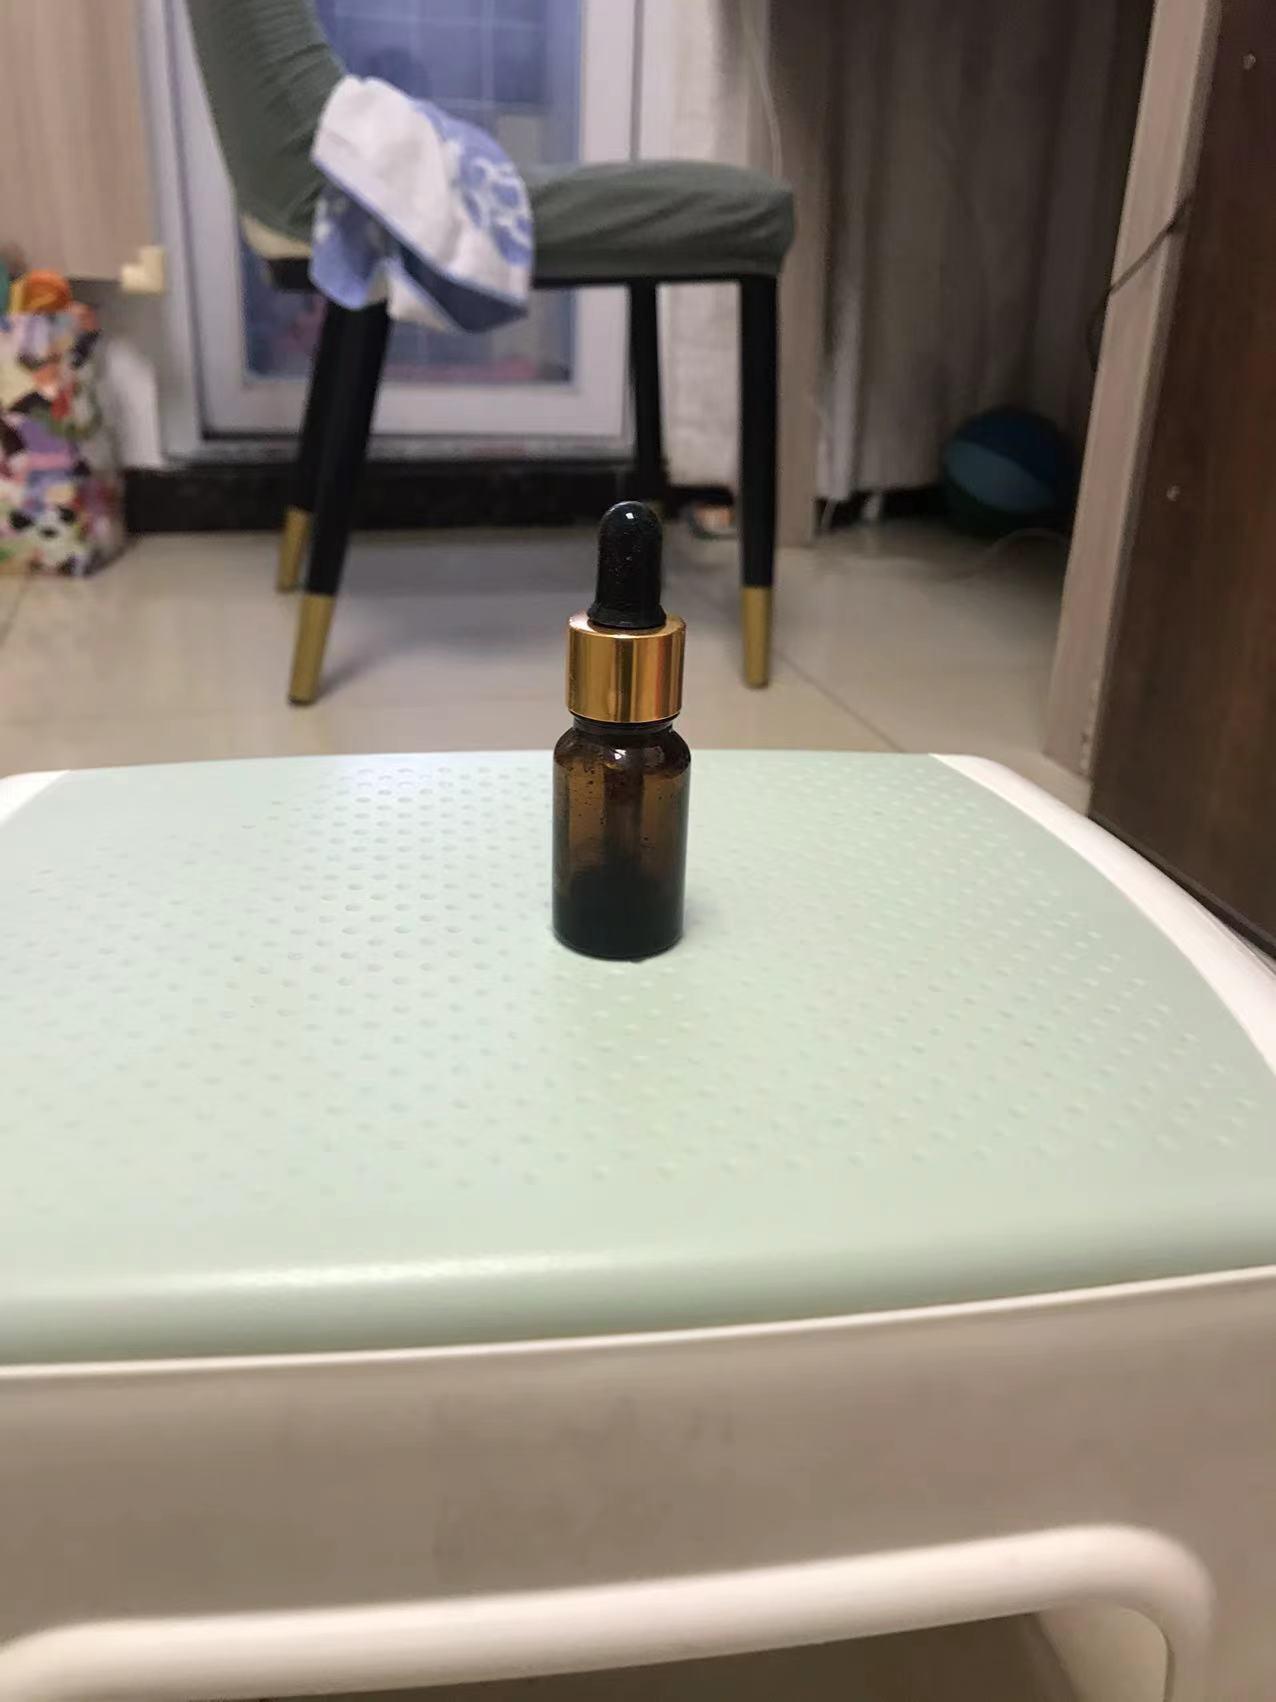
Sample pictures taken by mobile phones
feature_extractor_args = ['colmap', 'feature_extractor','--database_path', os.path.join(basedir, 'database.db'),'--image_path', os.path.join(basedir, 'images'),'--ImageReader.single_camera', '1',# '--SiftExtraction.use_gpu', '0',]
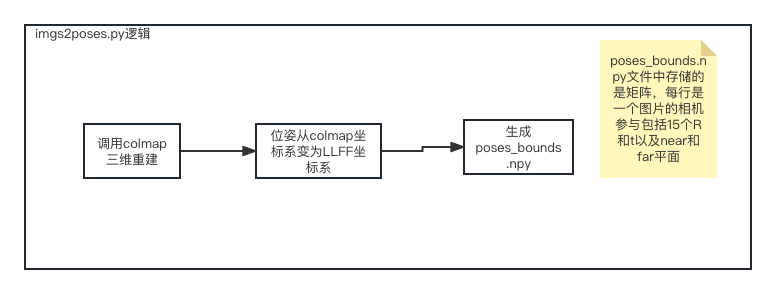
python imgs2poses.py
After running the imgs2poses.py file , generated the sparse directory, colmap_out.txt, database.db, poses_bounds.npy, then we created a new directory data/nerf_llff_data/ll under the nerf_tf2 project, and copied the above sparse directory and poses_bounds.npy to this directory. Finally, we configure a new file config_ll.txt. At this point our data preparation work is completed.
expname = ll_testbasedir = ./logsdatadir = ./data/nerf_llff_data/lldataset_type = llfffactor = 8llffhold = 8N_rand = 1024N_samples = 64N_importance = 64use_viewdirs = Trueraw_noise_std = 1e0
Migrate open source software to the windows platform.
Since this open source software mainly supports mac and linux, it cannot run on windows and requires modification of load_llff.py.
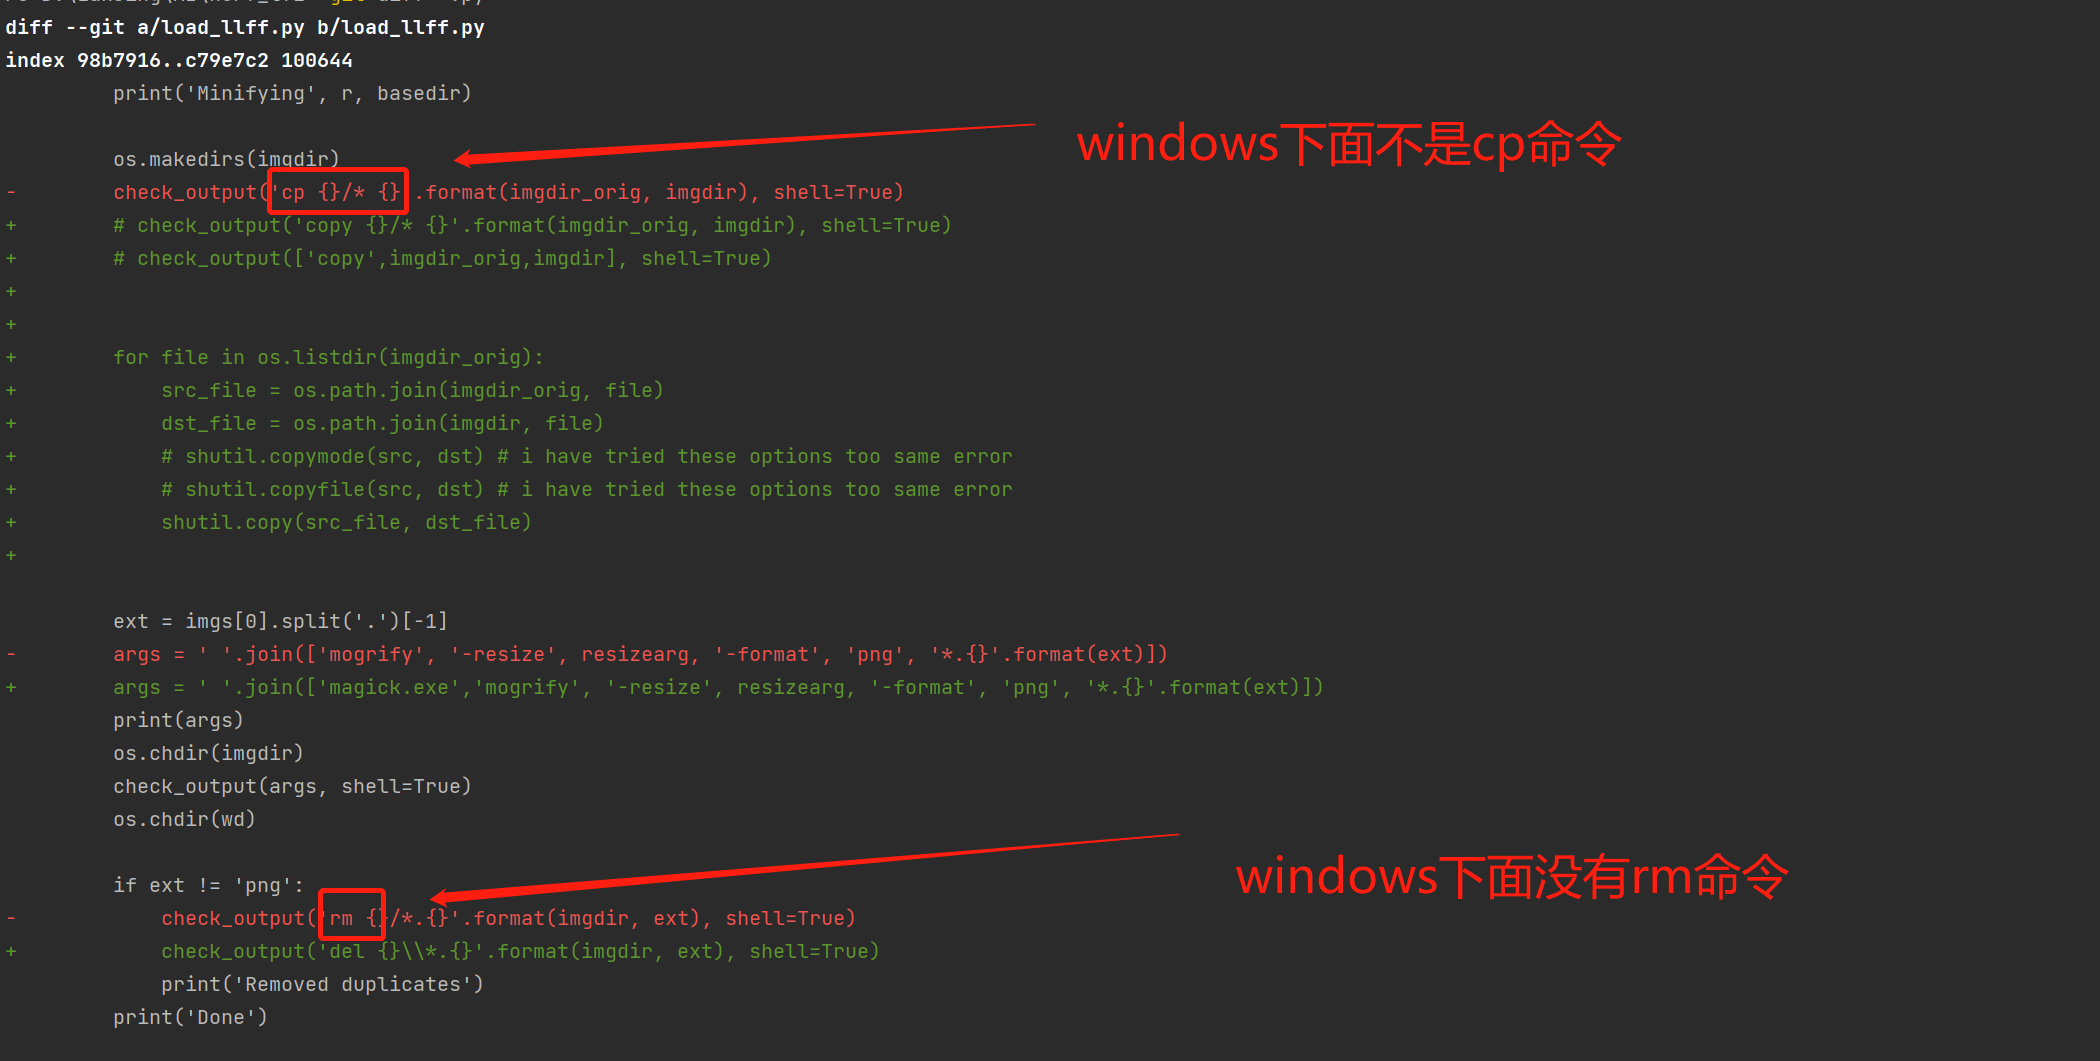
load_llff code migration
Run 300,000 times of batch training.
activate nerf_tf2python run_nerf.py --config config_ll.txt
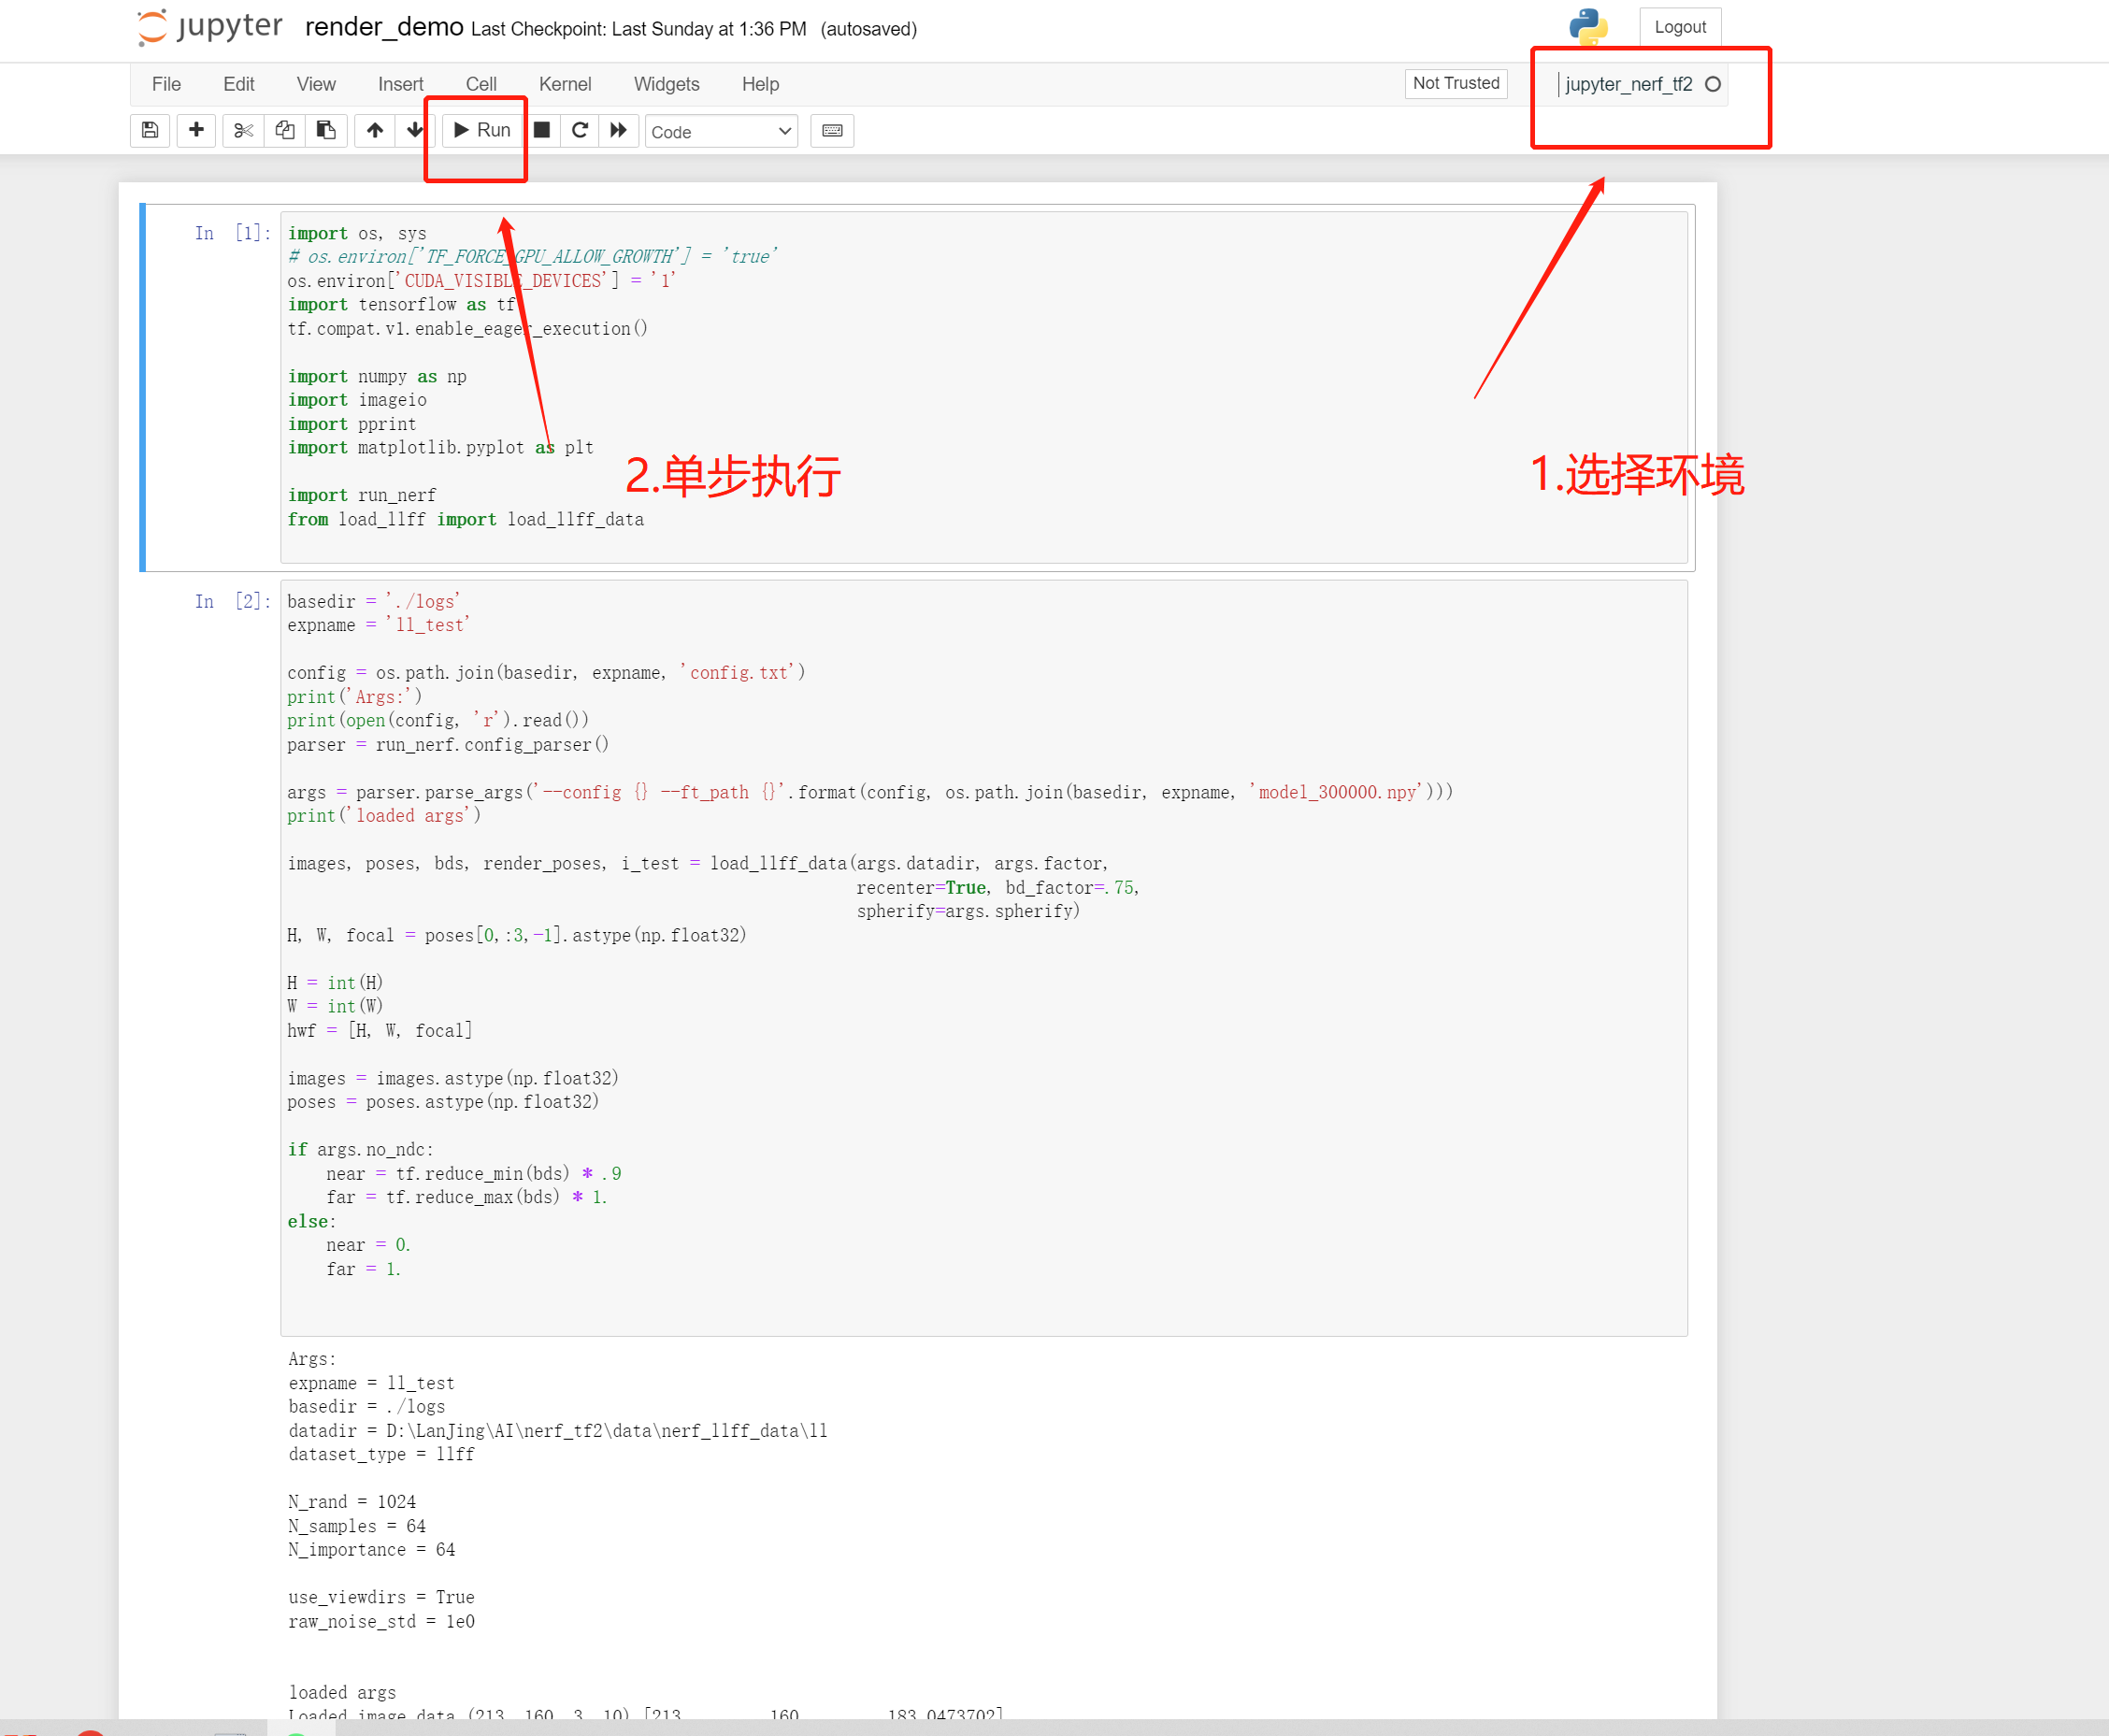
Rendering from a new perspective

fernOfficial synthesis of new perspective effect
https://zhuanlan.zhihu.com/p/554093703.
https://arxiv.org/pdf/2003.08934.pdf.
https://zhuanlan.zhihu.com/p/593204605.
https://inst.eecs.berkeley.edu/~cs194-26/fa22/Lectures/nerf_lecture1.pdf.
The above is the detailed content of DIY digital content production using AI technology. For more information, please follow other related articles on the PHP Chinese website!


