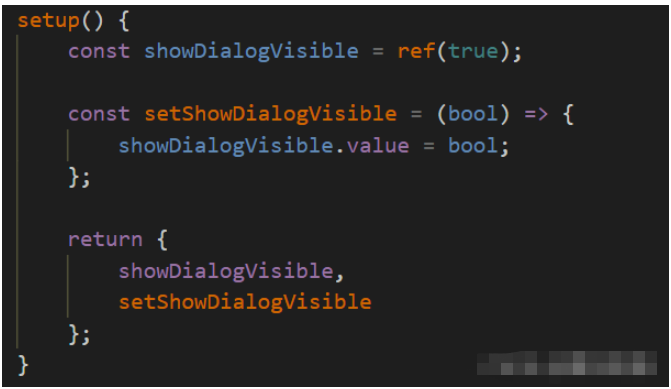
In the parent component:
1.Introduce ref

2. Define the attributes and attribute values to be passed

3. Pass the attribute attribute to the sub-component in the vue page

Pass attributes
: The name passed to the child component (customized) = "Corresponding to the attribute name defined in the parent component"
In the child component:
4. Receive the properties from the parent component
props: {
 showDialogVisible: Boolean
},
setup() {
 return {
 }
}5. Register the component
setup(props) {
    // 可以打印查看一下props传过来的属性以及属性的值
	console.log(props);

	return {
		props
	}
}6. In the child component The page uses this attribute

#The parent component passes the value to the child component complete!
In subcomponent:
Since vue data transfer is a one-way data flow, the child component does not have the right to modify the data passed by the parent component. It can only request the parent component to modify the original data, and use emit to notify the parent component to modify it.
1. Define the value of the property (or method) of the parent component that you want to modify in the child component
setup(props,context) {
    context.emit('setShow', false);

	return {
	}
}
//也可以:es6解构赋值取到emit
//setup(props,{emit}) {
//    emit('setShow', false);
//
//	return {
//	}
//}context.emit(‘Pass in the parent component’s custom property name ’, attribute value);
In the parent component:
2. Receive on the page The custom property name passed in the child component is bound to its corresponding property (method)

The parent component passes the value to the child component complete!
Attach my parent component method:

IfThe value passed by the child component to the parent component is exactly the value passed by the parent component to the child component , and two-way binding can be performed directly on this attribute.
Note: Before reading this section, it is recommended to read the first section: Parent component passes value to child component
In the child component Above:
#1. Directly modify the properties obtained from props

On the parent component:
2. Bind on the child component in the parent page

Value transfer completed!
I also searched for information online before writing this article, and found that there is very little information about it, so I’d better record it myself
The project requirement is that each page needs to add a top navigation bar and a return event

First write the sub-component code and create a nav.vue file in the components directory:
Subcomponent nav.vue file content
<template>
<div>
<el-affix position="top" :offset="0">
<div class="nav">
<span @click="backGo"><img src="../assets/back.png"/ alt="How to transfer values between components in vue3" >返回</span>
<p>{{title}}</p>
</div>
</el-affix>
</div>
</template>
<script setup>
import{ defineProps } from "vue"
const props =defineProps({ //子组件定义接收父组件传过来的值
title:String
})
//点击返回事件
const backGo = () => {
history.back()
}
</script>
<style scoped>
.nav{width: 100%;height:.6rem;display: flex;align-items: center;justify-content: center;text-align: center;position: relative;background-color: #ffffff;border-bottom: 1px solid #f0f0f0;}
.nav span{position: absolute;height:100%;left: .2rem;top: 0;display: flex;align-items: center;color: #8a8a8a;}
.nav span img{width: .32rem;}
</style>Parent component aboutus.vue file:
<template>
<div class="wrap">
<Nav title="关于我们"></Nav> <!--记住这里第一个字母大写哦-->
<div class="lists">
<ul class="abus">
<li><p><router-link to="/company">公司介绍</router-link></p></li>
<li><p><router-link to="/privacy">隐私政策</router-link></p></li>
<li><p><router-link to="/useragree">用户协议</router-link></p></li>
</ul>
</div>
</div>
</template>
<script setup>
import Nav from '@/components/nav.vue'
</script>Remember to capitalize the first letter when introducing subcomponents!
Is not it simple!
The same is done with the sub-component nav.vue to test, directly enter the code:
<template>
<div>
<el-affix position="top" :offset="0">
<div class="nav">
<span @click="backGo"><img src="../assets/back.png"/ alt="How to transfer values between components in vue3" >返回</span>
<p>{{title}}</p>
</div>
</el-affix>
</div>
</template>
<script setup>
import{ defineProps ,defineEmits} from "vue"
const emits =defineEmits(['getBackGo']) //注册父组件回调方法
const props =defineProps({
title:String
})
const backGo = () => {
// history.back()
emits("getBackGo","传个值给父组件!")
}
</script>
<style scoped>
.nav{width: 100%;height:.6rem;display: flex;align-items: center;justify-content: center;text-align: center;position: relative;background-color: #ffffff;border-bottom: 1px solid #f0f0f0;}
.nav span{position: absolute;height:100%;left: .2rem;top: 0;display: flex;align-items: center;color: #8a8a8a;}
.nav span img{width: .32rem;}
</style>Let’s take a look at the writing method of the parent component aboutus.vue:
<template>
<div class="wrap">
<Nav title="关于我们" @getBackGo="getBackGoInfo"></Nav>
<img src="../../assets/logo.jpg" class="logo"/ alt="How to transfer values between components in vue3" >
<div class="lists">
<ul class="abus">
<li><p><router-link to="/company">公司介绍</router-link></p></li>
<li><p><router-link to="/privacy">隐私政策</router-link></p></li>
<li><p><router-link to="/useragree">用户协议</router-link></p></li>
</ul>
</div>
</div>
</template>
<script setup>
import Nav from '@/components/nav.vue'
const getBackGoInfo = (value) => {
console.log(value)
}
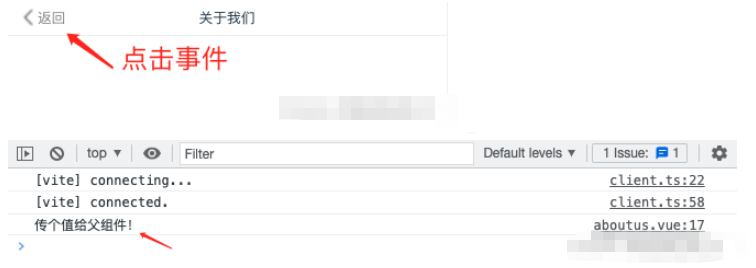
</script>The effect is as follows:

The above is the detailed content of How to transfer values between components in vue3. For more information, please follow other related articles on the PHP Chinese website!


