


This article brings you relevant knowledge about vue, which mainly introduces the relevant content about two-way data binding and vue.config.js file configuration. Vue internally uses Object.defineProperty The method attribute interception method converts the reading and writing of each data in the data object into getter/setter. Let's take a look at it together. I hope it will be helpful to everyone.

[Related recommendations: javascript video tutorial, web front-end】
Vue internally uses the Object.defineProperty method property interception to convert the reading and writing of each data in the data object into a getter/setter, and notifies the view to update when the data changes
The two-way binding of MVVM data mainly refers to the automatic rendering and display of the View when the Model data changes; the automatic synchronous update of the Model data when the View data changes
Definition
The Object.defineProperty() method directly defines a new property on an object, or modifies an existing property of an object, and returns the object. ------(Quoted from MDN)
Syntax
Object.defineProperty(obj, prop, descriptor)
(1) Parameters
obj The object on which to define properties.
prop The name of the property to be defined or modified.
descriptor The property descriptor to be defined or modified.
(2) Return value
The object passed to the function.
(3) Property descriptor
Object.defineProperty() defines properties for objects, which are divided into data descriptors and access descriptors. The two forms cannot be mixed.
Both the data descriptor and the access descriptor have the following optional key values:
configurable If and only if the configurable of this attribute is true, The property descriptor can be changed, and the property can also be deleted from the corresponding object. The default is false
enumerable If and only if the enumerable of the property is true, the property can appear in the enumeration property of the object. Defaults to false The data descriptor has the following optional key values:
value The value corresponding to this attribute. Can be any valid JavaScript value (number, object, function, etc.). The default is undefined
writable If and only if writable of the property is true, the value can be changed by the assignment operator. Defaults to false The access descriptor has the following optional key values:
get A method that provides a getter for the property, or undefined if there is no getter. When the property is accessed, the method will be executed. No parameters are passed in when the method is executed, but the this object will be passed in (due to the inheritance relationship, this here is not necessarily the object that defines the property). The default is
undefinedset A method that provides a setter for the property, or undefined if there is no setter. This method is triggered when the property value is modified. This method will accept the only parameter, which is the new parameter value of the property. The default is undefined
<body>
    <p id="app"></p>

    <script src="./vue.js"></script>
    <script>
        let app = document.getElementById("app")
        // 声明临时存储变量
        let temp = "初始数据"
        // 数据监听对象
        Object.defineProperty(window, "actual", {
            // 监听读取数据
            get() {
                console.log("获取数据调用");
                return temp            },

            // 监听修改数据
            set(value) {
                console.log("修改数据调用");
                temp = value                bind(actual) // 数据一旦发生变化就重新渲染页面
            }
        })

        // vue 数据双向绑定
        function bind(content) {
            app.innerHTML = content        }
        bind(actual)
    </script></body>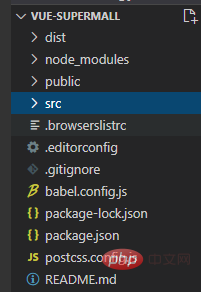
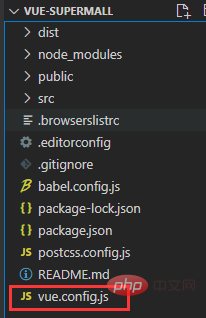
vue.config.js in the root directory
publicPath
Type: string
Default:'/'
The basic URL when deploying the application package. The usage is consistent with the output.publicPath of webpack itself.
This value can also be set to an empty string ('') or a relative path ('./'), so that all resources will be linked to relative paths, so that the package can be deployed. on any path.
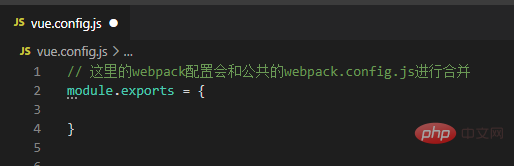
To set up the development server in the root path, you can use a conditional value:// 这里的webpack配置会和公共的webpack.config.js进行合并 module.exports = { // 执行 npm run build 统一配置文件路径(本地访问dist/index.html需'./') publicPath: './', }Copy after login
// 这里的webpack配置会和公共的webpack.config.js进行合并
module.exports = {
  // NODE_ENV:Node.js 暴露给执行脚本的系统环境变量。通常用于确定在开发环境还是生产环境
  publicPath: process.env.NODE_ENV === 'production' ? '' : '/',
}outputDir
Type:string
Default:‘dist’
输出文件目录,当运行vue-cli-service build(npm run build) 时生成的生产环境构建文件的目录。注意目标目录在构建之前会被清除 (构建时传入–no-clean可关闭该行为)。
// 这里的webpack配置会和公共的webpack.config.js进行合并
module.exports = {
  // 执行 npm run build 统一配置文件路径(本地访问dist/index.html需'./')
  // NODE_ENV:Node.js 暴露给执行脚本的系统环境变量。通常用于确定在开发环境还是生产环境
  // publicPath: '/',
  publicPath: process.env.NODE_ENV === 'production' ? '' : '/',
  outputDir: 'dist', // 输出文件目录
}assetsDir
Type:string
Default:’’
放置生成的静态资源 (js、css、img、fonts) 的目录。
// 这里的webpack配置会和公共的webpack.config.js进行合并
module.exports = {
  // 执行 npm run build 统一配置文件路径(本地访问dist/index.html需'./')
  // NODE_ENV:Node.js 暴露给执行脚本的系统环境变量。通常用于确定在开发环境还是生产环境
  // publicPath: '/',
  publicPath: process.env.NODE_ENV === 'production' ? '' : '/',
  outputDir: 'dist', // 输出文件目录
  assetsDir: 'static', // 放置静态资源
}**注:**从生成的资源覆写 filename 或 chunkFilename 时,assetsDir会被忽略。
indexPath
Type:string
Default:‘index.html’
指定生成的index.html的输出路径 (相对于outputDir)。也可以是一个绝对路径。
// 这里的webpack配置会和公共的webpack.config.js进行合并
module.exports = {
  // 执行 npm run build 统一配置文件路径(本地访问dist/index.html需'./')
  // NODE_ENV:Node.js 暴露给执行脚本的系统环境变量。通常用于确定在开发环境还是生产环境
  // publicPath: '/',
  publicPath: process.env.NODE_ENV === 'production' ? '' : '/',
  outputDir: 'dist', // 输出文件目录
  // assetsDir: 'static', // 放置静态资源
  // indexPath: 'index.html', // 可以不设置一般会默认
}filenameHashing
Type:boolean
Default:true
默认情况下,生成的静态资源在它们的文件名中包含了 hash 以便更好的控制缓存。然而,这也要求 index 的 HTML 是被 Vue CLI 自动生成的。如果你无法使用 Vue CLI 生成的 index HTML,你可以通过将这个选项设为false来关闭文件名哈希。
// 这里的webpack配置会和公共的webpack.config.js进行合并
module.exports = {
  // 执行 npm run build 统一配置文件路径(本地访问dist/index.html需'./')
  // NODE_ENV:Node.js 暴露给执行脚本的系统环境变量。通常用于确定在开发环境还是生产环境
  // publicPath: '/',
  publicPath: process.env.NODE_ENV === 'production' ? '' : '/',
  outputDir: 'dist', // 输出文件目录
  // assetsDir: 'static', // 放置静态资源
  // indexPath: 'index.html', // 可以不设置一般会默认
  // filenameHashing:true, // 文件命名
}pages
Type:Object
Default:undefined
在 multi-page(多页)模式下构建应用。每个“page”应该有一个对应的 JavaScript 入口文件。
其值应该是一个对象,对象的 key 是入口的名字,value 是:
一个指定了entry,template,filename,title和chunks的对象 (除了entry之外都是可选的);
或一个指定其entry的字符串。
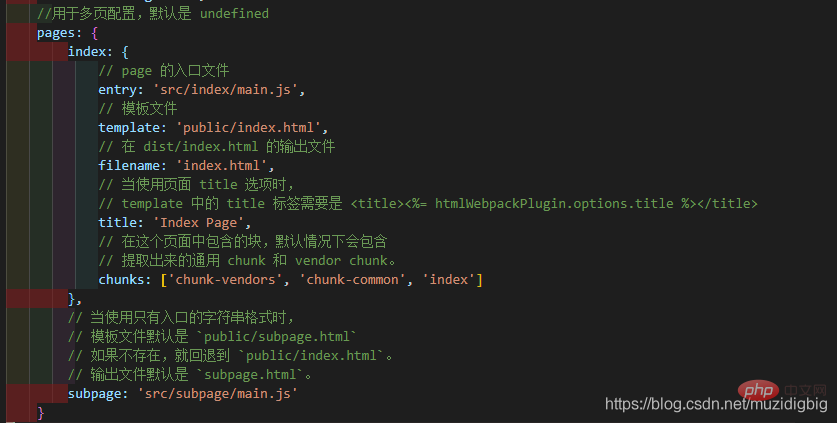
**注:**当在 多页应用 模式下构建时,webpack 配置会包含不一样的插件 (这时会存在多个html-webpack-plugin和preload-webpack-plugin的实例)。如果你试图修改这些插件的选项,请确认运行vue inspect。
lintOnSave
Type:boolean|‘error’
Default:true
是否在保存的时候使用 `eslint-loader` 进行检查。 有效的值:`ture` | `false` | `“error”` 当设置为 `“error”` 时,检查出的错误会触发编译失败。
// 这里的webpack配置会和公共的webpack.config.js进行合并
module.exports = {
  // 执行 npm run build 统一配置文件路径(本地访问dist/index.html需'./')
  // NODE_ENV:Node.js 暴露给执行脚本的系统环境变量。通常用于确定在开发环境还是生产环境
  // publicPath: '/',
  publicPath: process.env.NODE_ENV === 'production' ? '' : '/',
  outputDir: 'dist', // 输出文件目录
  // assetsDir: 'static', // 放置静态资源
  // indexPath: 'index.html', // 可以不设置一般会默认
  // filenameHashing:true, // 文件命名
  lintOnSave: false, //设置是否在开发环境下每次保存代码时都启用 eslint验证
}runtimeCompiler
Type:boolean
Default:false
是否使用包含运行时编译器的 Vue 构建版本。设置为true后你就可以在 Vue 组件中使用template选项了,但是这会让你的应用额外增加 10kb 左右。
// 这里的webpack配置会和公共的webpack.config.js进行合并
module.exports = {
  // 执行 npm run build 统一配置文件路径(本地访问dist/index.html需'./')
  // NODE_ENV:Node.js 暴露给执行脚本的系统环境变量。通常用于确定在开发环境还是生产环境
  // publicPath: '/',
  publicPath: process.env.NODE_ENV === 'production' ? '' : '/',
  outputDir: 'dist', // 输出文件目录
  // assetsDir: 'static', // 放置静态资源
  // indexPath: 'index.html', // 可以不设置一般会默认
  // filenameHashing:true, // 文件命名
  lintOnSave: false, //设置是否在开发环境下每次保存代码时都启用 eslint验证
  // runtimeCompiler: false, // 是否使用带有浏览器内编译器的完整构建版本
}transpileDependencies
Type:Array
Default:[]
默认情况下babel-loader会忽略所有node_modules中的文件。如果你想要通过 Babel 显式转译一个依赖,可以在这个选项中列出来。
productionSourceMap
Type:boolean
Default:true
如果你不需要生产环境的 source map,可以将其设置为false以加速生产环境构建。
crossorigin
Type:string
Default:undefined
设置生成的 HTML 中和
integrity
Type:boolean
Default:false
在生成的 HTML 中的和
Webpack相关配置
configureWebpack
Type:Object | Function
如果这个值是一个对象,则会通过webpack-merge合并到最终的配置中。
如果这个值是一个函数,则会接收被解析的配置作为参数。该函数及可以修改配置并不返回任何东西,也可以返回一个被克隆或合并过的配置版本。
chainWebpack
Type:Function
是一个函数,会接收一个基于webpack-chain的ChainableConfig实例。允许对内部的 webpack 配置进行更细粒度的修改。
Css相关配置
  css: { // css相关配置
    // 是否将组件中的 CSS 提取至一个独立的 CSS 文件中,生产环境下是 true,开发环境下是 false
    extract: process.env.NODE_ENV === "production",
    // 是否为 CSS 开启 source map。设置为 true 之后可能会影响构建的性能。
    sourceMap: false,
    // 启用 CSS modules for all css / pre-processor files.(预加载)
    requireModuleExtension: true,
    loaderOptions: {
      sass: {
        // data: `@import "@/assets/css/variables.scss";`
      }
    }
},css.modules(===css.requireModuleExtension)
Type:boolean
Default:false
默认情况下,只有*.module.[ext]结尾的文件才会被视作 CSS Modules 模块。设置为true后你就可以去掉文件名中的.module并将所有的*.(css|scss|sass|less|styl(us))文件视为 CSS Modules 模块。
从 v4 起已弃用,请使用[这里是代码010]。 在 v3 中,这个选项含义与
css.requireModuleExtension相反
css.extract
Type:boolean | Object
Default: 生产环境下是true,开发环境下是false
是否将组件中的 CSS 提取至一个独立的 CSS 文件中 (而不是动态注入到 JavaScript 中的 inline 代码)。
css.sourceMap
Type:boolean
Default:false
是否为 CSS 开启 source map。设置为true之后可能会影响构建的性能。
css.loaderOptions
Type:Object
Default:{}
向 CSS 相关的 loader 传递选项。
支持的 loader 有:
css-loader
postcss-loader
sass-loader
less-loader
stylus-loader
devServer
Type:Object
所有?webpack-dev-server?的选项都支持。注意:
有些值像host、port和https可能会被命令行参数覆写。
有些值像publicPath和historyApiFallback不应该被修改,因为它们需要和开发服务器的publicPath同步以保障正常的工作。
devServer.proxy
Type:string | Object
如果你的前端应用和后端 API 服务器没有运行在同一个主机上,你需要在开发环境下将 API 请求代理到 API 服务器。这个问题可以通过vue.config.js中的devServer.proxy选项来配置。
  devServer: {
    port: 2021, // 设置端口号
    host: '10.32.120.69', // ip 本地
    disableHostCheck: true, //是否关闭用于 DNS 重绑定的 HTTP 请求的 HOST 检查
    hotOnly: false, // 热更新
    https: false, // https:{type:Boolean}配置前缀
    open: false, //配置自动启动浏览器
    proxy: null,  //设置代理
    // proxy: { //目的是解决跨域,若测试环境不需要跨域,则不需要进行该配置
    //   '/api': { // 拦截以 /api 开头的url接口
    //     target: 'https://api.taobao.cn/', //目标接口域名
    //     changeOrigin: true, //是否跨域
    //     ws: true, //如果要代理 websockets,配置这个参数
    //     secure: false, // 如果是https接口,需要配置这个参数
    //     // 标识替换
    //     // 原请求地址为 /api/getData 将'/api'替换''时,
    //     // 代理后的请求地址为: http://xxx.xxx.xxx/getData
    //     // 若替换为'/other',则代理后的请求地址为 http://xxx.xxx.xxx/other/getData
    //     pathRewrite: { // 标识替换
    //       '^/api': '/'   //重写接口 后台接口指向不统一  所以指向所有/
    //       '^/api': '/api/mock'
    //     }
    //   }
    // }
},这里理解成用‘/api’代替target里面的地址,后面组件中我们掉接口时直接用api代替 比如我要调用’https://api.taobao.cn/xxx/proxytime=2017-07-07 14:57:22’,直接写‘/api/xxx/proxytime=2017-07-07 14:57:22’即可
import axios from 'axios'
export default {
  created() {
    // 1. 代理成功
    // https://api.taobao.cn/users/proxy 转换成 http://localhost:2021/api/users/proxy
    axios.get('/api/users/proxy').then(res => { // /api 不能少
      console.log(res)
    })
  }
}parallel
Type:boolean
Default:require(‘os’).cpus().length > 1
是否为 Babel 或 TypeScript 使用thread-loader。该选项在系统的 CPU 有多于一个内核时自动启用,仅作用于生产构建。
pwa 学习
Type:Object
向PWA 插件传递选项。
这个插件中添加的serviceworker只在生产环境中启用(例如,只有当你运行npmrunbuild或yarnbuild时)。
不推荐在开发模式中启用serviceworker,因为它会导致使用以前缓存的资产而不包括最新的本地更改的情况。
  pwa: {
    // serviceWorker:false,
    // 允许您从一个现有的service worker文件开始,并创建一个该文件的副本,并将“预缓存清单”注入其中。
    // workboxPluginMode:'InjectManifest',
    // workboxOptions: {
    //   //swSrc: './app/sw.js', /* Empty file. */
    // },
    iconPaths: {
      favicon32: "favicon.ico",
      favicon16: "favicon.ico",
      appleTouchIcon: "favicon.ico",
      maskIcon: "favicon.ico",
      msTileImage: "favicon.ico"
    }
}pluginOptions
Type:Object
这是一个不进行任何 schema 验证的对象,因此它可以用来传递任何第三方插件选项。
// 这里的webpack配置会和公共的webpack.config.js进行合并
module.exports = {
  // 执行 npm run build 统一配置文件路径(本地访问dist/index.html需'./')
  // NODE_ENV:Node.js 暴露给执行脚本的系统环境变量。通常用于确定在开发环境还是生产环境
  // publicPath: '/',
  publicPath: process.env.NODE_ENV === 'production' ? '' : '/',
  outputDir: 'dist', // 输出文件目录
  // assetsDir: 'static', // 放置静态资源
  // indexPath: 'index.html', // 可以不设置一般会默认
  // filenameHashing:true, // 文件命名
  lintOnSave: false, //设置是否在开发环境下每次保存代码时都启用 eslint验证
  // runtimeCompiler: false, // 是否使用带有浏览器内编译器的完整构建版本
  configureWebpack: { // 别名配置
    resolve: {
      alias: {
        //'src': '@', 默认已配置
        'assets': '@/assets',
        'common': '@/common',
        'components': '@/components',
        'api': '@/api',
        'views': '@/views',
        'plugins': '@/plugins',
        'utils': '@/utils',
      }
    }
    // 使用前面可加~
  },
  productionSourceMap: false, //如果你不需要生产环境的 source map,可以将其设置为 false 以加速生产环境构建
  css: { // css相关配置
    // 是否将组件中的 CSS 提取至一个独立的 CSS 文件中,生产环境下是 true,开发环境下是 false
    extract: process.env.NODE_ENV === "production",
    // 是否为 CSS 开启 source map。设置为 true 之后可能会影响构建的性能。
    sourceMap: false,
    // 启用 CSS modules for all css / pre-processor files.(预加载)
    requireModuleExtension: true,
    loaderOptions: {
      sass: {
        // data: `@import "@/assets/css/variables.scss";`
      }
    }
  },
  devServer: {
    port: 2021, // 设置端口号
    host: '10.32.120.69', // ip
    disableHostCheck: true, //是否关闭用于 DNS 重绑定的 HTTP 请求的 HOST 检查
    hotOnly: false, // 热更新
    https: false, // https:{type:Boolean}配置前缀
    open: false, //配置自动启动浏览器
    proxy: null,  //设置代理
    // proxy: { //目的是解决跨域,若测试环境不需要跨域,则不需要进行该配置
    //   '/api': { // 拦截以 /api 开头的url接口
    //     target: 'https://api.taobao.cn/', //目标接口域名
    //     changeOrigin: true, //是否跨域
    //     ws: true, //如果要代理 websockets,配置这个参数
    //     secure: false, // 如果是https接口,需要配置这个参数
    //     // 标识替换
    //     // 原请求地址为 /api/getData 将'/api'替换''时,
    //     // 代理后的请求地址为: http://xxx.xxx.xxx/getData
    //     // 若替换为'/other',则代理后的请求地址为 http://xxx.xxx.xxx/other/getData
    //     pathRewrite: { // 标识替换
    //       '^/api': '/'   //重写接口 后台接口指向不统一  所以指向所有/
    //       '^/api': '/api/mock'
    //     }
    //   }
    // }
  },
  // 这个插件中添加的service worker只在生产环境中启用(例如,只有当你运行npm run build或yarn build时)。
  // 不推荐在开发模式中启用service worker,因为它会导致使用以前缓存的资产而不包括最新的本地更改的情况。
  pwa: {
    // serviceWorker:false,
    // 允许您从一个现有的service worker文件开始,并创建一个该文件的副本,并将“预缓存清单”注入其中。
    // workboxPluginMode:'InjectManifest',
    // workboxOptions: {
    //   //swSrc: './app/sw.js', /* Empty file. */
    // },
    iconPaths: {
      favicon32: "favicon.ico",
      favicon16: "favicon.ico",
      appleTouchIcon: "favicon.ico",
      maskIcon: "favicon.ico",
      msTileImage: "favicon.ico"
    }
  }
}【相关推荐:javascript视频教程、web前端】
The above is the detailed content of Detailed explanation of vue data two-way binding and vue.config.js file configuration. For more information, please follow other related articles on the PHP Chinese website!


![[Web front-end] Node.js quick start](https://img.php.cn/upload/course/000/000/067/662b5d34ba7c0227.png)


