This article brings you relevant knowledge about Laravel, which mainly introduces issues related to single-user login. Let’s take a look at the relevant content of single-user login using laravel-admin as an example. I hope it will be helpful to everyone. helpful.

【Related recommendation:laravel video tutorial】
Everyone has heard of the term single-user login, why do we need single-user? Log in? For example: on a video website, if an account is recharged with VIP and then shares its account with others, then other people will also have VIP privileges, and the company's interests will be damaged. If the account is divided among 1,000 people , 10,000 people, this loss is not small, so today I will take you through a single user login.
Encore\Admin\Controllers\AuthController.php modification, you can separate the method without modifying the source file.
Add code
use Illuminate\Support\Facades\Session; use Illuminate\Support\Facades\Redis;
Modify postLogin() method
if ($this->guard()->attempt($credentials, $remember)) { // return $this->sendLoginResponse($request);//此注释修改为以下 return $this->sendLoginResponse($request,$credentials); }
Modify sendLoginResponse() method
protected function sendLoginResponse(Request $request,$credentials) { admin_toastr(trans('admin.login_successful')); $request->session()->regenerate(); // return redirect()->intended($this->redirectPath()); // 制作 token return $this->createtoken($credentials,$request); }
Add createtoken() method
protected function createtoken($credentials,$request){ //相同局域网下多设备通用token if(!Redis::get('STRING_SINGLETOKEN_MAJOR_'. $credentials['username'])){ $time = time(); // 当前 time 存入 Redis Redis::set('STRING_SINGLETOKEN_MAJOR_'. $credentials['username'], $time); } //局域网不通用 但设备使用 注释上边多设备使用 // $time = time(); $time=Redis::get('STRING_SINGLETOKEN_MAJOR_'. $credentials['username']); // md5 加密 $singleToken = md5($request->getClientIp() . $credentials['username'] . $time .'onlykey'); Redis::set('SINGLETOKEN_MAJOR_'. $credentials['username'],$singleToken); // 用户信息存入 Session Session::put('user_login', $credentials['username']); return redirect()->intended($this->redirectPath()); }
After logging in successfully, get the current timestamp, query the username and the unique anti-theft string onlykey through IP, time, onlykey can be any character, perform MD5 encryption, and get TOKEN. Then we store the timestamp and token we just obtained into Redis. The Redis Key is concatenated with username to the string to facilitate TOKEN verification in the middleware later. Then we store the user information in Session.
In layman’s terms, middleware means that when accessing a method, the content of the middleware will be verified in advance. After verification, the method to be accessed can be accessed.
Command to create middleware
// 项目根目录运行 php artisan make:middleware SsoMiddleware
The above command will generate a SsoMiddleware.php file under app/Http/Middleware, and add the middleware to app/Http/ Kernel.php
protected $routeMiddleware = [] and add the following
'SsoMiddleware' => \App\Http\Middleware\SsoMiddleware::class,
Now go to the middleware and write the program app/Http/Middleware/SsoMiddleware.php. There is a handle method in the file. We write the logic in this method.
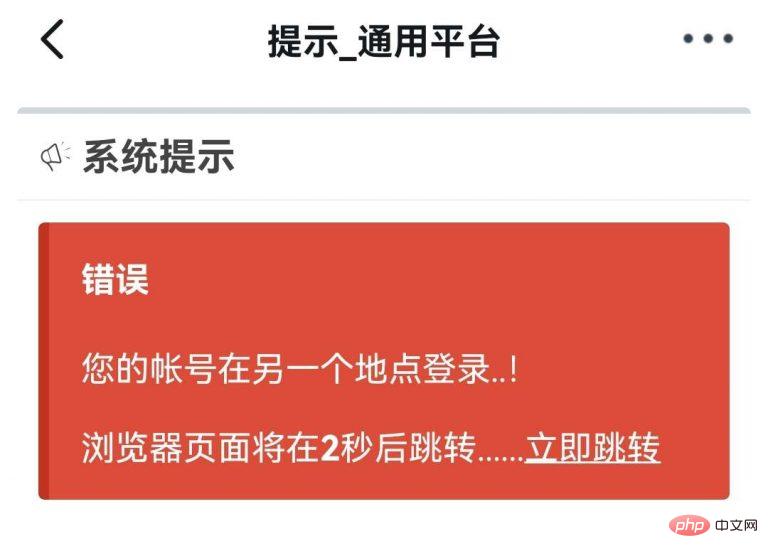
public function handle($request, Closure $next) { $prefix=config('admin.route.prefix'); $array=['/'.$prefix.'/auth/login','/'.$prefix.'/auth/logout','/'.$prefix.'/auth/clearsession']; $username= Session::get('user_login'); $url=$request->getRequestUri(); if(in_array($url,$array)){ return $next($request); exit; } if ($username) { // 获取 Cookie 中的 token $singletoken = Redis::get('SINGLETOKEN_MAJOR_'.$username); if ($singletoken) { // 从 Redis 获取 time $redisTime = Redis::get('STRING_SINGLETOKEN_MAJOR_'. $username); // 重新获取加密参数加密 $ip = $request->getClientIp(); $secret = md5($ip . $username . $redisTime.'onlykey'); if ($singletoken != $secret) { // 记录此次异常登录记录 // \DB::table('data_login_exception')->insert(['guid' => $userInfo->guid, 'ip' => $ip, 'addtime' => time()]); // 清除 session 数据 // abort('404','你可能来到了没有知识的荒漠'); // return redirect('/'.$prefix.'/auth/logout'); // $request->session()->invalidate(); $data = [ 'message' => '您的帐号在另一个地点登录..!', 'url' => '/'.$prefix.'/auth/clearsession', 'jumpTime' => 5, 'status' => 'error' ]; //显示模板及数据 return response()-> view('errors/Prompt',compact('data')); } return $next($request); } else { return redirect('/'.$prefix.'/auth/logout'); } } else { return redirect('/'.$prefix.'/auth/logout'); } }
In the above middleware What it does is: Get the user's data stored in the Session as the first level of judgment. If it passes the judgment, enter the second level of judgment. First get the token and the timestamp stored in Redis, and take out the security sequence and IP, username, time. ,onlykey,MD5 encryption, after encryption, compare it with the token obtained by the client.
The errors/Prompt is the prompt style and you need to click here to download
Clear clearsession() method
public function clearsession(Request $request){ $prefix=config('admin.route.prefix'); return redirect('/'.$prefix.'/auth/logout'); }
We have finished writing the logic. The last step is to control every step of the user's operation after logging in. Here we need the routing group.
Modify config/admin .php
'middleware' => ['web', 'admin','SsoMiddleware'],
The above can be used to log in to multiple devices using one wifi. If you log in to the latter device under different networks, it will override the former one

You’re done! ! !
[Related recommendations:laravel video tutorial]
The above is the detailed content of Taking laravel-admin as an example to explain Laravel single-user login in detail. For more information, please follow other related articles on the PHP Chinese website!
 Introduction to laravel components
 Introduction to laravel middleware
 What are the design patterns used by laravel?
 Which one is easier, thinkphp or laravel?
 How to clean the computer's C drive that is too full
 How to solve waiting for device
 How to run cmd as administrator
 What language can vscode be written in?