Data import is needed in many places. How to use ThinkPhp5.1 to make data import? Next, the editor will take you to understand the whole process.
1 Preparation
The editor implements data import through PHPExcel, so before production, you first need to download PHPExcel related components. Currently tp5.1 supports composer installation. The editor installed the PHPExcel component through composer. [Recommendation: thinkphp video tutorial]
Before installation, you first need to make sure that your computer has the composer component. If Composer has not been installed, you can run the following command in Linux and Mac OS X :
curl -sS https://getcomposer.org/installer | php
mv composer.phar /usr/local/bin/composer
In Windows, you need to download and run Composer-Setup.exe, download address:
https://www.kancloud.cn/manual/thinkphp5_1/353948
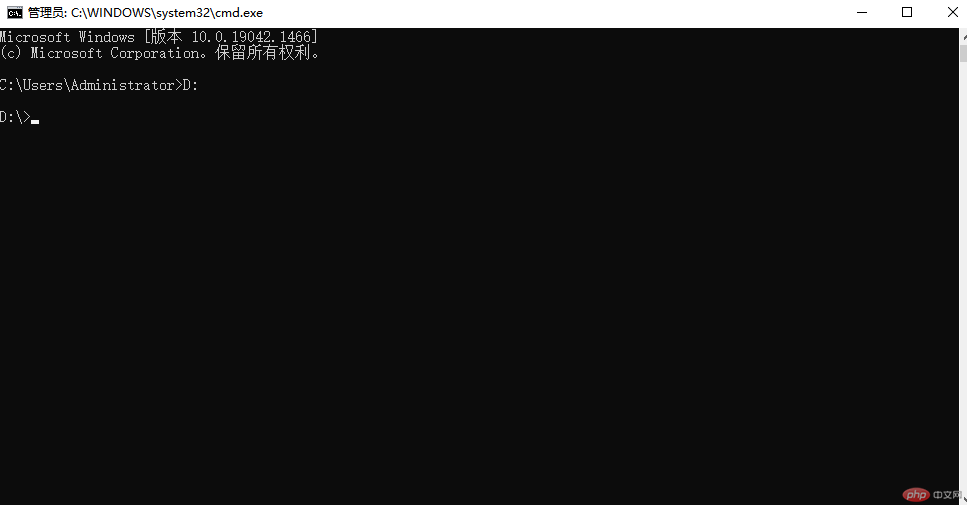
After installing composer, you need to install PHPExcel. Win R, open the run interface, enter cmd, enter the management interface, enter the drive letter where your project is located (here, take the D drive as an example, the project In D:\phpstudy_pro\WWW\myapp.io), then click Enter:

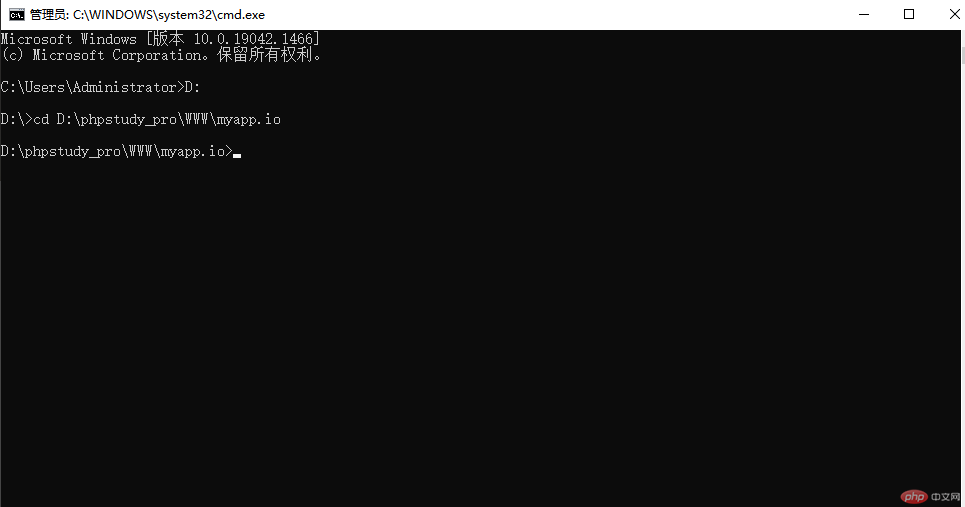
Enter: cd D:\phpstudy_pro\WWW\myapp.io, locate the project Directory

The next step is to install the PHPExcel plug-in. Enter: composer require phpoffice/phpexcel, and click Enter to start installing PHPExcel.
2 Front-end submission page
html
<form class="layui-form" enctype="multipart/form-data">
<input type="hidden" name="type_id" value="{$type_id}">
<div class="layui-form-item" style="margin-left: 42px;">
<div class="layui-input-inline" style="width: 122px;">
<button type="button" class="layui-btn" name="file" lay-verify="file" id="test3"><i class="layui-icon"></i>上传文件</button>
</div>
</div>
<div class="layui-form-item" style="margin-left: 42px;">
<div class="layui-input-inline">
<button class="layui-btn" lay-filter="add" lay-submit="add">
导入
</button>
</div>
</div>
<div class="layui-form-item">
<div class="layui-input-block">
<div style="line-height: 35px;">
注:
<p>1.文件大小:请上传小于10M的文件</p>
<p>2.文件类型:上传时首先
<span class="common-a">
<a href="/import/member.xlsx">下载导入模板</a>
</span>,填好信息后上传</p>
</div>
</div>
</div>
</form>js
<script>
layui.use(['form', 'layer','upload'], function () {
$ = layui.jquery;
var form = layui.form
, layer = layui.layer;
var $ = layui.jquery,
upload = layui.upload;
upload.render({
elem: '#test3'
,url: '你的上传路径'
,accept: 'file' //普通文件
,exts: 'xls|xlsx'
,size:'10240'
,done: function(res){
$('#test3').append('<input type="text" name="file" id="file" lay-verify="file" value="'+res.data +'" />')
}
});
//监听提交
form.on('submit(add)', function(data){
console.log(data);
//发异步,把数据提交给php
$.post('{:url(\'saveImportMember\')}',$('form').serialize(),function(data){
if(data.res == 1){
layer.msg(data.msg);
setTimeout(function(){parent.window.location.reload();},1000);
}else if(data.res == 0){
layer.alert(data.msg,{icon: 2});
}else{
layer.alert('操作失败',{icon: 2});
}
})
return false;
});
});
</script>3 Background processing
Here is an example of uploading a member information table. The field values included are: name, gender, and membership type. (type_id), ID number (identity), membership number (number), contact number (telephone), sort (sort), member status (status).
//上传excel文件
$file = Request::param('file');
//获取文件路径
$filePath = Env::get('root_path').'public'.DIRECTORY_SEPARATOR.$file;
if($filePath == ''){
return ['res'=>0,'msg'=>'你上传的文件为空'];
}
$suffix = $this->DbSy->GetFileExt($file);
//判断哪种类型
if($suffix=="xlsx"){
$reader = \PHPExcel_IOFactory::createReader('Excel2007');
}else{
$reader = \PHPExcel_IOFactory::createReader('Excel5');
}
//载入excel文件
$excel = $reader->load("$filePath",$encode = 'utf-8');
//读取第一张表
$sheet = $excel->getSheet(0);
//获取总行数
$row_num = $sheet->getHighestRow();
//获取总列数
$col_num = $sheet->getHighestColumn();
$time = time();
$data = []; //数组形式获取表格数据
$count = 0;
$total = 0;
$error_count = 0;
for ($i = 2; $i <= $row_num; $i ++) {
$type_id = Request::param('type_id');
$data['type_id'] = $type_id;
$name = $sheet->getCell("A".$i)->getValue();
$sex = $sheet->getCell("B".$i)->getValue();
$identity = $sheet->getCell("C".$i)->getValue();
$telephone = $sheet->getCell("F".$i)->getValue();
$data['sort'] = $this->DbSy->getSort(5,'sort desc',array('type_id'=>$type_id));
if(!$identity){
return ['res'=>0,'msg'=>'身份证号不能为空'];
}
$data['identity'] = $identity;
if(!$name){
return ['res'=>0,'msg'=>'姓名不能为空'];
}
$data['name'] = $name;
if($sex=='男'){
$data['sex'] = 1;
}elseif ($sex=='女'){
$data['sex'] = 2;
}else{
$data['sex'] = 3;
}
$data['identity'] = $identity;
$data['number'] = $this->DbSy->getNumber(5,'sort desc',array('type_id'=>$type_id));
if($telephone){
$data['telephone'] = $telephone;
}else{
$data['telephone'] = '';
}
$data['status'] = 5;
$member = $this->DbSy->FindWhere(5,array('name'=>$name,'identity'=>$identity,'type_id'=>$type_id));
if($member){
/*$data['updatetime'] = time();*/
$info = $this->DbSy->editContent(5,$data,array('id'=>$member['id']));
if($info){
$total++;
}
}else{
// 读取单元格
$data['addtime'] = time();
$data['updatetime'] = time();
$info = $this->DbSy->insertGetId(5,$data);
if($info){
$count++;
}else{
$error_count++;
}
}
}
$msg = "成功导入".$count."条数据,重复".$total."条数据,导入失败".$error_count."条数据";
if($count > 0){
return ['res'=>1,'msg'=>$msg];
}else{
return ['res'=>0,'msg'=>$msg];
}The above is the editor’s summary of all the processes for importing information using TP5.1 PHPExcel. I hope it will be helpful to everyone.
The above is the detailed content of ThinkPhp5.1 + PHPExcel production data import. For more information, please follow other related articles on the PHP Chinese website!