We often encounter documents that we have edited and cannot automatically generate a table of contents, such as writing plans, work reports, graduation projects, etc. This has brought great inconvenience to my work. Today I will give you a detailed description of how to complete this step.
First step: Set the title style
Click "Start", right-click on the word "Title 1" and click "Modify Style" Button
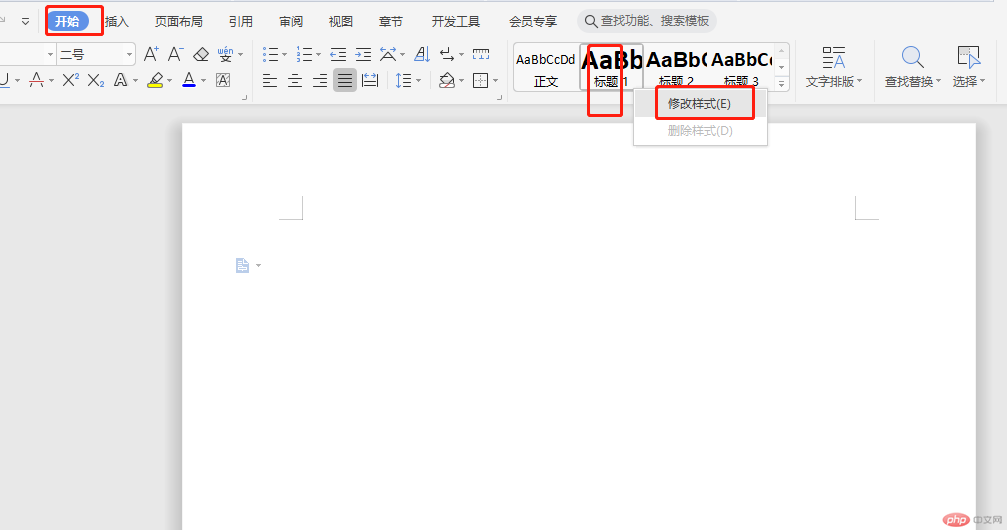
Click "Format" and select "Font" to set the font format
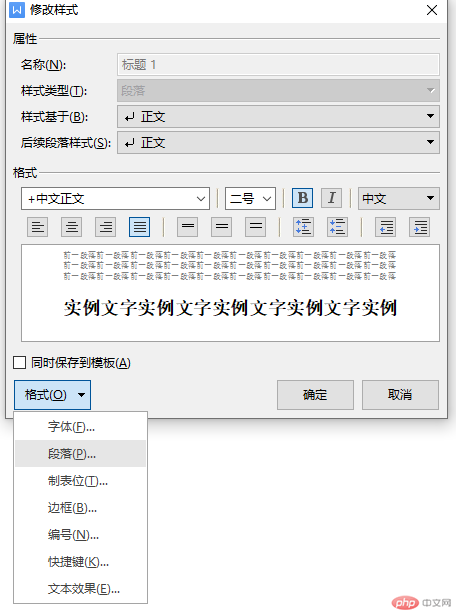
Chinese The font is set to "Microsoft Yahei", the font size is set to size four
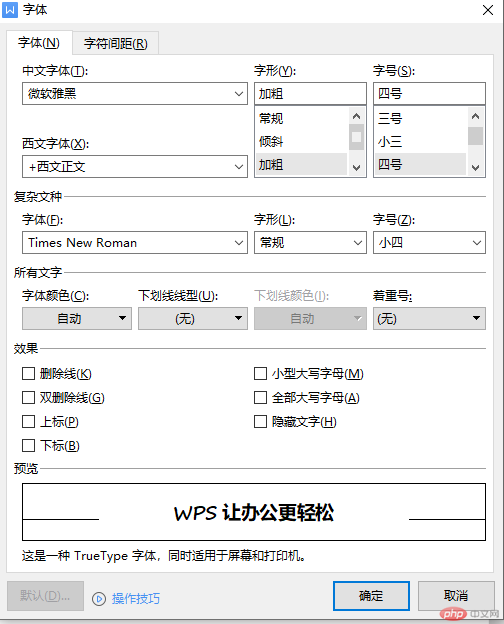
#Select "Paragraph" to set the paragraph format, set both before and after the paragraph to 0, and set the line spacing. It is single-spaced, and the rest default to
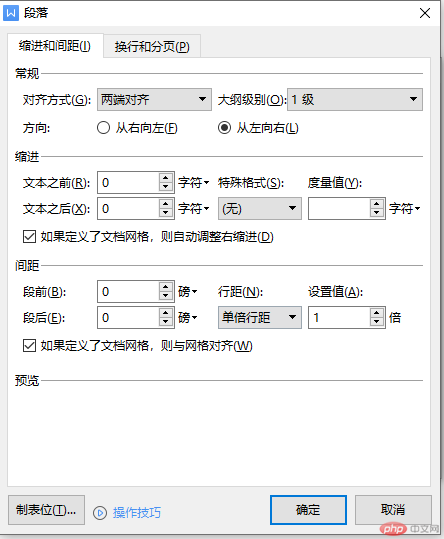
. Click "OK", and the level 1 title is set.
Similarly, you can set level 2, level 3 and other titles in sequence. The setting method is the same as above.
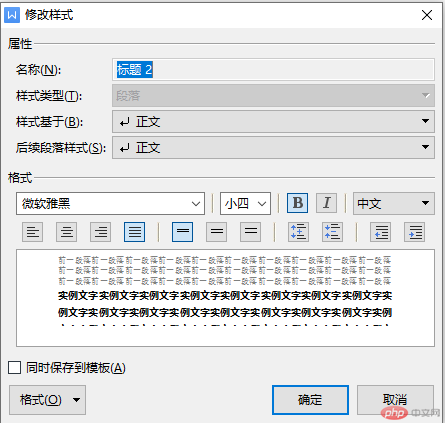
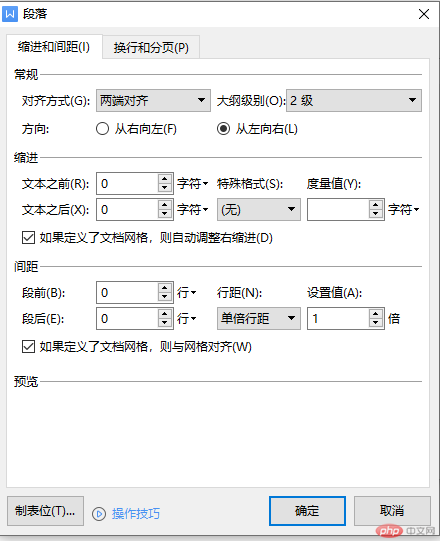
2 level title setting
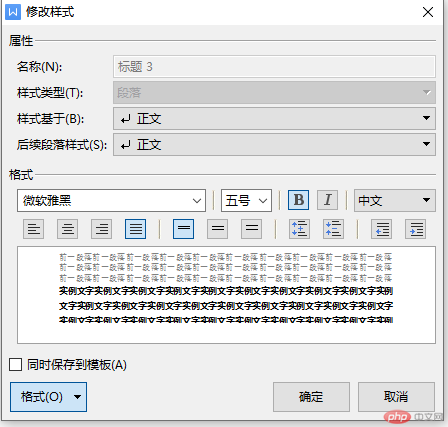
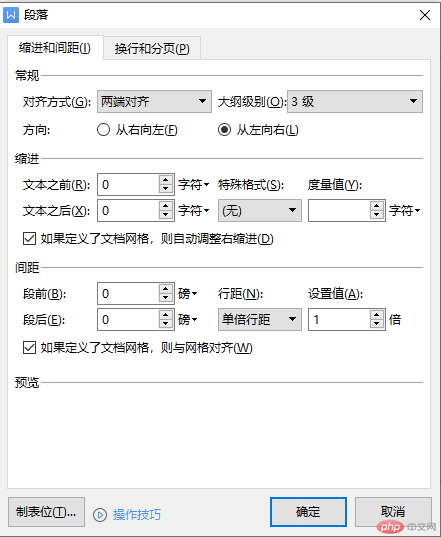
Level 3 title setting
Step 2: Create a content outline:
Click "Page Layout--Separator--Next Page Section Break" to start a new page
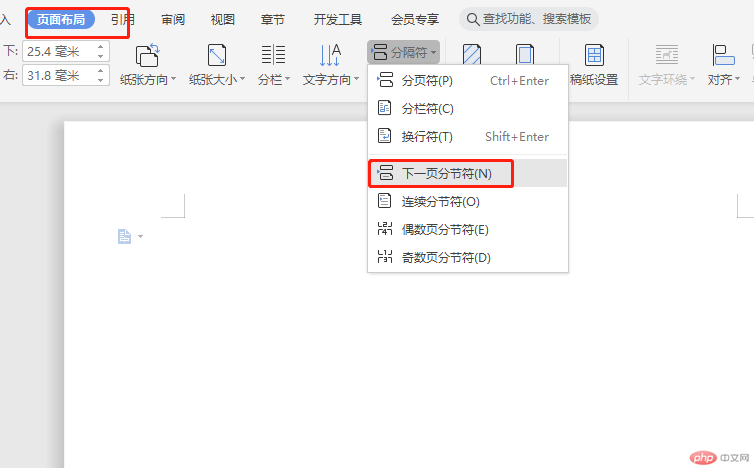
Then click Title 1, enter a Level 1 title, click Title 2, enter a Level 2 title, click Title 3, enter a Level 3 title. Note that when entering the text, be sure to click on the text before entering. As shown in the figure
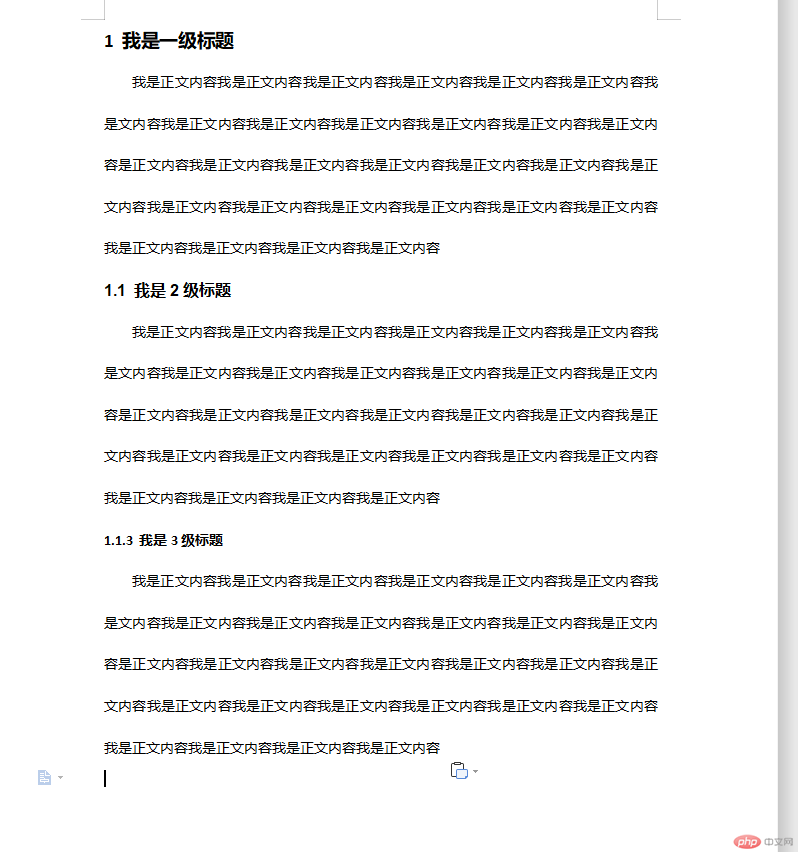
Others can be deduced in turn
Step 3: Generate directory
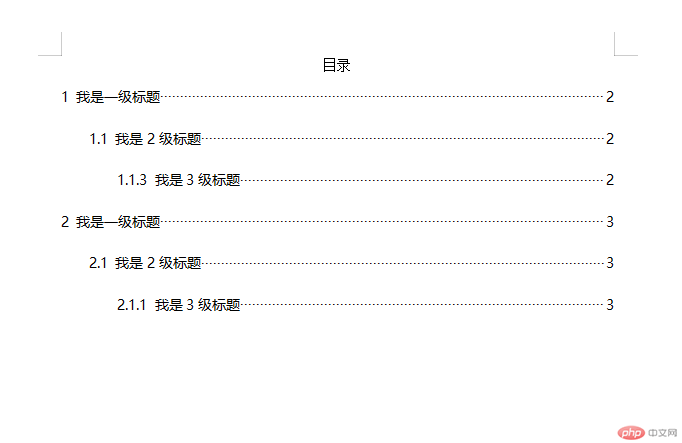
Click "Quote- -Directory", select the directory with third-level titles in the pop-up directory. The directory as shown in the picture can be generated
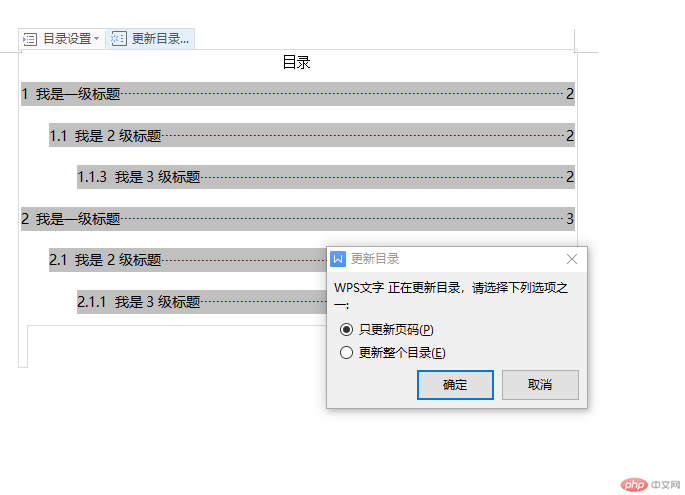
After we finish editing the new content, we only need to click on the directory to pop up the settings according to our own needs. Just select
#The above are the complete steps to generate the directory. I hope it will be helpful to everyone, thank you!
For more Word-related technical articles, please visit theWord usage tutorialcolumn of the PHP Chinese website!
The above is the detailed content of How to create a table of contents for a document. For more information, please follow other related articles on the PHP Chinese website!


