


This article will give you an in-depth talk about change detection inAngular, introduce how Angular subscribes to asynchronous events to perform change detection, and talk about the change detection strategy. I hope it will be helpful to everyone!

Change detection is a very interesting part of the front-end framework. Each front-end framework also has its own set of solutions. Generally speaking, we don’t need too many Learn about change detection, because the framework has done most of the work for us. However, as we use the framework in depth, we will find that it is difficult to avoid understanding change detection. Understanding change detection can help us better understand the framework, troubleshoot errors, optimize performance, etc. [Related tutorial recommendations: "angular tutorial"]
Simply put, change detection is to detect the relationship between the view and the state. After the state changes, it helps us update the view. This mechanism of synchronizing the view with our data is called change detection.

We understand what change detection is, but when is change detection triggered? We can look at the following two simple Demo
Demo1:
A counter component, click the button Count will keep adding 1
@Component({ selector: "app-counter", template: ` Count:{{ count }}
`, }) export class CounterComponent { count = 0; constructor() {} increase() { this.count = this.count + 1; } }
Demo2:
A Todo List component, which obtains data through Http and renders it to the page
@Component({ selector: "app-todos", template: ` From the two demos above, we found that change detection was triggered in two situations:
When a click event occurs
When requesting remote data through http
Think carefully, these two triggers What do the methods have in common? We found that both methods are asynchronous operations, so we can draw a conclusion:As long as an asynchronous operation occurs, Angular will think that the state may have changed, and then it will proceed Change detection.
At this time, you may think ofsetTimeoutsetInterval, yes, they will also trigger change detection.
@Component({ selector: "app-counter", template: ` Count:{{ count }}
`, }) export class CounterComponent implements OnInit { count = 0; constructor() {} ngOnInit(){ setTimeout(()=>{ this.count= 10; }); } increase() { this.count = this.count + 1; } }
In short, Angular will trigger change detection if one of the following events occurs:
setInterval()andsetTimeout()
Request
Zone.js##Zone.js provides a mechanism called **Zone**, It is used to encapsulate and intercept asynchronous activities in the browser. It also providesAsynchronous life cycle hooks
andunified asynchronous error handling mechanism.Zone.js usesMonkey Patching
to intercept common methods and elements in the browser, such assetTimeoutandHTMLElement.prototype.onclick. Angular leverages zone.js to patch several low-level browser APIs on startup to capture asynchronous events and call change detection after the capture time.The following is a simplified code to simulate the process of replacing setTimeout:
function setTimeoutPatch() { // 存储原始的setTimeout var originSetTimeout = window['setTimeout']; // 对浏览器原生方法的包裹封装 window.setTimeout = function () { return global['zone']['setTimeout'].apply(global.zone, arguments); }; // 创建包裹方法,提供给上面重写后的setTimeout使用Ï Zone.prototype['setTimeout'] = function (fn, delay) { // 先调用原始方法 originSetTimeout.apply(window, arguments); // 执行完原始方法后就可以做其他拦截后需要进行的操作了 ... }; }
Provided by Zone.js A global zone that can be forked and extended to further encapsulate/isolate asynchronous behavior. Angular creates a fork and extends it with its own behavior. Generally speaking, in Angular APP, each Task will run in Angular's Zone , this Zone is calledNgZone
. There is only one Angular Zone in an Angular APP,and change detection will only be triggered by asynchronous operations running in this ****NgZone****.The simple understanding is:Angular creates its own zone through Zone.js and calls it NgZone. All asynchronous operations in Angular applications run in this zone.
How does change detection work?
We understand that the core of Angular isComponent tree.
Angular 在生成组件的同时,还会为每一个组件生成一个变化检测器changeDetector,用来记录组件的数据变化状态,由于一个 Component 会对应一个changeDetector,所以changeDetector同样也是一个树状结构的组织。

在组件中我们可以通过注入ChangeDetectorRef来获取组件的changeDetector
@Component({ selector: "app-todos", ... }) export class TodosComponent{ constructor(cdr: ChangeDetectorRef) {} }
我们在创建一个 Angular 应用 后,Angular 会同时创建一个ApplicationRef的实例,这个实例代表的就是我们当前创建的这个 Angular 应用的实例。ApplicationRef创建的同时,会订阅 ngZone 中的onMicrotaskEmpty事件,在所有的微任务完成后调用所有的视图的detectChanges()来执行变化检测。
下是简化的代码:
class ApplicationRef { // ViewRef 是继承于 ChangeDetectorRef 的 _views: ViewRef[] = []; constructor(private _zone: NgZone) { this._zone.onMicrotaskEmpty.subscribe({ next: () => { this._zone.run(() => { this.tick(); }); }, }); } // 执行变化检测 tick() { for (let view of this._views) { view.detectChanges(); } } }
单向数据流
什么是单向数据流?
刚才我们说了每次触发变化检测,都会从根组件开始,沿着整棵组件树从上到下的执行每个组件的变更检测,默认情况下,直到最后一个叶子 Component 组件完成变更检测达到稳定状态。在这个过程中,一但父组件完成变更检测以后,在下一次事件触发变更检测之前,它的子孙组件都不允许去更改父组件的变化检测相关属性状态的,这就是单向数据流。
我们看一个示例:
@Component({ selector: "app-parent", template: ` {{ title }}

为什么出现这个错误呢?
这是因为我们违反了单向数据流,ParentComponent 完成变化检测达到稳定状态后,ChildComponent 又改变了 ParentComponent 的数据使得 ParentComponent 需要再次被检查,这是不被推荐的数据处理方式。在开发模式下,Angular 会进行二次检查,如果出现上述情况,二次检查就会报错: ExpressionChangedAfterItHasBeenCheckedError ,在生产环境中,则只会执行一次检查。
并不是在所有的生命周期去调用都会报错,我们把刚才的示例修改一下:
@Component({ selector: "app-child", template: ``, }) export class ChildComponent implements OnInit { constructor(private parent: ParentComponent) {} ngOnInit(): void { this.parent.title = "被修改的标题"; } }
修改后的代码运行正常,这是为什么呢?这里要说一下Angular检测执行的顺序:
更新所有子子组件绑定的属性
调用所有子组件生命周期的钩子 OnChanges, OnInit, DoCheck ,AfterContentInit
更新当前组件的DOM
调用子组件的变换检测
调用所有子组件的生命周期钩子 ngAfterViewInit
ngAfterViewInit是在变化检测之后执行的,在执行变化检测后我们更改了父组件的数据,在Angular执行开发模式下的第二次检查时,发现与上一次的值不一致,所以报错,而ngOnInit的执行在变化检测之前,所以一切正常。
这里提一下AngularJS,AngularJS采用的是双向数据流,错综复杂的数据流使得它不得不多次检查,使得数据最终趋向稳定。理论上,数据可能永远不稳定。AngularJS的策略是,脏检查超过10次,就认为程序有问题,不再进行检查。

刚才我们聊了变化检测的工作流程,接下来我想说的是变化检测的性能,默认情况下,当我们的组件中某个值发生了变化触发了变化检测,那么Angular会从上往下检查所有的组件。不过Angular对每个组件进行更改检测的速度非常快,因为它可以使用 内联缓存 在几毫秒内执行数千次检查,其中内联缓存可生成对 VM 友好代码。
尽管 Angular 进行了大量优化,但是遇到了大型应用,变化检测的性能仍然会下降,所以我们还需要用一些其他的方式来优化我们的应用。
Angular 提供了两种运行变更检测的策略:
Default
OnPush
Default 策略
默认情况下,Angular 使用ChangeDetectionStrategy.Default变更检测策略,每次事件触发变化检测(如用户事件、计时器、XHR、promise 等)时,此默认策略都会从上到下检查组件树中的每个组件。这种对组件的依赖关系不做任何假设的保守检查方式称为脏检查,这种策略在我们应用组件过多时会对我们的应用产生性能的影响。

OnPush 策略
Angular 还提供了一种OnPush策略,我们可以修改组件装饰器的changeDetection来更改变化检测的策略
@Component({ selector: 'app-demo', // 设置变化检测的策略 changeDetection: ChangeDetectionStrategy.OnPush, template: ... }) export class DemoComponent { ... }
设置为 OnPush 策略后,Angular 每次触发变化检测后会跳过该组件和该组件的所以子组件变化检测

OnPush模式下变化检测流程
在OnPush策略下,只有以下这几种情况才会触发组件的变化检测:
输入值(@Input)更改
当前组件或子组件之一触发了事件
手动触发变化检测
使用 async 管道后, observable 值发生了变化
在默认的变更检测策略中,Angular 将在@Input()数据发生更改或修改时执行变化检测,使用该OnPush时,传入@Input()的值必须是一个新的引用才会触发变化检测。
JavaScript有两种数据类型,值类型和引用类型,值类型包括:number、string、boolean、null、undefined,引用类型包括:Object、Arrary、Function,值类型每次赋值都会分配新的空间,而引用类型比如Object,直接修改属性是引用是不会发生变化的,只有赋一个新的对象才会改变引用。
var a= 1; var b = a; b = 2; console.log(a==b); // false var obj1 = {a:1}; var obj2 = obj1; obj2.a = 2; console.log(obj1); // {a:2} console.log(obj1 === obj2); //true obj2= {...obj1}; console.log(obj1 === obj2); //false
如果OnPush组件或其子组件之一触发事件,例如 click,则将触发变化检测(针对组件树中的所有组件)。
需要注意的是在OnPush策略中,以下操作不会触发变化检测:
setTimeout()
setInterval()
Promise.resolve().then()
this.http.get('...').subscribe()
有三种手动触发更改检测的方法:
**detectChanges(): ** 它会触发当前组件和子组件的变化检测
markForCheck():它不会触发变化检测,但是会把当前的OnPush组件和所以的父组件为OnPush的组件 ** 标记为需要检测状态** ,在当前或者下一个变化检测周期进行检测
ApplicationRef.tick(): 它会根据组件的变化检测策略,触发整个应用程序的更改检测

可以通过 在线Demo ,更直观的了解这几种触发变化检测的方式
内置的AsyncPipe订阅一个 observable 并返回它发出的最新值。
每次发出新值时的内部AsyncPipe调用markForCheck
private _updateLatestValue(async: any, value: Object): void { if (async === this._obj) { this._latestValue = value; this._ref.markForCheck(); } }
刚才我们聊了变化检测的策略,我们可以使用
OnPush的策略来优化我们的应用,那么这就够了吗? 在我们实际的开发中还会有很多的场景,我们需要通过一些其他的方式来继续优化我们的应用。
场景1:
假如我们在实现一个回车搜索的功能:
@Component({ selector: "app-enter", template: ``, }) export class EnterComponent implements AfterViewInit { @ViewChild("input", { read: ElementRef }) private inputElementRef: any; constructor() {} ngAfterViewInit(): void { this.inputElementRef.nativeElement.addEventListener( "keydown", (event: KeyboardEvent) => { const keyCode = event.which || event.keyCode; if (keyCode === 13) { this.search(); } } ); } search() { // ... } }
大家从上面的示例中可以发现什么问题呢?
我们知道事件会触发Angular的变化检测,在示例中绑定 keydown 事件后,每一次键盘输入都会触发变化检测,而这些变化检测大多数都是多余的检测,只有当按键为 Enter 时,才需要真正的进行变化检测。
在这种情况下,我们就可以利用NgZone.runOutsideAngular()来减少变化检测的次数。
@Directive({ selector: '[enter]' }) export class ThyEnterDirective implements OnInit { @Output() enter = new EventEmitter(); constructor(private ngZone: NgZone, private elementRef: ElementRef) {} ngOnInit(): void { // 包裹代码将运行在Zone区域之外 this.ngZone.runOutsideAngular(() => { this.elementRef.nativeElement.addEventListener('keydown', (event: KeyboardEvent) => { const keyCode = event.which || event.keyCode; if (keyCode === 13) { this.ngZone.run(() => { this.enter.emit(event); }); } }); }); } }
场景2:
假如我们使用 WebSocket 将大量数据从后端推送到前端,则相应的前端组件应仅每 10 秒更新一次。在这种情况下,我们可以通过调用detach()和手动触发它来停用更改检测detectChanges():
constructor(private cdr: ChangeDetectorRef) { cdr.detach(); // 停用变化检测 setInterval(() => { this.cdr.detectChanges(); // 手动触发变化检测 }, 10 * 1000); }
当然使用ngZone.runOutsideAngular()也可以处理这种场景。
之前我们说了Angular 可以自动帮我们进行变化检测,这主要是基于Zone.js来实现,那么很多人潜意识会任务Zone.js 就是 Angular 是一部分,Angular的 应用程序必须基于Zone.js,其实不然,如果我们对应用有极高的性能要求时,我们可以选择移除 Zone.js,移除Zone.js 将会提升应用的性能和打包的体积,不过带来的后果就是我们需要主要去调用变化检测。
如何移除 Zone.js?

手动调用变化检测
在 Ivy 之后,我们有一些新的API可以更方便的调用变化检测
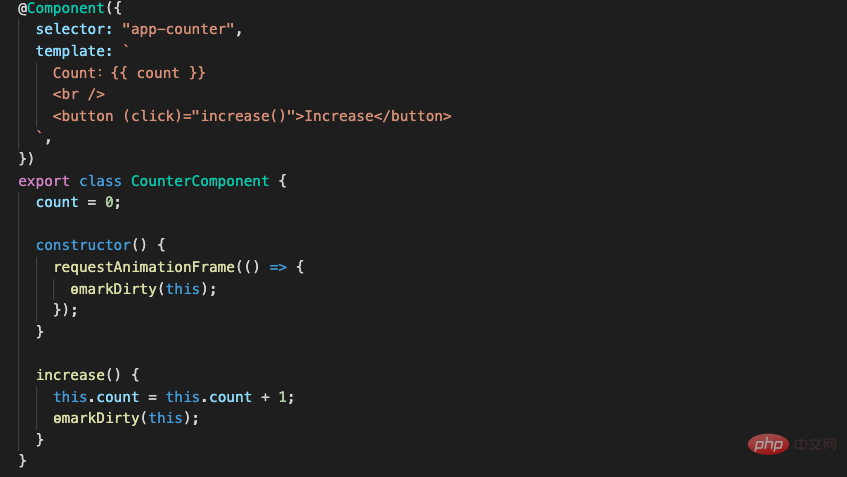
**ɵmarkDirty: ** 标记一个组件为 dirty 状态 (需要重新渲染) 并将在未来某个时间点安排一个变更检测
ɵdetectChanges:因为某些效率方面的原因,内部文档不推荐使用ɵdetectChanges而推荐使用ɵmarkDirty,ɵdetectChanges会触发组件以子组件的变更检测。
移除后的性能
移除Zone.js后变化检测由应用自己来控制,极大的减少了不必要的变化检测次数,同时打包后的提及也减少了 36k
移除前:

移除后:

组件绑定
我们先来看一个组件绑定的例子:

按我们正常开发组件的想法,当看到这个示例的时候一定认为这个Case是Ok的,但是在运行测试后我们发现这个Case失败了。
在生产环境中,当 Angular 创建一个组件,就会自动进行变更检测。但是在测试中,**TestBed.createComponent()**并不会进行变化检测,需要我们手动触发。
修改一下上面的Case:
origin-url0.00KB
origin-url0.00KB
从上面的示例中可以了解到,我们必须通过调用fixture.detectChanges()来告诉 TestBed 执行数据绑定。
如果我们在测试中动态改变了绑定值,同样也需要调用fixture.detectChanges()。
it("should update title", () => { component.title = 'Test Title'; fixture.detectChanges(); const h1 = fixture.nativeElement.querySelector("h1"); expect(h1.textContent).toContain('Test Title'); });
自动变更检测
我们发现写测试过程中需要频繁的调用fixture.detectChanges(),可能会觉得比较繁琐,那 Angular 可不可以在测试环境中自动运行变化检测呢?
我们可以通过配置ComponentFixtureAutoDetect来实现
TestBed.configureTestingModule({ declarations: [ BannerComponent ], providers: [ { provide: ComponentFixtureAutoDetect, useValue: true } ] });
然后再回头看看刚才的示例:

上面的示例我们并没有调用fixture.detectChanges(),但是测试依然通过了,这是因为我们开启了自动变化检测。
再看一个示例:

In the above example, we dynamically modified the value of title in the test code, and the test failed. This is because Angular does not know that the test has changed the component.ComponentFixtureAutoDetectonly performs automatic changes for asynchronous operations. Detection, such as Promise, setTimeout, click and other DOM events, etc. If we manually change the binding value, we still need to callfixture.detectChanges()to perform change detection.
Common pitfalls

In the above example, binding value After modification,fixture.detectChanges()was called, but an error was still reported after running the test. Why is this?

After checking the Angular source code, we found that the value of ngModel is updated asynchronously. Although it was triggered after executingfixture.detectChanges()Change detection, but the value has not been modified successfully.
Modify the test:

After modification, we wrap the assertion infixture.whenStable(), and then the test passes, So what iswhenStable()?
whenStable(): Promise: A promise that resolves when the fixture is stable. This method can be used to continue test execution after an event has triggered an asynchronous activity or asynchronous change detection.
Of course in addition to usingfixture.whenStable()we can also usetick()to solve this problem

tick(): Simulate asynchronous time lapse for a timer in fakeAsync Zone At the beginning of this function and after any timer callbacks are executed, the microtask queue is exhausted
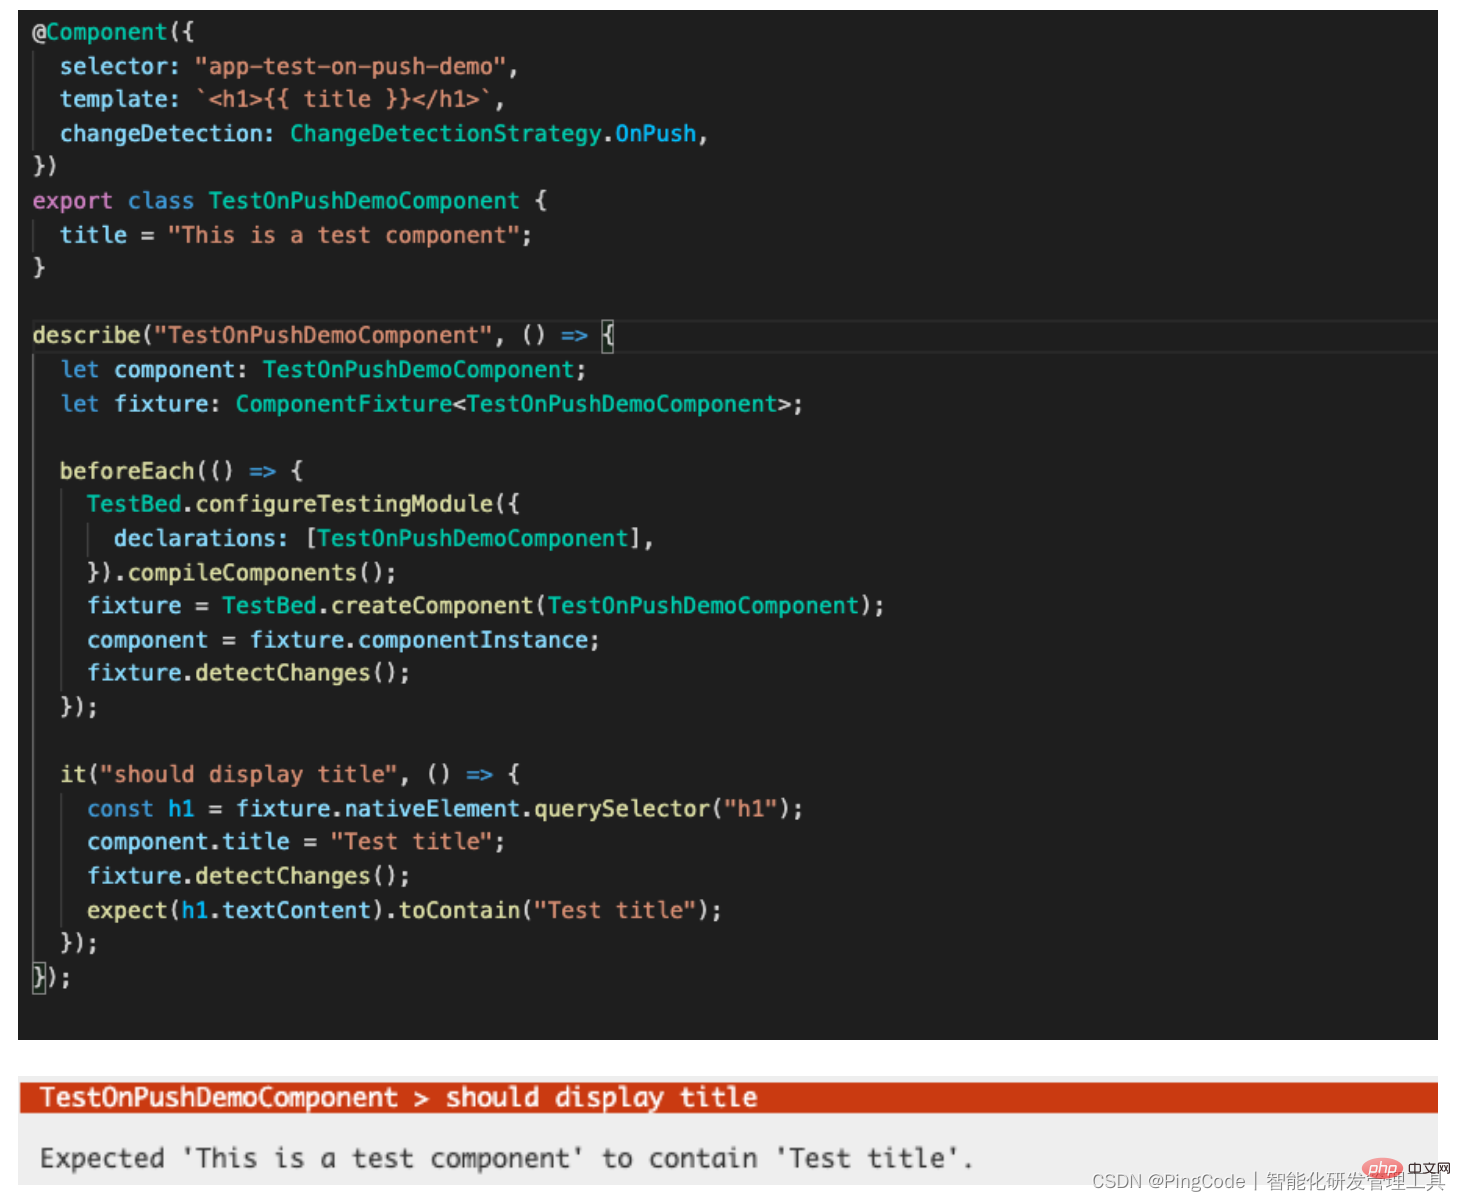
In the above example, we calledfixture.detectChanges()after modifying the properties, but The test failed, why? We found that the only difference between this example and the first example is that this component is anOnPushcomponent. We said before that the default change detection will skip theOnPushcomponent, only in certain Change detection will be triggered under several circumstances. How to solve this situation?

We can manually obtain theChangeDetectorRefof the component to actively trigger change detection.
Virtual DOM and Incremental DOM
Angular Ivy is a new Angular renderer, It's very different from anything we've seen in mainstream frameworks because it uses incremental DOM. What is incremental DOM? How is it different from a virtual Dom?
Virtual DOM
First of all, let’s talk about the virtual DOM. We need to understand that directly operating the DOM in the browser consumes a lot of performance. , and the main concept of virtual DOM is to save the virtual representation of the UI in memory, and compare the difference between the current memory and the last view in memory through the Diff operation, thereby reducing unnecessary Dom operations and only making changes to the different Dom.
Virtual DOM execution process:
When the UI changes, the entire UI is rendered into the Virtual DOM.
Calculate the difference between the previous and current virtual DOM representation.
Update the real DOM with the changes.

Advantages of virtual DOM:
Efficient Diff algorithm.
Simple and helps improve performance.
Can be used without React
Light enough
Allows building applications without Consider state transitions
The main concept of incremental Dom is to compile components into a series of instructions that create DOM tree and update them in-place when the data changes.

For example:
@Component({ selector: 'todos-cmp', template: ` {{t.description}}
` }) class TodosComponent { todos: Observable = this.store.pipe(select('todos')); constructor(private store: Store) {} }
编译后:
var TodosComponent = /** @class */ (function () { function TodosComponent(store) { this.store = store; this.todos = this.store.pipe(select('todos')); } TodosComponent.ngComponentDef = defineComponent({ type: TodosComponent, selectors: [["todos-cmp"]], factory: function TodosComponent_Factory(t) { return new (t || TodosComponent)(directiveInject(Store)); }, consts: 2, vars: 3, template: function TodosComponent_Template(rf, ctx) { if (rf & 1) { // create dom pipe(1, "async"); template(0, TodosComponent_p_Template_0, 2, 1, null, _c0); } if (rf & 2) { // update dom elementProperty(0, "ngForOf", bind(pipeBind1(1, 1, ctx.todos))); } }, encapsulation: 2 }); return TodosComponent; }());
增量DOM的优点:
渲染引擎可以被Tree Shakable,降低编译后的体积
占用较低的内存
为什么可渲染引擎可以被 Tree Shakable?
Tree Shaking 是指在编译目标代码时移除上下文中未引用的代码,增量 DOM 充分利用了这一点,因为它使用了基于指令的方法。正如示例所示,增量 DOM 在编译之前将每个组件编译成一组指令,这有助于识别未使用的指令。在 Tree Shakable 过程中,可以将这些未使用的的指令删除掉。
减少内存的使用
与虚拟 DOM 不同,增量 DOM 在重新呈现应用程序 UI 时不会生成真实 DOM 的副本。此外,如果应用程序 UI 没有变化,增量 DOM 就不会分配任何内存。大多数情况下,我们都是在没有任何重大修改的情况下重新呈现应用程序 UI。因此,按照这种方法可以极大的减少设备内存使用。
至此,Angular 变化检测相关的内容就介绍完了,这是我在公司内部 2个小时的分享内容,在准备的过程中参考了很多优秀的资料,自己也学习到了更深层,更细节的一些技术点。如果大家有不理解的,欢迎在评论区沟通,如果有需要改正的地方,也欢迎大家指出,希望这篇文章可以帮助大家更好的理解Angular的变化检测。
更多编程相关知识,请访问:编程学习!!
The above is the detailed content of Let's take you through an in-depth chat about change detection in Angular. For more information, please follow other related articles on the PHP Chinese website!
 C++ software Chinese change tutorial
 Recover data from mobile hard drive
 What are the data backup software?
 How to solve the problem that Ethernet cannot connect to the internet
 setproperty function usage
 Why does win10 activation fail?
 The difference between vue2 and vue3 two-way binding
 What does frame rate mean?


![[Web front-end] Node.js quick start](https://img.php.cn/upload/course/000/000/067/662b5d34ba7c0227.png)


