How to introduce Gaode map into the mini program? This article will introduce to you how to use Amap in the WeChat applet. I hope it will be helpful to you!

If you don’t have a key, you need to apply first and enter the Amap development platformlbs.amap.com/, there are detailed steps in Development Guide-> Obtain key, and you can view the key we created in Console-> Application Management-> My Application. [Related learning recommendations:小program development tutorial]

We can encapsulate the key so that we don’t have to look for it every time. In lib Create a new config.js file in the folder
var config = { key: "你的key" } module.exports.config = config;
Import the js and key of Amap in js to call the Amap map api
var amapFile = require('../../lib/amap-wx.130.js'); //高德js var config = require('../../lib/config.js'); //引用我们的配置文件
Create a Gaode map instance and name it myAmapFun
var key = config.config.key; var myAmapFun = new amapFile.AMapWX({ key: key });
Call the getRegeo method
myAmapFun.getRegeo({ success: (data) => { //保存位置的描述信息( longitude经度 latitude纬度 和位置信息 ) let textData = {}; textData.name = data[0].name; textData.desc = data[0].desc //将获取的信息保存 this.setData({ textData: textData, longitude: data[0].longitude, latitude: data[0].latitude, // 给该经度纬度加上icon做标记,并调节大小 markers: [{ latitude: data[0].latitude, longitude: data[0].longitude, height: 30, width: 35, iconPath: '../../imgs/locationIcon/siteA brief analysis of how to introduce Amap into mini programs' }] }) }, fail: function(info){ console.log("get Location fail"); } });
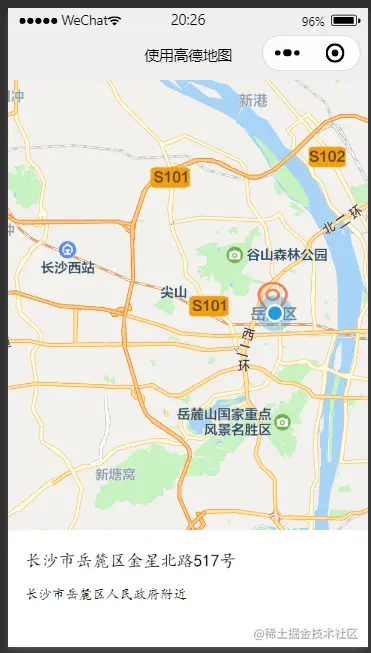
We can look at the successfully output data, and we can take the information according to our own needs
Display the map in the wxml file. The width is 100%, the height is 400px,scaleis the zoom ratio of the map
{{textData.name}} {{textData.desc}}
Red The marked points are the data of markers; the blue marked points are displayed with show-location="true", but there is no real device preview.


data: { # 当前位置经度 longitude: "", # 当前位置纬度 latitude: "", # 获取位置的标记信息 markers: [], # 获取位置的位置信息 poisdatas : [], # 简单展示信息使用的 textData: {} }
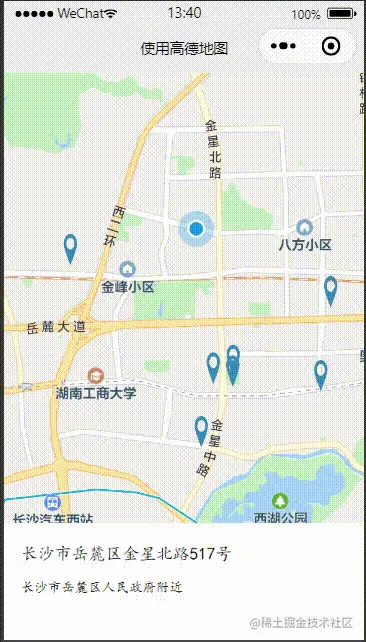
Call the getPoiAround interface of Amap to obtain nearby information based on keywords
get_current_PoiAround(){ var key = config.config.key; var myAmapFun = new amapFile.AMapWX({ key: key }); // getRegeo 获得当前位置信息(上面有用到过这个方法) myAmapFun.getRegeo({ success: (data) => { let textData = {}; textData.name = data[0].name; textData.desc = data[0].desc this.setData({ textData: textData, longitude: data[0].longitude, latitude: data[0].latitude, }) }, fail: function(info){ console.log("get Location fail"); } }); // 通过关键词获取附近的点 myAmapFun.getPoiAround({ // 改变icon图标的样式,点击前和点击后的我都暂时设成blue.svg, 如果不设置的话,默认就是一个红色的小图标 iconPath: '../../icon/keshan/blue.svg', iconPathSelected: '../../icon/keshan/blue.svg', // 搜索的关键字(POI分类编码),在官方文档https://lbs.amap.com/api/javascript-api/download/ 可以下载查看 querykeywords: '购物', querytypes: '060100', success: (data) => { const markers = data.markers; const poisdatas = data.poisData; let markers_new = [] markers.forEach((item, index) => { // 只取10个点,超过就continue了,forEach是不能使用break和continue关键字的 if( index >= 10 ){ return; } // 将我们需要的markers数据重新整理一下存入markers_new中 markers_new.push({ id: item.id, width: item.width, height: item.height, iconPath: item.iconPath, latitude: item.latitude, longitude: item.longitude, // 自定义标记点上方的气泡窗口 // display | 'BYCLICK':点击显示; 'ALWAYS':常显 | callout: { padding: 2, fontSize: 15, bgColor: "#f78063", color: '#ffffff', borderRadius: 5, display: 'BYCLICK', content: poisdatas[index].name } }) }) // 将数据保存 this.setData({ markers: markers_new, poisdatas: poisdatas }) }, fail: function(info){ wx.showModal({title:info.errMsg}) } }) },
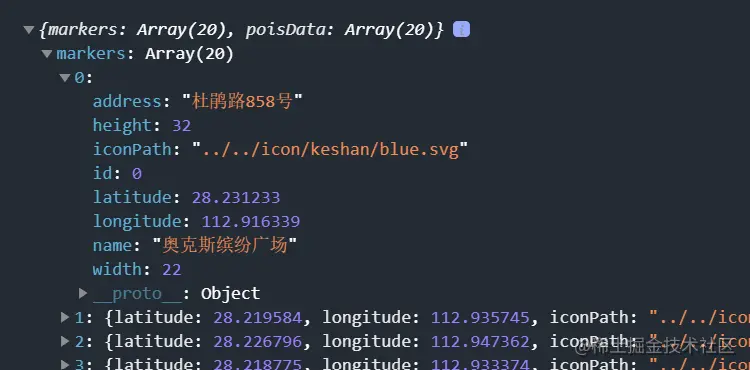
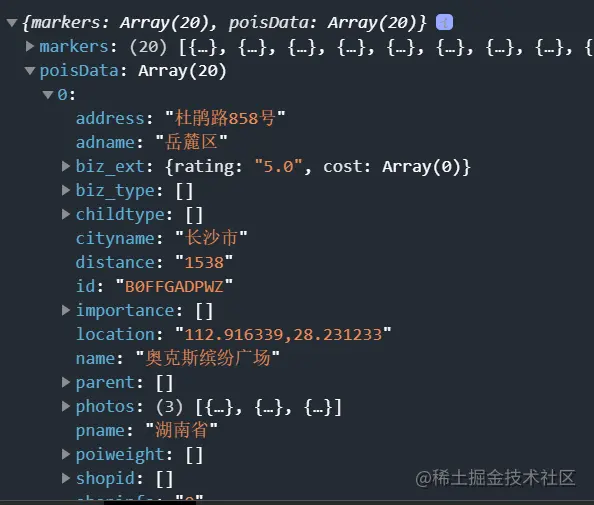
Call the getPoiAround interface to return a successful result


bindmarkertap activates the makertap icon click event and changes the content in map_text
{{textData.name}} {{textData.distance}}m {{textData.desc}}
makertap activates showMarkerInfo to display mark point information, changeMarkerColor Change the color of the marker point
makertap(e) { var id = e.detail.markerId; this.showMarkerInfo(id); this.changeMarkerColor(id); },
Didn’t we say that poisdatas stores the location information of the point? Once we get the ID, we can take it out and save it in textData to display
// 展示标记点信息 showMarkerInfo(i) { const {poisdatas} = this.data; this.setData({ textData: { name: poisdatas[i].name, desc: poisdatas[i].address, distance: poisdatas[i].distance } }) },
If it is the clicked position Just replace iconPath with orange.svg, and the rest are blue.svg, and set the clicked bubble display to display ('ALWAYS'), and then save the modified data again
// 改变标记点颜色 changeMarkerColor(index) { let {markers} = this.data; for (var i = 0; i < markers.length; i++) { if (i == index) { markers[i].iconPath = "../../icon/keshan/orange.svg"; markers[i].callout.display = 'ALWAYS' } else { markers[i].iconPath = "../../icon/keshan/blue.svg"; markers[i].callout.display = 'BYCLICK' } } this.setData({ markers: markers }) },

For more programming-related knowledge, please visit:Introduction to Programming! !
The above is the detailed content of A brief analysis of how to introduce Amap into mini programs. For more information, please follow other related articles on the PHP Chinese website!