


This article will take you through the instructions in Angular and introduce the three types of instructions: component instructions, structural instructions, and attribute instructions. I hope it will be helpful to you!

There are three types of directives in Angular:
*ngIf,*ngFor,ngSwitchNgClass,NgStyle【Related Tutorial recommendation: "angular tutorial"】
angular directive——https://angular.cn/guide/built-in-directives
Component type directive
When viewing the angular source code, you will see the following
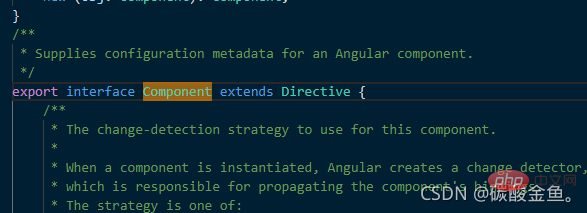
So Components inherit instructions, but they are special and have templates
Similarly, because components inherit instructions, the following series of operations of attribute and structural instructions can be implemented in components
However, because the purpose of the directive is to reuse, operating this way in the component will not achieve this purpose, so it is strongly not recommended to operate like this.
Attribute-type directive
It is said above that attribute instructions are used to change the appearance and behavior of elements, components or other instructions
So how do we create our own attribute instructions?
First, creating a directive is much like creating a component.
DirectiveDecoratorsInput,TemplateRefandViewContainerRef, depending on the instruction type and requirements, selectCSSattribute selector to identify which element in the template this directive should apply to.Custom attribute-based directive
1. Create an attribute-based directiveappHighlightCommand: highlight.directive.ts
// 1、导入 Directive 装饰器 // 3、导入 ElementRef。ElementRef 的 nativeElement 属性会提供对宿主 DOM 元素的直接访问权限 import { Directive, ElementRef } from '@angular/core'; // 2、@Directive() 装饰器的 selector 属性会指定指令的 CSS 属性选择器 [appHighlight] @Directive({ selector: '[appHighlight]' }) export class HighlightDirective { // 4、构造函数中使用 ElementRef 来注入宿主 DOM 元素的引用 constructor(el: ElementRef) { // 将对应元素的背景颜色设置为 黄色 el.nativeElement.style.backgroundColor = 'yellow'; } }
Like
componentandpipe,directivealso needs to be declared in thedeclarationsarray to use
2. Host element usage
Highlight me!
Handling user events
The functions of the following instructions are:
Can receive 2 parameters, one of which is the default value of the other
Listen to the mouse entry and exit events of the host element. When entering, the host background color is the above-passed value
import { Directive, ElementRef, HostListener, Input } from '@angular/core'; @Directive({ //指定指令的属性型选择器 selector: '[appHighlight]' }) export class HighlightDirective { @Input('appHighlight') highlightColor: string; @Input() defaultColor: string; //构造函数中使用 ElementRef 来注入宿主 DOM 元素的引用 constructor(private el: ElementRef) { } //监听宿主元素 mousenter 事件 @HostListener('mouseenter') onMouseEnter() { this.highlight(this.highlightColor || this.defaultColor); } //监听宿主元素 mouseleave 事件 @HostListener('mouseleave') onMouseLeave() { this.highlight(null); } // 修改背景颜色 private highlight(color: string) { //ElementRef通过其 nativeElement 属性,提供直接访问宿主 DOM 元素的能力。 this.el.nativeElement.style.backgroundColor = color; } }
Host element usage
宿主元素
Structural directive
The responsibility of the structural directive is HTML layout . They shape or reshape the structure of the DOM, often by adding, removing, and manipulating the host elements they are attached to.
Common built-in structural directives:
NgIf- Create or destroy subviews from the template.NgFor- Repeatedly render a node for each entry in the list.NgSwitch- A set of instructions to switch between alternate views.Please check the official website for specific usage methodsCustom structural instructions
The effect is:
If the condition is true and a view is currently displayed, this setter clears the container, which causes the view to be destroyed.
1. Create instruction ts file:unless.directive.ts
// 1、导入 Input、TemplateRef 和 ViewContainerRef import { Directive, Input, TemplateRef, ViewContainerRef } from '@angular/core'; // 2、添加 Directive 装饰器 @Directive({ selector: '[appUnless]'}) export class UnlessDirective { private hasView = false; // 3、在指令的构造函数中将 TemplateRef 和 ViewContainerRef 注入成私有变量。 constructor( private templateRef: TemplateRef, private viewContainer: ViewContainerRef ) { } // 4、添加一个带 setter 的 @Input() 属性 appUnless @Input() set appUnless(condition: boolean) { // 如果条件是假值,并且 Angular 以前尚未创建视图,则此 setter 会导致视图容器从模板创建出嵌入式视图。 if (!condition && !this.hasView) { this.viewContainer.createEmbeddedView(this.templateRef); this.hasView = true; } else if (condition && this.hasView) { // 如果条件为真值,并且当前正显示着视图,则清除容器,这会导致销毁该视图。 this.viewContainer.clear(); this.hasView = false; } } }
2. Test instruction
Show this sentence unless the condition is true.
#structural directives (such asFor example:*ngIf
) is a shorthand for what Angular interprets as the longer form. Angular converts the asterisks in front of structural directives intoaround the host element and its descendants.
*ngIf
{{hero.name}}
element, only
andcomment node placeholderswill be rendered into the DOM
Customized Command example
The following command will remove all spaces in theinputinput box
import { Component, Directive, HostListener } from '@angular/core' import { hostElement } from '@angular/core/src/render3/instructions'; import { FormGroup, FormControl, Validators, NgControl } from '@angular/forms' @Component({ selector: "app-test", templateUrl: "./test.component.html", // declarations: [TestDirective] }) export class TestComponent { constructor() {} ngOninit() {} firstName = ''; lastName = ''; profileForm = new FormGroup({ firstName: new FormControl('aa', [Validators.required,Validators.pattern('[a-zA-Z0-9]*')]), lastName: new FormControl('', Validators.required), }); onchange(event) { console.log('触发了onchange', this.firstName) } } @Directive({ selector: '[testDirective]', // host: { // 要传递传递事件参数,使用这种方法,不用的可以使用下面的 @HostListener 方法 // '(keyup)': 'onkeyup($event)', // } }) export class TestDirective { constructor(public ngControl: NgControl) {} ngOnInit() {} // onkeyup(event) { @HostListener('keyup') onkeyup(event) { // console.log("event", event) // 事件参数 console.log(this.ngControl) console.log(this.ngControl.control) console.log(this.ngControl.control.value) if(/\s+/g.test(this.ngControl.control.value)) { // 只读属性,要通过 setValue 修改 // this.ngControl.control.value = this.ngControl.control.value.replace(/\s+/g, '') this.ngControl.control.setValue(this.ngControl.control.value.replace(/\s+/g, '')) } } }
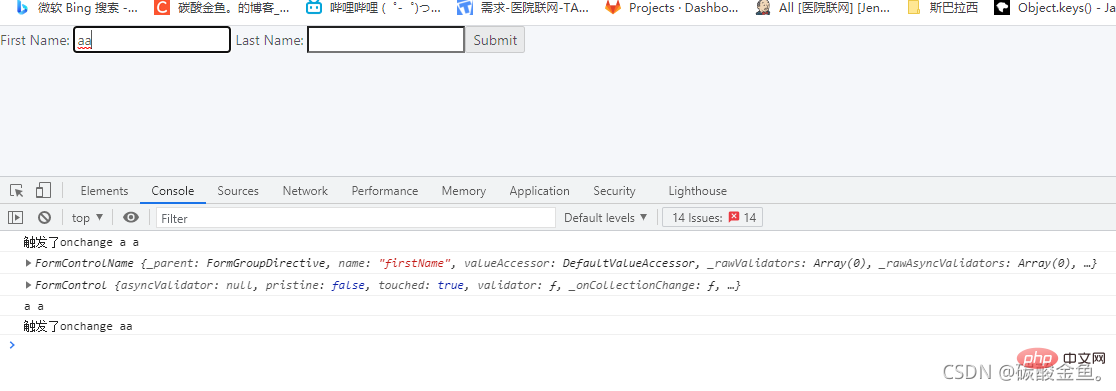
The initial value ofinputabove isaa, enter thespace characterin the middle, and first triggeronchangeevent, then trigger thekeyupevent in the command, change the value offirstName, and then re-trigger theonchangeevent, so thechangeevent Triggered twice in total.
For more programming-related knowledge, please visit:Introduction to Programming! !
The above is the detailed content of A brief discussion of the three types of instructions in Angular: component type, structural type, and attribute type. For more information, please follow other related articles on the PHP Chinese website!


![[Web front-end] Node.js quick start](https://img.php.cn/upload/course/000/000/067/662b5d34ba7c0227.png)


