This article will take you through the two decorators inAngular-HostBinding and HostListener, and introduce the usage scenarios of these two decorators.

I don’t know if any of you have encountered these two decorators when you are learning Angular by yourself. ——HostBindingandHostListener. When I read the API description of these two decorators on the official website, I was really puzzled. I could understand every word, but I just couldn't understand them when they were connected together. Moreover, the examples given on the official website are also very confusing, making me confused about the usage scenarios of these two APIs. [Recommended related tutorials: "angular tutorial"]
Let's first take a look at the description of these two APIs on the official website:
HostBinding(Official website link):
is used to mark a DOM attribute as a property bound to the host and provide Configuration metadata. Angular automatically checks the host property binding during change detection, and if the binding changes, it updates the host element where the directive is located.
HostListener(Official website link):
is used to declare the DOM event to be listened to and provide the information in the event The handler method to run when this occurs.
After reading this, don’t you know what the usage scenarios of these two brothers are? In my opinion, the function of these two decorators isto facilitate us to extract complex DOM operations into one instruction to streamline the code. Not much nonsense, just read the code and you will understand it at a glance.
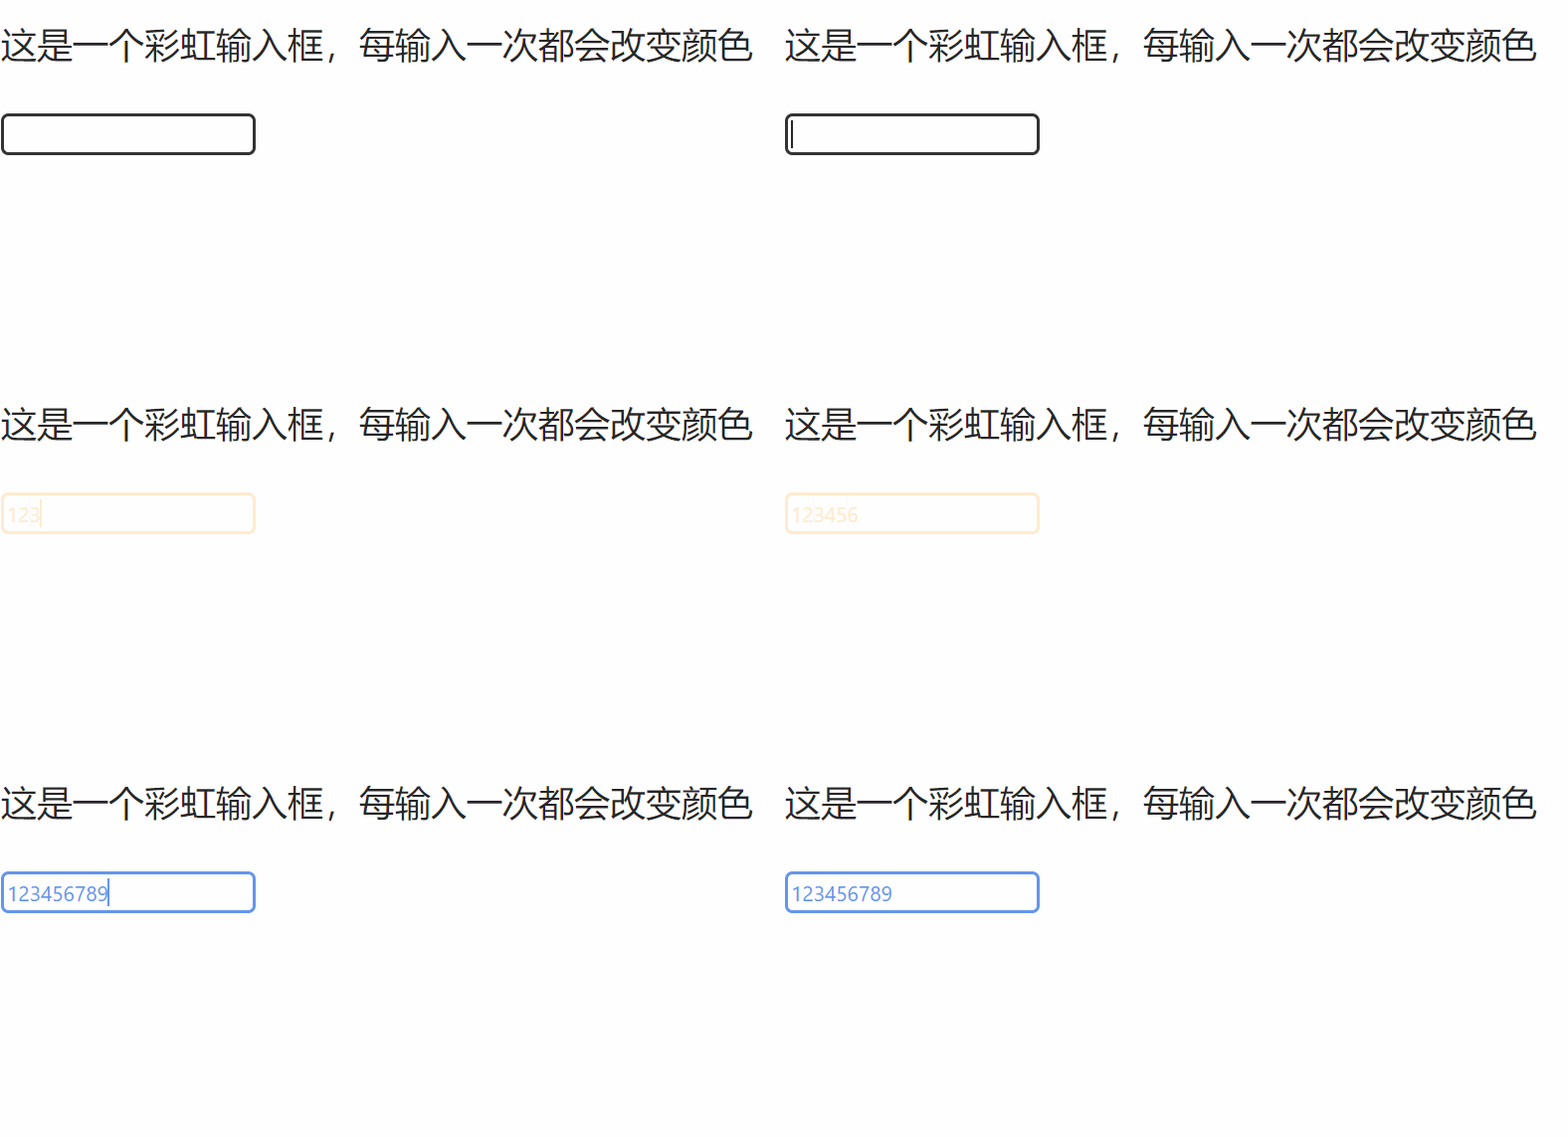
Suppose there is a business scenario at this time, there is an input boxinput, every time we input, the color of the words and the color of the border will change, we named it "Rainbow Input Box".
If we do not use component encapsulation, write the relevant DOM operations directly in the component. The code is as follows:
@Component({ selector: 'app-rainbow-input-demo', template: ` 这是一个彩虹输入框,每输入一次都会改变颜色
`, styles:[ `.my-input { border:none; outline: none; border: 2px solid #333333; border-radius: 5px; }` ] }) export class RainbowInputDemoComponent { //默认的颜色样式 public inputStyleObj = { color:null, borderColor:null, }; //颜色库 public possibleColors = [ 'darksalmon', 'hotpink', 'lightskyblue', 'goldenrod', 'peachpuff', 'mediumspringgreen', 'cornflowerblue', 'blanchedalmond', 'lightslategrey' ]; //键盘落下事件 onKeyDown(){ const index = Math.floor(Math.random() * this.possibleColors.length); //如果我们直接使用this.inputStyleObj.color = this.possibleColors[index]的话, //this.inputStyleObj虽然内容变了,由于它是引用类型,其地址值没有变。所以不会触发视图的重新渲染 //在angular中,和react似的,我们直接修改引用类型不会触发重新渲染,只能覆盖它或者合并它,使其地址值发生改变,才会触发重新渲染 //如果觉得麻烦的话,完全可以在模板中使用[style.color]和[style.borderColor] this.inputStyleObj = { color:this.possibleColors[index], borderColor:this.possibleColors[index], } } }
The effect is as shown:

That’s it, we have implemented this function, but now there is a problem. What if we need to use thisrainbowInputin other components? Do we have to copy and paste these codes every time we use it? Obviously this does not comply with the principle of component encapsulation. If you really do this, the technical manager or project manager will also blow your mind.
Then we need to encapsulate it into a component or an instruction. In this article, we first encapsulate it into a command, and we will talk about the reason later. The code is as follows:
@Directive({ selector: '[appRainbow]' }) export class RainbowInputDirective { public possibleColors = [ 'darksalmon', 'hotpink', 'lightskyblue', 'goldenrod', 'peachpuff', 'mediumspringgreen', 'cornflowerblue', 'blanchedalmond', 'lightslategrey' ]; //字体颜色 @HostBinding('style.color') color: string; //边框颜色 @HostBinding('style.borderColor') borderColor: string; //监听键盘落下的事件 @HostListener('keydown') onKeyDown() { //获取一个随机的颜色 const index = Math.floor(Math.random() * this.possibleColors.length); this.color = this.borderColor = this.possibleColors[index]; } } @Component({ selector: 'app-rainbow-input-demo', template: ` 这是一个彩虹输入框,每输入一次都会改变颜色
`, styles:[ //省略,和上面相同 ] }) export class RainbowInputDemoComponent {}
Just like the above code, we extracted the repeated logic, which greatly improved the maintainability and beauty of the code.
In the code we can see that the function of @HostBinding is actually to bind a certain attribute to the host element, but thisattributeNot just anyattribute. This attribute refers to the attributes supported in angular templates. In fact, @HostBinding is equivalent to[]orbind-in the template. In the same way, @HostListener is equivalent to()oron-in the template. This allows us to bind attributes and methods to the host element in the instruction. The effect achieved is the same as our first direct writing of(keydow)and[style]It's the same on the template. Therefore, the strings in these two decorators cannot be written casually.
However, in fact, in angular, the difference between components and instructions is not particularly big, because the component decorator @Component in angular is inherited from @Directive.
In fact, it is not impossible for us to encapsulate this DOM operation into a component. The code is as follows
@Component({ selector:'input[appRainbow]' })
, but it is really not much different from the instruction writing method:
@Directive({ selector: '[appRainbow]' })
.
@HostBinding is equivalent to[]orbind-;
on the template @HostListener is equivalent to()oron-on the template;
is the data and method binding in the instructions provided by Angular in order not to let us directly operate the DOM. Certainly.
For more programming-related knowledge, please visit:Programming Teaching! !
The above is the detailed content of Deep dive into HostBinding and HostListener decorators in Angular. For more information, please follow other related articles on the PHP Chinese website!
 span tag function
 The difference between vscode and visual studio
 What should I do if English letters appear when I turn on the computer and the computer cannot be turned on?
 u shield driver
 How to use localstorage
 Interview assessment tools
 Get window handle method
 What are the differences between linux and windows