
Method to resize the picture to within 20k: First open the picture that needs to be modified; then click the [Crop Tool] option and write [114,156] in the box in sequence; then click the [Image] option and select [Image Size]; finally check [Scale Style - Constraint Proportion] and click OK.

Method to resize the picture to within 20k:
#1. First open Photoshop, in the Photoshop interface Find the "File" option and click Open. Find the "Open" option in the pop-up option bar and click Open.
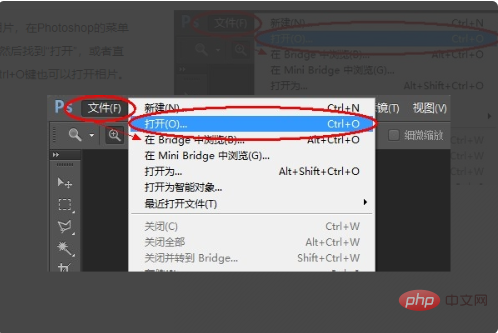
2. Then a dialog box for opening photos will appear. Select the photo to be processed here, and then click "Open" in the lower right corner, so that the photo to be processed will be It will be opened to the Photoshop work interface.

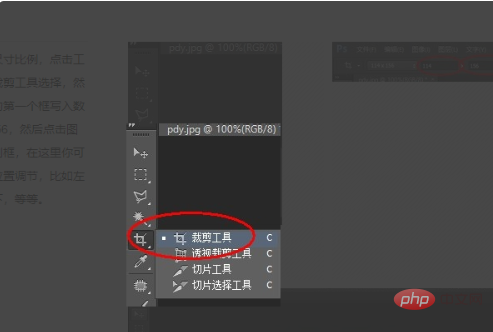
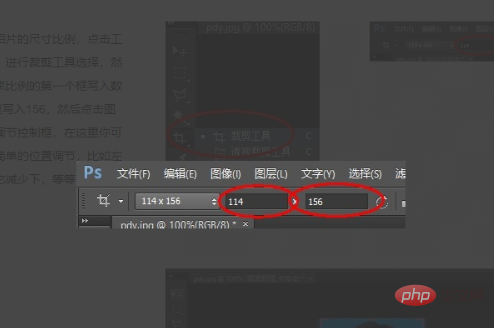
3. Find the "Crop Tool" option in the interface and click it, then write the number 114 in the first box of the constraint ratio in the prompt box, and the second box Write 156 in the box.
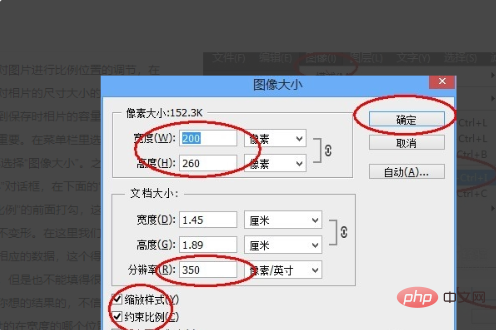
4. Then find the "Image" option in the interface and click to open it. Find "Image Size" in the pop-up option bar. ” option and click.
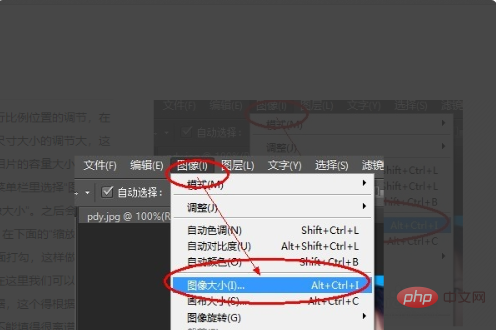
5. Find the "Scale Style" and "Constraint Ratio" options in the interface and click to check them. Enter 350 in the resolution input box, and then enter 350 in the interface. Find the "OK" option and click to save the image to successfully change the photo size to within 20k.
Related learning recommendations: PS video tutorial
The above is the detailed content of How to resize pictures to within 20k. For more information, please follow other related articles on the PHP Chinese website!