
How to establish a LAN in win10
1. First, we can press the keyboard shortcut "WIN key X" on the WIN10 desktop. In the menu that appears, click to open Control Panel.
2. In the Control Panel window, click Network and Internet here to enter.
3. Network and internet creation, click Network and Sharing Center to enter.
4. Network and Sharing Center, here we select the Change Adapter Settings button on the left to open it.
5. Right-click on the network connection icon and select Properties from the menu to open it.
6. At this time, in the network properties window, select internet protocol version 4, and then select properties.
7. Then in this interface, we can enter the IP address and DNS address to be set.
Recommended related article tutorials: windows tutorial
Detailed operation:
First step: Find the windows in the lower left corner of the desktop Right click on the icon.

Step 2: Find the command prompt in the pop-up box and open it.

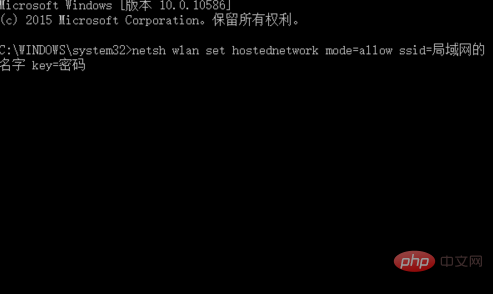
Step 3: The command box as shown in the figure will pop up, directly enter netsh wlan set hostednetwork mode=allow ssid=name of the LAN key=password.

Step 4: Don’t rush to enter at this step. Enter netsh wlan start hostednetwork in the space and press Enter.

Step 5: When the prompt appears that the bearer network has been started, it is completed. Otherwise, it must be an input error. It is best to copy and paste directly.
PHP Chinese website, a large number of Introduction to Programming, welcome to learn!
The above is the detailed content of How to establish a LAN in win10. For more information, please follow other related articles on the PHP Chinese website!