
This article brings you a detailed introduction (pictures and texts) about Dreamweaver site management. It has certain reference value. Friends in need can refer to it. , hope it helps you.
To create and maintain a website, you first need to create and modify the website files on the local disk, and then upload the modified files for the website to the Internet Web server to update the website files. A website placed on a local disk is called a local site, and a website located on an Internet Web server is called a remote site. Dreamweaver provides powerful management functions for local and remote sites.
Dreamweaver site refers to the term used in the process of creating and designing web pages in Dreamweaver. It defines a site name, a folder to store files, and can facilitate remote management and maintenance of the website. To use Dreamweaver site management, you need to understand the definitions of the following three types of sites:
1. Local information
is the local working directory. Also called a "local site".
2. Remote information
is the location where the remote site stores files, also known as the "remote site", generally pointing to the site that is running using the running system.
3. The test server
is the server used to test the site. After the test passes in the test server, it is then published to the remote site.
Okay, after understanding this, the basic work is ready. Let’s take Dreamweaver CS4 as an example to introduce the basic operations of Dreamweaver site management:
1. Manage site
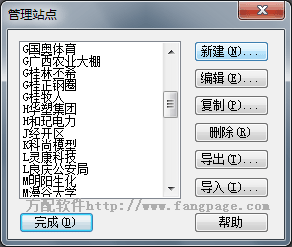
Select "Site" -> "Manage Site" in the Dreamweaver menu bar, and the "Site Management" dialog box will appear. In the dialog box, you can Select the corresponding site to define and manage. As shown below:
2. Create a new site
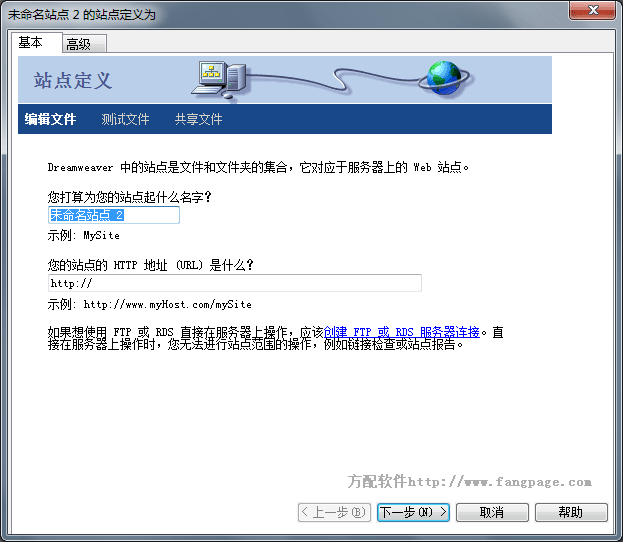
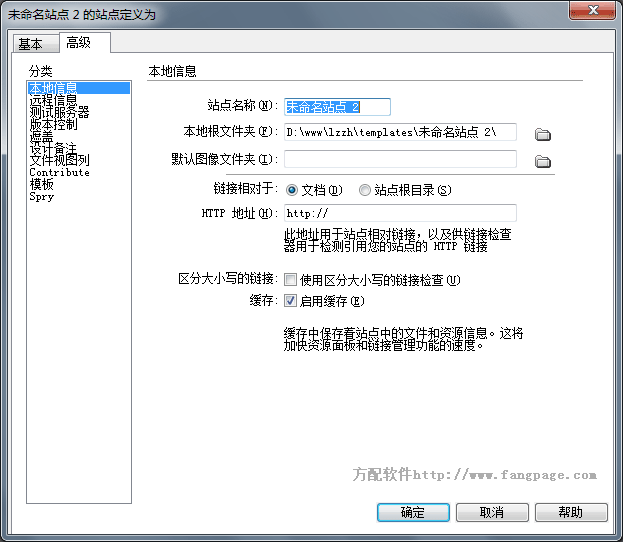
You can effectively create and manage multiple sites in Dreamweave sites. There are two ways to build a site. One is to use the "Site Definition Wizard", which can complete the setup process step by step according to the prompts. The second is to use "advanced" settings to complete. You can set local information, remote information and test servers separately as needed.
Click "New" -> "Site", the site definition dialog box appears, click the "Basic" tab in the dialog box to use the site definition wizard, or click the "Advanced" tab to Use "Advanced" settings, as shown below:
##3. Set up the local site
1. Select the Advanced tab and Local Information category options in the Site Definition dialog box. 2. Enter the "site name", such as "F party website" 3. Enter "Local root folder", or click the folder icon to select or create a new local folder, such as D:/www/fangpage. 4. Determine the default folder to store images in "Default Image Folder", usually "images" in the root directory. 5. In the HTTP Address text box, enter the URL that the Web site will use. This enables Dreamweaver to validate links in your site that use absolute URLs. 6. Enable Cache option that specifies whether to create a local cache to increase the speed of linking and site management tasks. (Tips: Why add an initial letter in front of the site name? The purpose of adding letters is to quickly find the site you are looking for through keyboard keys, because Chinese does not support letter button search)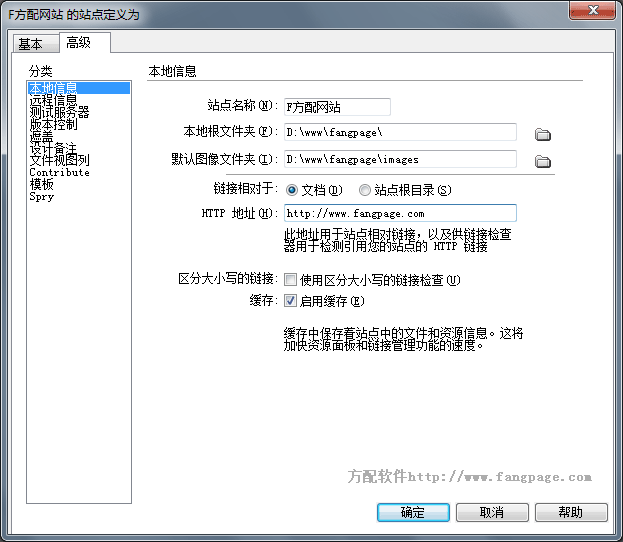
4. Set up a remote site
If your site has remote access, you can According to the following configuration, you can maintain and manage the file content on the server: 1. In the site definition dialog box, select the "Remote Information" category option of the "Advanced" tab2. Select an Access option.
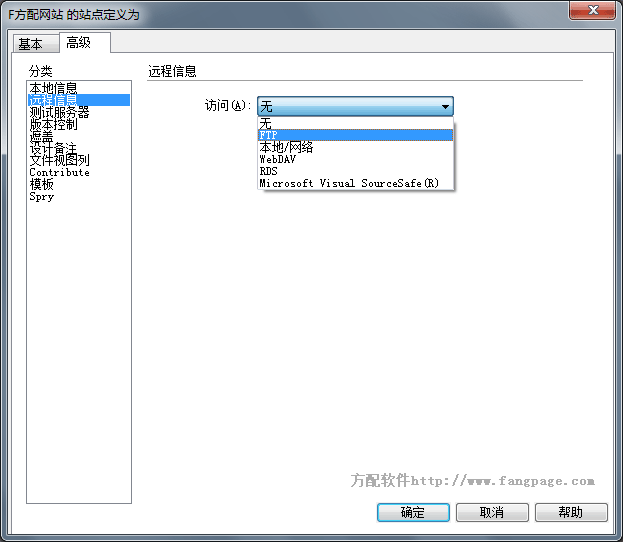
3. Enter the login name and password to connect to the FTP server.
4. If your firewall configuration requires passive FTP, select "Passive FTP".
5. Use firewall options.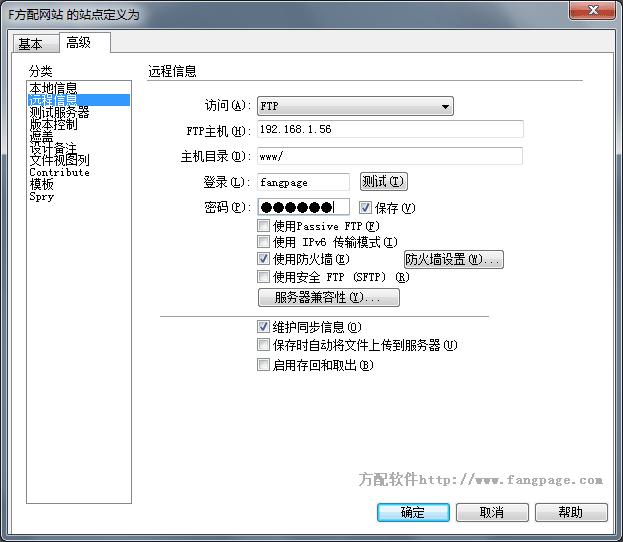
5. Set up the test server
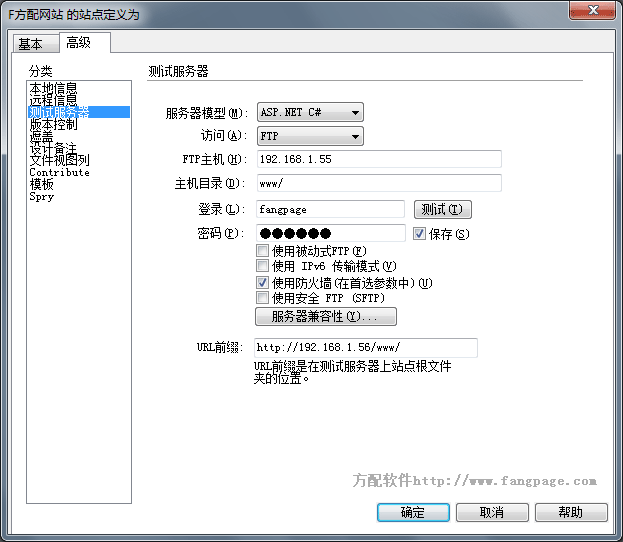
1. In the "Site Definition" dialog box, select the "Advanced" tab, and then select "Test Server" from the "Category" list;
2. Server Model;
3. Access There are three methods: "None", "FTP" and "Local/Network".
##6. Manage site files
1. After the site information is built, we can make unified modifications to the entire site. You don’t have to worry about it yourself. Use the "File" panel, which is usually on the right side of the Dreamweaver main window, as shown below: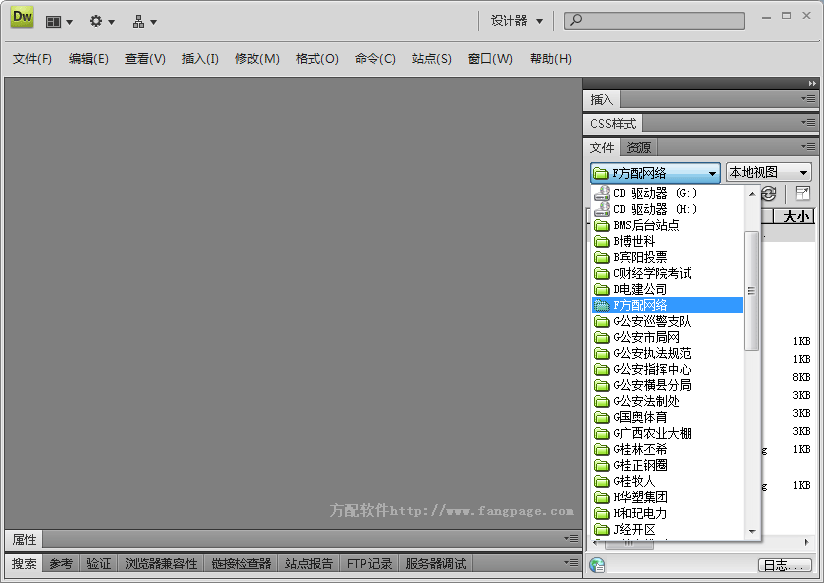
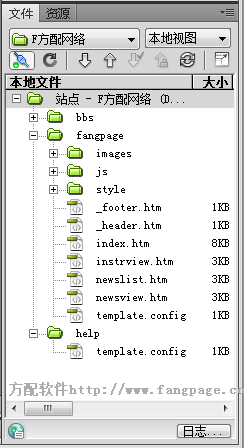

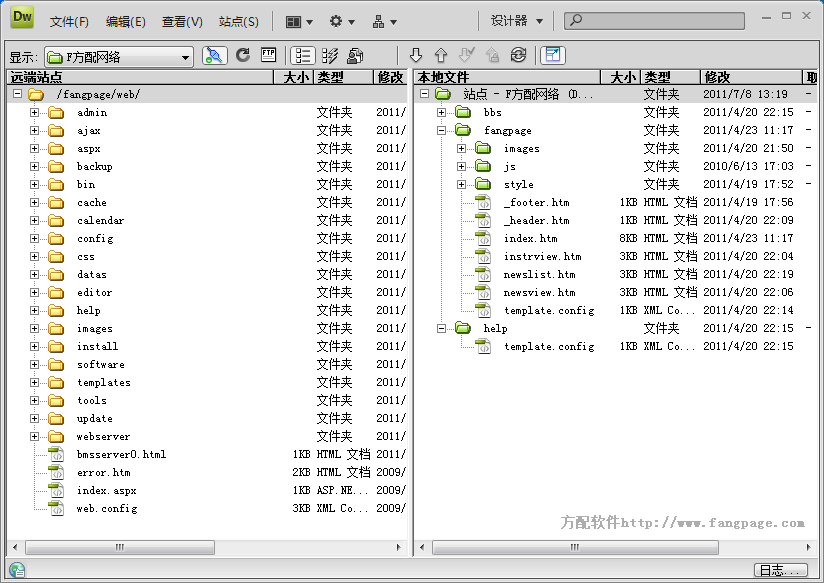
2. Get files from remote or test servers
(1) If you are using FTP to transfer files, please click the "Connect" button to open a connection to the remote server.If you see the remote file in the previously linked "Remote" pane, you do not need to click "Connect"; Dreamweaver will automatically connect when you click "Get". (2) Select the Files are required to download. Usually these files are selected in the "Remote View" or "Test Server" view, or the corresponding files can be selected in the "Local View". (3) Click the "File" panel "Get" button on the toolbar, or right-click the menu and select "Get".If the file is currently open in the document window, you can select "File Management"->"Get" from the document window , a dialog box appears, asking whether you want to obtain the corresponding file. (4) If you want to download the relevant file, click "Yes"; otherwise, click the "No" button.3. Upload files to remote or test server
(1) Select the files to upload. Usually select these files in the "Local" view, you can also select the corresponding files in the "Remote" view file.(2) Click the "Upload" button on the toolbar of the "File" panel, or select "Upload" from the right-click menu. If the file is currently open in the document window, you can Select "File Management"->"Upload". (3) If you want to upload relevant files, click "Yes"; otherwise, click the "No" button.
4. If the remote site is an ftp server, use ftp to synchronize files. The operation is as follows:
(1) Select a specific file or folder . If you want to synchronize your entire site, skip this step. (2) Click the "Sync" button on the toolbar of the "File" panel, or select "Sync" from the right-click menu. If the file is currently open in the document window, you can select "File Management" -> "Synchronization" from the document window, and the "Synchronize Files" dialog box will appear. (3) Select the corresponding synchronization direction, select "Preview" to compare files, and then click "OK".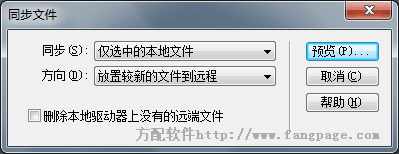
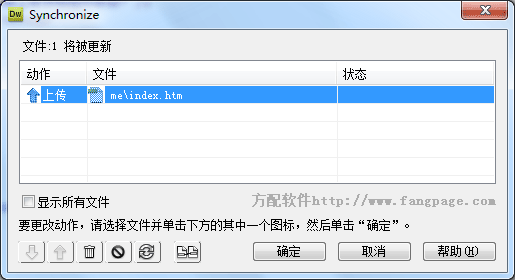
Through the above introduction, I believe everyone has a preliminary understanding of the site management function of Deamweaver. But to truly appreciate its power and speed, you need to slowly experience it in your future work. There are many other functions in the website manager. I will not discuss them one by one here. You can try them out one by one!
The above is the detailed content of Detailed introduction to Dreamweaver site management (pictures and text). For more information, please follow other related articles on the PHP Chinese website!