This article mainly introduces the relevant information about using ueditor rich text editor in vue. Friends who need it can refer to it
I recently encountered the need to use a rich text editor when working on a backend management system. Finally, I chose ueditor. My project uses the vue vuex vue-router webpack elementUI solution to complete the framework construction.
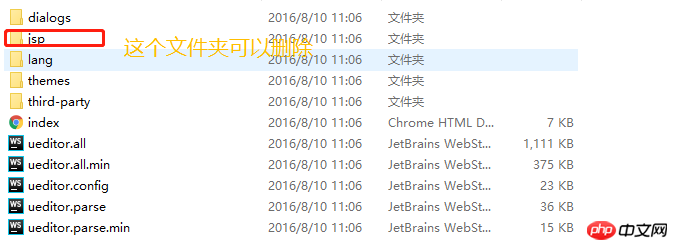
1. Download the latest jsp version of the UEditor official website, and download and decompress it. After that, you get a utf8-jsp folder, which contains the following content:


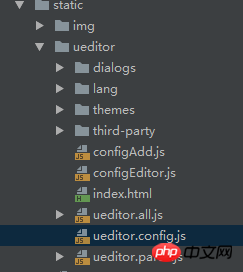
#2. Rename this folder to ueditor, and move it into your own project. Under the static folder, modify the contents in the ueditor.config.js folder, as shown below:


3. Write sub-components
<template>
<p :id="id" type="text/plain"></p>
</template>
<script>
import '../../../static/ueditor/ueditor.config.js'
import '../../../static/ueditor/ueditor.all.min.js'
import '../../../static/ueditor/lang/zh-cn/zh-cn.js'
import '../../../static/ueditor/ueditor.parse.min.js'
export default {
name: 'UE',
data() {
return {
editor: null
}
},
props: {
defaultMsg: {
type: String,
default: '请输入内容'
},
config: {
type: Object
},
id: {
type: String,
default: `ue${Math.random(0, 100)}`
}
},
mounted() {
this.$nextTick(() => {
this.editor = UE.getEditor(this.id, this.config); // 初始化UE
this.editor.addListener("ready", () => {
this.editor.execCommand('insertHtml', this.defaultMsg);
this.editor.focus() // 确保UE加载完成后,放入内容。
})
})
},
methods: {
getUEContent() { // 获取内容方法
return this.editor.getContent()
},
clearContent() { // 清空编辑器内容
return this.editor.execCommand('cleardoc');
},
},
beforeDestroy() {
// 组件销毁的时候,要销毁 UEditor 实例
if (this.editor !== null && this.editor.destroy) {
this.editor.destroy();
}
}
}
</script>
<style scoped></style>4. Use
<UE :config="configEditor" :id="ue1" ref="ue" :defaultMsg="val"></UE>
in the parent component. 5. After doing it, uploading images will prompt a back-end configuration item http error, and uploading files will prompt an upload error. It should be noted here that after ueditor is configured on the front end, it needs to cooperate with the back-end part, and then change the prefix of serverUrl in ueditor.config.js to the request path address of your own back-end access
serverUrl: "统一请求地址"
The above is what I compiled for everyone. I hope it will be helpful to everyone in the future.
Related articles:
How to use highCharts to draw a 3d pie chart in Vue
Use the image lazy loading plug-in in vue-lazyload
Vuejs single file component (detailed tutorial)
The above is the detailed content of How to use ueditor in vue. For more information, please follow other related articles on the PHP Chinese website!


