
How to fix Win10 Ethernet not enabling DHCP? If you encounter an issue with Ethernet not having DHCP enabled in Windows 10, there is no need to panic. PHP editor Zimo has carefully compiled two simple and easy-to-understand solutions to help you quickly solve this problem. In the text, PHP editor Zimo will detail the following steps: Enable DHCP through the "Network and Internet" settings Launch the DHCP Client using the run window command Follow these clear instructions and you will be able to easily resolve this issue and restore the Ethernet connection normal function.
Analysis of the problem that dhcp is not enabled on win10 computer Ethernet
Method 1:
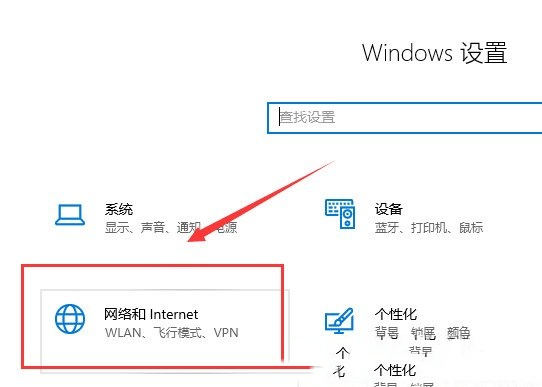
1. First, press the [Win + i] key combination on the keyboard to open Windows Settings. Use the search box to find Settings, then find and click [Network and Internet].
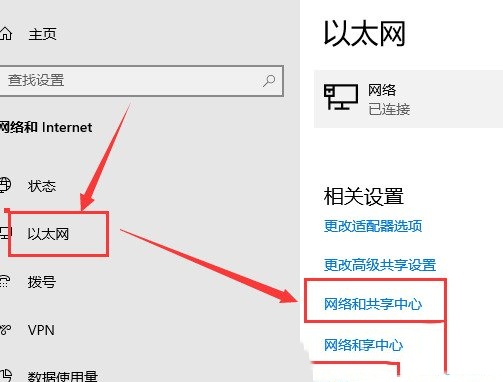
2. Network and Internet homepage window, select [Ethernet] on the left, and click [Network and Sharing Center] under related settings on the right.
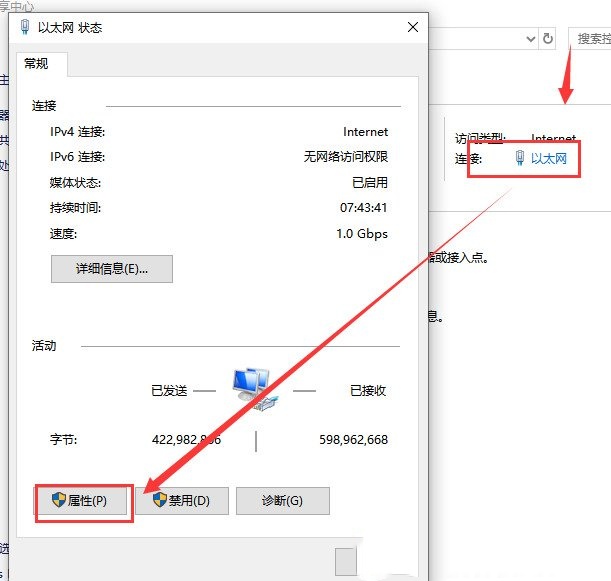
3. Click [Ethernet] in the local connection, and in the window that opens, click the [Properties] button.
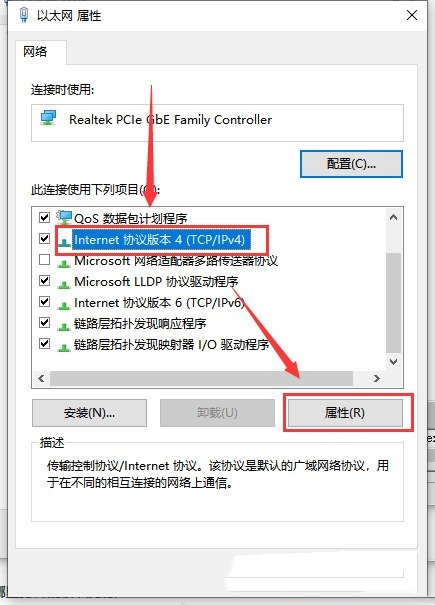
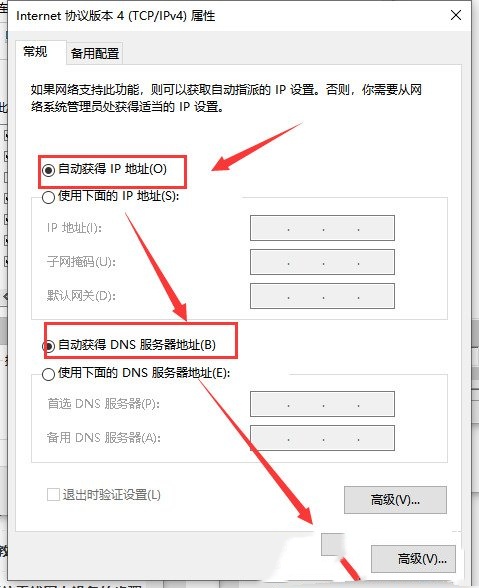
4. In the Ethernet properties window, select [Internet Protocol Version 4 (TCP/IPV4)], and then click [Properties] below.
5. Finally, check [Obtain an IP address automatically] and [Obtain DNS server address automatically] and click [OK] to save.
Method 2:
1. First, press the [Win + R] key combination on the keyboard to open Run, and then enter [services.msc] command, press [OK or Enter] to open the service.
2. In the service window, find and double-click to open [DHCP Client] on the right side.
3. In the properties (local computer) window of the DHCP Client, change the startup type to [Automatic], and finally click [OK] to save.
The above is the detailed content of What should I do if dhcp is not enabled on the Ethernet of my win10 computer? Analysis of the problem that dhcp is not enabled on the Ethernet of my win10 computer. For more information, please follow other related articles on the PHP Chinese website!


