One of the common failures when you encounter the problem of not being able to connect to the network in Windows 11 is the DNS server not responding error. If you find yourself in this situation, this article will guide you through how to fix it. PHP editor Baicao has compiled several proven steps to help you identify and resolve the root cause of the DNS server not responding error. Whether it's due to network misconfiguration, outdated drivers or a malware infection, this article covers a range of troubleshooting techniques to get you back to a smooth internet connection quickly. Read on to learn how to diagnose and resolve DNS server not responding issues in Windows 11, and find an effective solution for your specific situation.
Method 1. Security software
If third-party software is installed on the computer, it may cause interception conflicts on the network. It is recommended to exit all security software before connecting to the Internet.

Method 2, dns settings
1. Right-click the "Network" icon in the taskbar in the lower right corner and select "Network and Internet" in the option list set up".

2. In the window that opens, click "Ethernet".

3. Then find the "DNS Server Assignment" and click the "Edit" button on the right side of it.

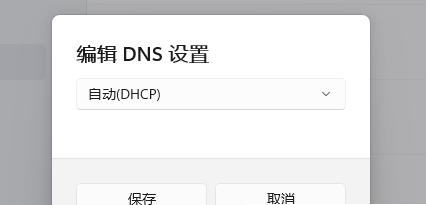
4. Finally, change it to "Automatic" in the window. If you have DNS, select Manual and set it up, then click "Save". .

Method three, dns failure
1. If the above method cannot solve the problem, return to the "Network and Internet Settings" interface and click "Advanced Network Settings" option.

2. Then click the "Network Reset" option in "More Settings".

3. Finally, click the "Reset Now" button to reset the network and reset the DNS.

The above is the detailed content of How to deal with Win11DNS server not responding Win11DNS server not responding. For more information, please follow other related articles on the PHP Chinese website!


