


This article mainly introduces the relevant information of the menu menu example tutorial of Yii2 rbac permission control. Friends who need it can refer to it.
In the previous article, I introduced you to build a perfect backend in yii2 and implement rbac permissions. The background construction and rbac permission control of yii2 are perfectly implemented in the control example tutorial. If you have not implemented it yet, please read the above first and then come back to refer to this article, because this article is improved and supplemented on the basis of the above.
Some guys have reported that they can’t understand how to control the permissions of the final menu, and they can’t figure it out. Moreover, it seems that you haven’t finished it yet, so you are fooling around! It’s really not that comprehensive. Let’s see today how we can achieve perfect permissions for the menu. Let me first list the main content. If you don’t need it, there is no need to read it. I just want to share it with those who need it.
Use the menu table to add a menu
The left menu result adminlte is perfectly presented
Customize the icon in front of the menu Small icons are displayed
How to control the display or hiding of the menu
The page operation button will not be displayed without permission
Only buttons with operation permissions are displayed in the gridview
Well, that’s about all. If you have other needs about the permission control menu, please leave a message below, we will Communicate and discuss together.
First look at the picture to preview the general effect, otherwise how can you stimulate your eagerness to learn.
First we visit the routing page/dmin/route/index, select everything on the left as much as possible, then move it to the right, and remember to give it to the current user Assign relevant access permissions.
Next, access the menu list/admin/menu/index and click Add Menu. If you do not have permission to access it at this time, please temporarily allow the current user to access any permissions in the as access file of the configuration file, and add After we add the permissions, remove the as access setting. Be sure to remember, otherwise don't come back to me if the permissions expire.
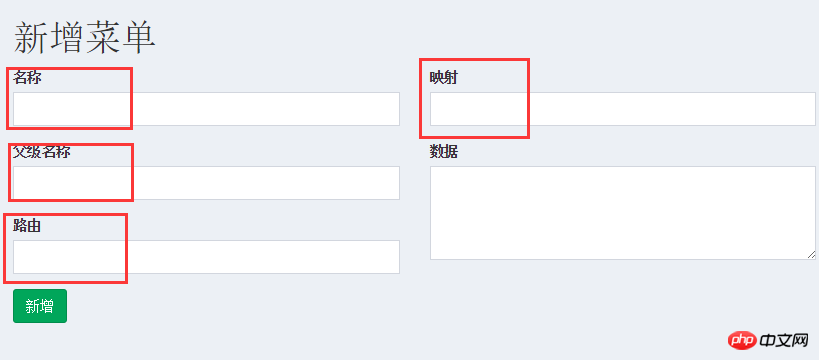
Here we first fill in the four fields marked red in the picture above
For example: we want to add a first-level menu "Permission Management"
Please fill in "Permission Management" for the name. Because it is a first-level menu, please leave the parent name blank. For routing, we choose "/admin/default/index" here. Note that if any route is matched, please visit the routing page. Move the selection on the left to the right.
Mapping is actually a matter of sorting. For example, if I add two menus, the one with a mapping value of 1 is on top and the one with a mapping value of 2 is below 1. We fill in the number 1 here.
We will talk about the "data" item later.
Add it in the way just introduced. Let’s give an example of adding a secondary menu "Permission Control"
You only need to fill in the parent name here with the first-level name we just added successfully. Just "Permission Management". Everything else remains as usual. If you don’t know how to operate, read it twice. It’s best to add all the menus for permission management here, because we need it next and you can practice more.
At this point we have added the menu.
Let’s look at the next step and use the background framework we built before to display it.
use mdm\admin\components\MenuHelper; echo dmstr\widgets\Menu::widget( [ 'options' => ['class' => 'sidebar-menu'], 'items' => MenuHelper::getAssignedMenu(Yii::$app->user->id), ] );
Isn’t it very simple, What? Why doesn’t mine have dmstr? Sorry, I’ve said it many times. You need to read the above before combining this menu.
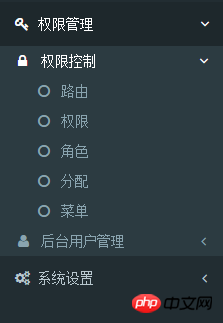
ok, refresh the page to see your menu. Although we have not fully implemented the functionality we want, you should be able to see your menu displayed by now.
Next we will enter our focus and difficulty. We need to implement the small icon in front of the menu and complete the menu to hide the control.
Do you still remember that when we first created the menu, the only option "data" was not filled in? For the convenience of subsequent operations, we will fill in the icons and hidden options together here. Let's take the "Backend User Management" secondary menu in the initial screenshot as an example to make modifications. Take a screenshot and take a look at the current status of our menu.
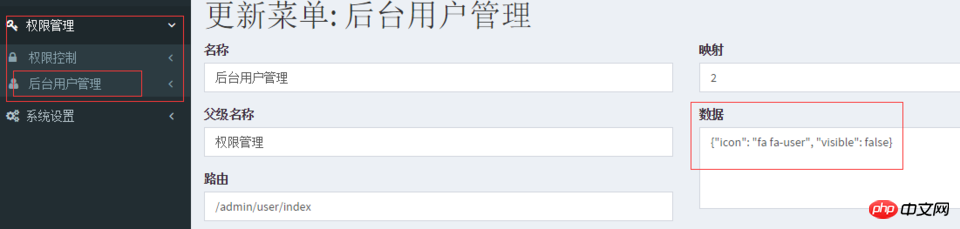
#Please be sure to fill in the following code in the "data" item on its update page, if you have new ideas , please also follow my ideas before making modifications, because we have to do it later.
{"icon": "fa fa-user", "visible": false}
Yes, what we fill in for this "data" item is a piece of json code. Next, we also make slight changes to the code for displaying the menu. In order to It is convenient for everyone to read the code. The $callback here is written directly on the page. You can continue to package and optimize it later.
use mdm\admin\components\MenuHelper; $menu['name'], 'url' => [$menu['route']], ]; //处理我们的配置 if ($data) { //visible isset($data['visible']) && $return['visible'] = $data['visible']; //icon isset($data['icon']) && $data['icon'] && $return['icon'] = $data['icon']; //other attribute e.g. class... $return['options'] = $data; } //没配置图标的显示默认图标 (!isset($return['icon']) || !$return['icon']) && $return['icon'] = 'fa fa-circle-o'; $items && $return['items'] = $items; return $return; }; //这里我们对一开始写的菜单menu进行了优化 echo dmstr\widgets\Menu::widget( [ 'options' => ['class' => 'sidebar-menu'], 'items' => MenuHelper::getAssignedMenu(Yii::$app->user->id, null, $callback), ] ); ?>
是的,你没有看错,代码是有点长,我们来简单分析分析。其实我们这里的$callback方法也只是针对上面我们添加菜单的"数据"项进行的分析。不难看出,我们对icon和visible分别进行了判断,并追加到当前menu中。
到此,我们费了一番波折终于实现菜单加icon和设置菜单的隐藏。如果你有其他的属性需要进行配置,此处仍然可以继续单独配置。
现在,我们还有两个任务仍待完成,要完成接下来的两个任务,为了大家的方便,建议你的项目可以自定义配置gii模版,不支持自定义gii模板的可以参考自定义gii模版 当你发现我们后面需要做的功能,我觉得你会赞叹我们这里的操作。
为了方便操作,我们这里增加一个测试表test,我们先用未做修改的gii模版生成一份model+curd。我们先把test/*的所有权限分配给当前登录的用户,并添加一条数据。打开/test我们可以正常看到下面的截图,注意图中的两个标记。

然后我们打开test/index.php文件,对标记的两个地方进行如下修改
use mdm\admin\components\Helper; 'btn btn-success']); } ?> [ // ...... [ 'class' => 'yii\grid\ActionColumn', 'template' => Helper::filterActionColumn('{view}{update}{delete}'), ], ], ]); ?>
现在我们刷新下页面/test再看看,好像没什么变化嘛。别急,我们现在撤销当前用户的/test/create 权限和/test/update权限,然后你在刷新下页面看看效果,我们截图看看。
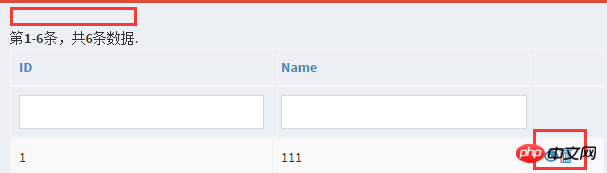
也就是说我们没有权限的按钮消失了,当你手动访问/test/create的时候你会发现也会提醒你没有权限。
如果你的gii模板是自定义的,相信你会迅速在其生成的模板中所有的操作上添加权限控制的,是不是很happy
最后,我们的菜单menu关于权限控制的讲解基本也就结束了,长篇大论,仔细回想起来也没多少东西,倒是希望能帮到你一二
以上就是本文的全部内容,希望对大家的学习有所帮助,更多相关内容请关注PHP中文网!
相关推荐:
The above is the detailed content of Using Yii2 rbac permissions to control the menu menu. For more information, please follow other related articles on the PHP Chinese website!


![[Web front-end] Node.js quick start](https://img.php.cn/upload/course/000/000/067/662b5d34ba7c0227.png)


