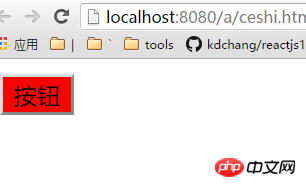
이번에는 Angular의 스코플 명령어 사용에 대한 자세한 설명을 가져오겠습니다. 앵귤러의 스코플 명령어 사용 시 주의사항은 무엇인가요?
커스텀 명령어를 만들어보자
<!DOCTYPE html><html lang="en"><head>
<meta charset="UTF-8">
<title>Document</title>
<style>
.primary{ background: red;
} </style></head><body ng-app="myApp">
<div ng-controller="mainCtrl">
<my-btn></my-btn>
</div>
<script src="node_modules/angular/angular.min.js"></script>
<script>
var myApp = angular.module('myApp',[]);
myApp.controller('mainCtrl',['$scope',function($scope){
$scope.myClass = 'primary';
}]);
myApp.directive('myBtn',function(){ return {
template:'<input type="button" value="按钮" class="{{myClass}}">'
}
}); </script></body></html>
위처럼 커스텀 명령어를 사용하면 정말 좋지만, 각 명령어에 의해 렌더링되는 버튼을 커스터마이징하고 싶다면 불가능할 것 같습니다. 이 사용자 정의 명령을 여러 개 생성하면 완전히 똑같아 보입니다.
<!DOCTYPE html><html lang="en"><head>
<meta charset="UTF-8">
<title>Document</title>
<style>
.primary{ background: red;
} </style></head><body ng-app="myApp">
<div ng-controller="mainCtrl">
<my-btn></my-btn>
<my-btn></my-btn>
<my-btn></my-btn>
<my-btn></my-btn>
</div>
<script src="node_modules/angular/angular.min.js"></script>
<script>
var myApp = angular.module('myApp',[]);
myApp.controller('mainCtrl',['$scope',function($scope){
$scope.myClass = 'primary';
}]);
myApp.directive('myBtn',function(){ return {
template:'<input type="button" value="按钮" class="{{myClass}}">'
}
}); </script></body></html>
한 가지 아이디어는 이러한 사용자 정의 명령 버튼을 다른 컨트롤러에 넣은 다음 컨트롤러에서 $scope를 사용하는 것입니다. 컨텍스트는 다른 값을 전달합니다.
<!DOCTYPE html><html><head>
<meta charset="UTF-8">
<title>Document</title>
<style>
.primary{ background: red;
} .success{ background: green;
} .default{ background: gray;
} </style></head><body ng-app="myApp">
<div ng-controller="aCtrl">
<my-btn></my-btn>
</div>
<div ng-controller="bCtrl">
<my-btn></my-btn>
</div>
<div ng-controller="cCtrl">
<my-btn></my-btn>
</div>
<script src="node_modules/angular/angular.min.js"></script>
<script>
var myApp = angular.module('myApp',[]);
myApp.controller('aCtrl',['$scope',function($scope){
$scope.myClass = 'primary';
}]);
myApp.controller('bCtrl',['$scope',function($scope){
$scope.myClass = 'success';
}]);
myApp.controller('cCtrl',['$scope',function($scope){
$scope.myClass = 'default';
}]);
myApp.directive('myBtn',function(){ return {
template:'<input type="button" value="按钮" class="{{myClass}}">'
}
}); </script></body></html>작성하기가 너무 번거롭기 때문에 우리 각도에서는 사용자 정의 명령에 대해 범위라는 구성 항목을 제공하므로 다음과 같이 작성할 수 있습니다.
<!DOCTYPE html><html lang="en"><head>
<meta charset="UTF-8">
<title>Document</title>
<style>
.primary{ background: red;
} .success{ background: green;
} .default{ background: gray;
} </style></head><body ng-app="myApp">
<div ng-controller="Controller">
<my-btn b="className1"></my-btn>
<my-btn b="className2"></my-btn>
<my-btn b="className3"></my-btn>
</div>
<script src="node_modules/angular/angular.min.js"></script>
<script>
var myApp = angular.module('myApp',[]);
myApp
.controller('Controller', ['$scope', function($scope) {
$scope.className1 = 'primary';
$scope.className2 = 'success';
$scope.className3 = 'default';
}])
.directive('myBtn',function(){ return {
scope:{
a:'=b'
},
template:'<input type="button" value="按钮" class="{{a}}">'
}
}); </script></body></html>위 내용을 이해하려면 두 가지 사항만 주의하면 됩니다. :
여기서 독립 범위의 a는 템플릿의 모델 a를 나타냅니다.
=b는 뷰에서 현재 명령어를 찾기 위해 각도가 필요한 b
속성을 나타냅니다. b 값은 외부 범위에서 찾아야 합니다.
명령 범위에서 바인딩하려는 모델 이름이 외부에서 사용할 때 속성 이름과 동일하면 생략하고 다음과 같이 작성해도 됩니다.
<!DOCTYPE html><html lang="en"><head>
<meta charset="UTF-8">
<title>Document</title>
<style>
.primary{ background: red;
} .success{ background: green;
} .default{ background: gray;
} </style></head><body ng-app="myApp">
<div ng-controller="Controller">
<my-btn a="className1"></my-btn>
<my-btn a="className2"></my-btn>
<my-btn a="className3"></my-btn>
</div>
<script src="node_modules/angular/angular.min.js"></script>
<script>
var myApp = angular.module('myApp',[]);
myApp
.controller('Controller', ['$scope', function($scope) {
$scope.className1 = 'primary';
$scope.className2 = 'success';
$scope.className3 = 'default';
}])
.directive('myBtn',function(){ return {
scope:{
a:'='
},
template:'<input type="button" value="按钮" class="{{a}}">'
}
}); </script></body></html>물론 위 = 숫자는 2입니다. -방향 데이터 바인딩:
<!DOCTYPE html><html lang="en"><head>
<meta charset="UTF-8">
<title>Document</title>
<style>
.primary{ background: red;
} .success{ background: green;
} .default{ background: gray;
} </style></head><body ng-app="myApp">
<div ng-controller="Controller">
<my-btn a="abc"></my-btn>
</div>
<script src="node_modules/angular/angular.min.js"></script>
<script>
var myApp = angular.module('myApp',[]);
myApp
.controller('Controller', ['$scope', function($scope) {
$scope.abc = '我是初始内容';
}])
.directive('myBtn',function(){ return {
scope:{
a:'='
},
template:'<input type="text" ng-model="a"><span>{{a}}</span>'
}
}); </script></body></html>단방향 데이터 통신만 원하는 경우 @ 기호를 사용할 수 있습니다:
<!DOCTYPE html><html lang="en"><head>
<meta charset="UTF-8">
<title>Document</title>
<style>
.primary{ background: red;
} .success{ background: red;
} .default{ background: red;
} </style></head><body ng-app="myApp">
<div ng-controller="Controller">
<my-btn a="primary"></my-btn>
</div>
<script src="node_modules/angular/angular.min.js"></script>
<script>
var myApp = angular.module('myApp',[]);
myApp
.controller('Controller', ['$scope', function($scope) {
$scope.mm = 'primary';
}])
.directive('myBtn',function(){ return {
scope:{
a:'@'
},
template:'<input type="button" value="按钮" class="{{a}}">'
}
}); </script></body></html>ng-class를 사용하려는 경우 다음도 가능합니다.
<!DOCTYPE html><html lang="en"><head>
<meta charset="UTF-8">
<title>Document</title>
<style>
.primary{ background: red;
} .success{ background: red;
} .default{ background: red;
} </style></head><body ng-app="myApp">
<div ng-controller="Controller">
<my-btn a="primary"></my-btn>
</div>
<script src="node_modules/angular/angular.min.js"></script>
<script>
var myApp = angular.module('myApp',[]);
myApp
.controller('Controller', ['$scope', function($scope) {
$scope.mm = true;
}])
.directive('myBtn',function(){ return {
scope:{
a:'@'
},
template:'<input type="button" value="按钮" ng-class="{primary:a}">'
}
}); </script></body></html>마지막으로 다음이 있습니다. 범위를 설정할 수 있는 방법 외부 범위를 참조하는 방법
<!DOCTYPE html><html lang="en"><head>
<meta charset="UTF-8">
<title>Document</title>
<style>
.primary{ background: red;
} .success{ background: red;
} .default{ background: red;
} </style></head><body ng-app="myApp">
<div ng-controller="Controller">
<my-btn fn2="fn()"></my-btn>
</div>
<script src="node_modules/angular/angular.min.js"></script>
<script>
var myApp = angular.module('myApp',[]);
myApp
.controller('Controller', ['$scope', function($scope) {
$scope.fn = function(){
alert(11);
}
}])
.directive('myBtn',function(){ return {
scope:{
fn1:'&fn2'
},
template:'<input type="button" value="按钮" ng-click="fn1()">'
}
}); </script></body></html>이 기사의 사례를 읽으신 후 방법을 마스터하셨다고 생각합니다. 더 흥미로운 정보를 보려면 PHP 중국어 웹사이트의 다른 관련 기사를 주목하세요!
추천 자료:
Angular Material 사용에 대한 자세한 설명
요소를 가로 및 세로로 가운데 배치하는 인기 없는 방법
위 내용은 각도의 범위 지정문 사용에 대한 자세한 설명의 상세 내용입니다. 자세한 내용은 PHP 중국어 웹사이트의 기타 관련 기사를 참조하세요!