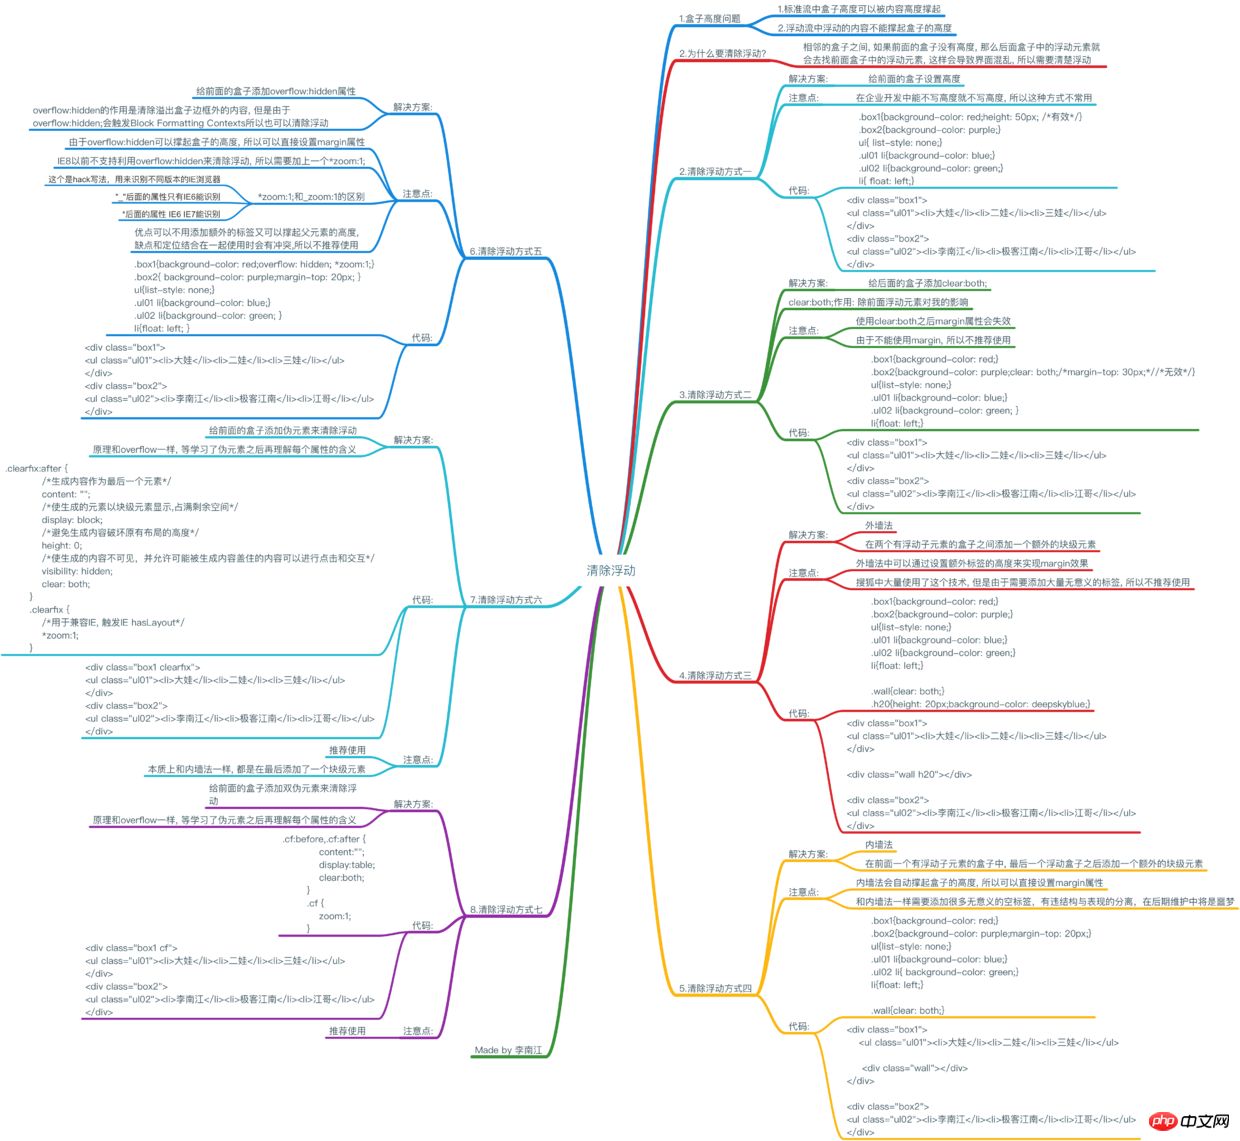
Clear float
상자 높이 문제
표준 흐름에서는 콘텐츠 높이가 상자 높이를 지원할 수 있습니다

<style>

        div{
            background-color: red;
        }

        p{
            width: 200px;
            height: 100px;
            background-color: blue;
        }

</style>

<div>
    <p></p>
</div>플로팅 흐름에서 플로팅 요소의 콘텐츠 높이가 상자 높이를 지원할 수 없습니다

<style>
        div{
            background-color: red;
        }
        p{
            float: left;
            width: 200px;
            height: 100px;
            background-color: blue;
        }
</style>
<div>
    <p></p>
</div>플로팅 지우기 방법 1
이전 상위 상자에 높이 추가
샘플 코드:
<style>
 {
     margin: 0;
     padding: 0;
 }
 .box1{
     background-color: red;
     /这里*/
     height: 50px;
 }
 .box2{
     background-color: purple;
 }
 ul{
     list-style: none;
 }
 .ul01 li{
     background-color: blue;
 }
 .ul02 li{
     background-color: green;
 }
 ul li{
     float: left;
 }
</style>
<div class="box1">
   <ul class="ul01">
大娃

二娃

三娃

   </ul>

</div>

<div class="box2">

   <ul class="ul02">

李南江

极客江南

江哥

   </ul>

</div>- 높이 추가 전: - 
- 높이 추가 후 - 
- 참고: - 엔터프라이즈 개발에서는 높이 없이 높이를 쓸 수 있으므로 이 방법은 적합하지 않습니다. 일반적으로 사용됩니다. ` ### 플로팅 지우기 방법 2 - 이전 플로팅 요소가 나에게 미치는 영향을 지우려면 Clear:both; 속성을 사용하세요.
- 샘플 코드: html
<style>
{
           margin: 0;
           padding: 0;
       }
       .box1{
           background-color: red;
       }
       .box2{
           background-color: purple;
           /这里/
           clear: both;
           /margin无效/
           margin-top: 30px;
       }
       ul{
           list-style: none;
       }
       .ul01 li{
           background-color: blue;
       }
       .ul02 li{
           background-color: green;
       }
       ul li{
           float: left;
       }
</style>
<div class="box1">
   <ul class="ul01">
大娃
二娃
三娃
   </ul>
</div>
<div class="box2">
   <ul class="ul02">
李南江
极客江南
江哥
   </ul>
</div>- 명확하게 추가: 이전: -  - 추가 후: 둘 다 - ! 참고: - Clear:both 뒤에 여백을 사용하십시오. 속성이 유효하지 않으므로 일반적으로 사용되지 않습니다. ###float 메소드 지우기 3 - 부동 하위 요소가 있는 두 상자 사이에 추가 블록 수준 요소 추가
- 샘플 코드: html
<style>
       {
           margin: 0;
           padding: 0;
       }
       .box1{
           background-color: red;
       }
       .box2{
           background-color: purple;
       }
       ul{
           list-style: none;
       }
       .ul01 li{
           background-color: blue;
       }
       .ul02 li{
           background-color: green;
       }
       ul li{
           float: left;
       }
       /这里/
       .wall{
           clear: both;
       }
       .h20{
           /利用额外块级元素实现margin/
           height: 20px;
           background-color: deepskyblue;
       }
</style>
<div class="box1">
   <ul class="ul01">
大娃
二娃
三娃
   </ul>
</div>
<!--这里-->
<div class="wall h20"></div>
<div class="box2">
   <ul class="ul02">
李南江
极客江南
江哥
   </ul>
</div>- 추가 블록 수준 요소를 추가하기 전 - 
- 블록 수준 요소를 추가한 후 -  - 참고 사항 - 외벽 방식에서는 추가 라벨의 높이를 설정하여 여백 효과를 얻을 수 있습니다. - Sohu는 이 기술을 광범위하게 사용하지만, 의미 없는 라벨을 많이 추가해야 하는 필요성, 일반적으로 사용되지 않음 ` ###Clear float 방식 4 - 이전 상자 끝에 블록 수준 요소 추가
- 샘플 코드 html
<style>
{
margin: 0;
padding: 0;
}
.box1{
background-color: red;
}
.box2{
background-color: purple;
/margin有效/
margin-top: 20px;
}
ul{
list-style: none;
}
.ul01 li{
background-color: blue;
}
.ul02 li{
background-color: green;
}
ul li{
float: left;
}
/这里*/
.wall{
clear: both;
}
</style>
<div class="box1">
<ul class="ul01">
大娃
二娃
三娃
</ul>
<!--这里-->
<div class="wall"></div>
</div>
<div class="box2">
<ul class="ul02">
李南江
极客江南
江哥
</ul>
</div>- 添加额外块级元素前
- 
- 添加额外块级元素后
- 
- 참고:
- 내벽 방식은 상자의 높이를 자동으로 지원하므로 여백 속성을 직접 설정할 수 있습니다.
- 내벽 방식과 마찬가지로 의미 없는 빈 태그를 많이 추가하면 구조와 성능의 분리를 위반하고 향후 유지 관리에 악몽이 됩니다.
###Clear float method five
- Overflow:hidden이 무엇인가요?
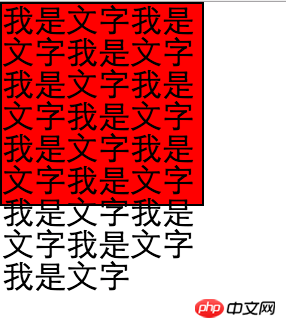
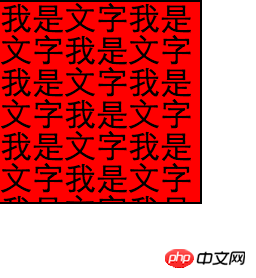
- Overflow:hidden 기능은 오버플로 상자 테두리 밖의 내용을 지우는 것입니다
- 샘플 코드
```html
.test{
            width: 100px;
            height: 100px;
            border: 1px solid #000;
            background-color: red;
            overflow: hidden;
}

<div class="test">我是文字我是文字我是文字我是文字我是文字我是文字我是文字我是文字我是文字我是文字我是文字我是文字我是文字</div>overflow:hidden을 추가하기 전

overflow:hidden을 추가한 후

float를 지우는 방법:overflow:hidden
오버플로를 추가합니다. 이전 상자의 숨겨진 속성
샘플 코드
```html
<style>
{
margin: 0;
padding: 0;
}
.box1{
background-color: red;
/这里/
overflow: hidden; zoom:1;
}
.box2{
background-color: purple;
/margin有效/
margin-top: 20px;
}
ul{
list-style: none;
}
.ul01 li{
background-color: blue;
}
.ul02 li{
background-color: green;
}
ul li{
float: left;
}
</style>
<div class="box1">
<ul class="ul01">
大娃
二娃
三娃
</ul>
</div>
<div class="box2">
<ul class="ul02">
李南江
极客江南
江哥
</ul>
</div>- 添加overflow:hidden;前
- 
- 添加overflow:hidden;后
- - 注意点:
- 由于overflow:hidden可以撑起盒子的高度, 所以可以直接设置margin属性
- IE8以前不支持利用overflow:hidden来清除浮动, 所以需要加上一个*zoom:1;
- 实际上*zoom:1能够触发IE8之前IE浏览器的hasLayout机制
- 优点可以不用添加额外的标签又可以撑起父元素的高度, 缺点和定位结合在一起使用时会有冲突
- *zoom:1;和_zoom:1的区别
- 这个是hack写法,用来识别不同版本的IE浏览器
- _后面的属性只有IE6能识别
- *后面的属性 IE6 IE7能识别
###清除浮动方式六
- 给前面的盒子添加伪元素来清除浮动
- 示例代码
```html
<style>
        *{
            margin: 0;
            padding: 0;
        }
        .box1{
            background-color: red;
        }
        .box2{
            background-color: purple;
            /*margin有效*/
            margin-top: 20px;
        }
        ul{
            list-style: none;
        }
        .ul01 li{
            background-color: blue;
        }
        .ul02 li{
            background-color: green;
        }
        li{
            float: left;
        }

        /*这里*/
        .clearfix:after {
            /*生成内容作为最后一个元素*/
            content: "";
            /*使生成的元素以块级元素显示,占满剩余空间*/
            display: block;
            /*避免生成内容破坏原有布局的高度*/
            height: 0;
            /*使生成的内容不可见,并允许可能被生成内容盖住的内容可以进行点击和交互*/
            visibility: hidden;
            /*重点是这一句*/
            clear: both;
        }
        .clearfix {
            /*用于兼容IE, 触发IE hasLayout*/
            *zoom:1;
        }
</style>
<div class="box1 clearfix">
    <ul class="ul01">
        <li>大娃</li>
        <li>二娃</li>
        <li>三娃</li>
    </ul>
</div>
<div class="box2">
    <ul class="ul02">
        <li>李南江</li>
        <li>极客江南</li>
        <li>江哥</li>
    </ul>
</div>添加伪元素前

添加伪元素后

注意点:
本质上和内墙法一样, 都是在前面一个盒子的最后添加一个额外的块级元素
添加伪元素后可以撑起盒子的高度, 所以可以直接设置margin属性
CSS中还有一个东西叫做伪类, 伪元素和伪类不是同一个东西
清除浮动方式七
给前面的盒子添加双伪元素来清除浮动
示例代码
<style>
        *{
            margin: 0;
            padding: 0;
        }
        .box1{
            background-color: red;
        }
        .box2{
            background-color: purple;
            /*margin有效*/
            margin-top: 20px;
        }
        ul{
            list-style: none;
        }
        .ul01 li{
            background-color: blue;
        }
        .ul02 li{
            background-color: green;
        }
        li{
            float: left;
        }

        /*这里*/
        .cf:before,.cf:after {
            content:"";
            display:table;
            /*重点是这一句*/
            clear:both;
        }
        .cf {
            zoom:1;
        }
</style>
<div class="box1 clearfix">
    <ul class="ul01">
        <li>大娃</li>
        <li>二娃</li>
        <li>三娃</li>
    </ul>
</div>
<div class="box2">
    <ul class="ul02">
        <li>李南江</li>
        <li>极客江南</li>
        <li>江哥</li>
    </ul>
</div>添加双伪元素前

添加双伪元素后

注意点:
添加伪元素后可以撑起盒子的高度, 所以可以直接设置margin属性
先知道有这些方式, 原理需要学习到BFC和hasLayout才能明白
支持BFC的浏览器(IE8+,firefox,chrome,safari)通过创建新的BFC闭合浮动;
不支持 BFC的浏览器 (IE5-7),通过触发 hasLayout 闭合浮动。
위 내용은 CSS 기본 Clear Float에 대한 자세한 그래픽 설명의 상세 내용입니다. 자세한 내용은 PHP 중국어 웹사이트의 기타 관련 기사를 참조하세요!