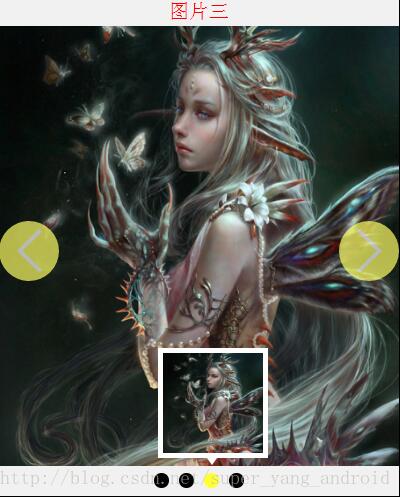
먼저 js 캐러셀 렌더링을 살펴보세요

코드:
<html>
<head>
<meta http-equiv="Content-Type" content="text/html; charset=utf-8" />
<style>
*{padding:0;margin:0;}
#content {width:400px;height:500px;margin:10px auto;position:relative;border:1px solid #000;color:red;font-size:20px;}
#title, #bottom{position:absolute;width:400px;height:30px;line-height:30px;text-align:center;font-size:20px;background:#f1f1f1;}
#bottom{bottom:0;cursor:pointer;}
#bottom span{display:inline-block;width:15px;height:15px;border-radius:15px;background:#000;text-align:center;line-height:15px;position:relative;}
#bottom span.active{background: #FFFF33;}
#bottom span div {position:absolute;width:110px;height:110px;top:-125px;left:-46px;display:none;}
#bottom span div:after{content:'';position:absolute;left:49px;bottom:-12px;border-top:7px solid #fff;border-right:5px solid transparent;border-bottom:5px solid transparent;border-left:5px solid transparent;}
#bottom span img {width:100px;height:100px;border:5px solid #fff;}
#left, #right{position:absolute;width:60px;height:60px;border-radius:60px;line-height:60px;font-size:60px;background:#FFFF66;font-weight:bold;text-align:center;top:50%;margin-top:-25px;color:#fff;cursor:pointer;filter(opacity:70);opacity:0.7;}
#left:hover,#right:hover{filter(opacity:100);opacity:1;}
#left{left:0px;}
#right{right:0px;}
#img{width:400px;height:500px;}
</style>
<script>
window.onload = function () {
var bottom = $('bottom'),title = $('title'),
img = $('img'),left = $('left'),right = $('right');
var aSpan = bottom.getElementsByTagName('span');
var aDiv = bottom.getElementsByTagName('div');
var arr = ['图片一','图片二','图片三', '图片四'];
var num = 0;
// 初始化
picTab();
// 点击下一张
right.onclick = function () {
if (num === aDiv.length - 1) num = -1;
num++;
picTab();
}
// 点击上一张
left.onclick = function () {
if (num === 0) num = aDiv.length;
num--;
picTab();
}
function picTab() {
title.innerHTML = arr[num];
img.src = 'img/' + (num + 1) + '.png';
for ( var i = 0; i < aSpan.length; i++ ) {
aSpan[i].className = '';
}
aSpan[num].className = 'active';
}
// 鼠标移入移出显示缩略图
for ( var i = 0; i < aSpan.length; i++ ) {
aSpan[i].index = i;
aSpan[i].onmouseover = function () {
aDiv[this.index].style.display = 'block';
}
aSpan[i].onmouseout = function () {
aDiv[this.index].style.display = 'none';
}
aSpan[i].onclick = function () {
num = this.index;
picTab();
}
}
function $(id) { return document.getElementById(id);}
}
</script>
</head>
<body>
<div id="content">
<div id="title">带缩略图的轮播</div>
<div id="left"><</div>
<div id="right">></div>
<div id="bottom">
<span><div><img src="img/1.png"/ alt="자바스크립트 기반 썸네일로 캐러셀 효과 구현" ></div></span>
<span><div><img src="img/2.png"/ alt="자바스크립트 기반 썸네일로 캐러셀 효과 구현" ></div></span>
<span><div><img src="img/3.png"/ alt="자바스크립트 기반 썸네일로 캐러셀 효과 구현" ></div></span>
<span><div><img src="img/4.png"/ alt="자바스크립트 기반 썸네일로 캐러셀 효과 구현" ></div></span>
</div>
<img src="" id="img"/ alt="자바스크립트 기반 썸네일로 캐러셀 효과 구현" >
</div>
</body>
</html>위 내용이 이 기사의 전체 내용입니다. 모든 분들의 학습에 도움이 될 것입니다. 도움을 주셔서 감사드리며, 모든 분들이 PHP 중국어 웹사이트를 응원해주시기를 바랍니다.
자바스크립트 기반 썸네일로 회전판 효과 구현과 관련된 더 많은 기사를 보려면 PHP 중국어 웹사이트를 주목하세요!