This article mainly introduces the steps of building a vue project with webpack. Now I will share it with you and give you a reference.
Preparation
webpack
vue.js
npm
nodejs
ES6 syntax
Since the content of this article is to load vue through npm, so start You need to install the nodejs environment before. After the installation is complete, perform the following steps:
Create the project
mkdir vue-demo
cd vue-demo
Use the npm init command to generate the package.json file
npm init
Approximately generated package. json is as follows:
{
 "name": "vue-demo",
 "version": "1.0.0",
 "description": "this is a vue demo",
 "main": "index.js",
 "scripts": {
 "test": "echo \"Error: no test specified\" && exit 1"
 },
 "license": "ISC",
 "dependencies": {
 }
}Introduce webpack, please refer to the official website for how to use webpack
npm install webpack --save-dev
If the download speed using npm is too slow, you can use Taobao’s cnpm mirror
npm install -g cnpm –registry=https://registry.npm.taobao.org
Input The above command can point npm to the domestic image. When using it, you need to replace npm with cnpm. Leave the rest unchanged
Create the webpack.config.js file in the project
const path = require('path')
module.exports ={
 entry:'./src/main.js',
 output:{
  path:path.resolve(__dirname,'dist'),
  filename:"demo.js"
 }
}Use webpack command to compile
webpack
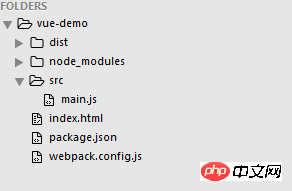
The project directory after compilation is approximately as follows:

Note: Before using webpack command You need to create index.html and main.js files first. The main.js file is located in the src directory.
The content of index.html is as follows
<!DOCTYPE html>
<html lang="en">
<head>
 <meta charset="UTF-8">
 <title>vue demo</title>
</head>
<body>
 <script src="./dist/demo.js"></script>
</body>
</html>
main.js is as follows
alert('hello world');
Introduce vue
npm install vue --save
After executing the command, the following code will be added to package.json
"dependencies": { "vue": "^2.4.2" }
Modify the content in main.js to the following code
import Vue from 'vue'
var vm = new Vue({
 el:'#app',
 data:{
  msg:'hello vue'
 }
})Introduce babel
npm install --save-dev babel-core babel-loader
Because a lot of es6 syntax is used when using vue, but now many browsers do not support es6 The support is not very good, so these syntaxes need to be converted to es5 syntax during compilation. At this time, we use babel for compilation.
Please read the official website documentation http://babeljs.cn/ for the use of Babel.
Add babel to the webpack.config.js configuration file:
const path = require('path')

module.exports ={
 entry:'./src/main.js',
 output:{
  path:path.resolve(__dirname,'dist'),
  filename:"demo.js"
 },
 module:{
  rules:[
   {
    test: /\.js$/,
    loader:"babel-loader",
    exclude: /node_modules/
   }
  ]
 }
}Then enter the webpack command on the command line to compile. After the compilation is completed, use the browser to open the index.html file. At this time, you will find the following error in the browser console:
[Vue warn]: You are using the runtime-only build of Vue where the template compiler is not available. Either pre-compile the templates into render functions, or use the compiler-included build.

(found in <Root>)
This is because the runtime version of vue is being used, and the compiler in this version is not available. We need to switch it to For the runtime compiled version, you need to add the following code to the configuration file
resolve: {
 alias: {
  'vue$': 'vue/dist/vue.esm.js' // 'vue/dist/vue.common.js' for webpack 1
 }
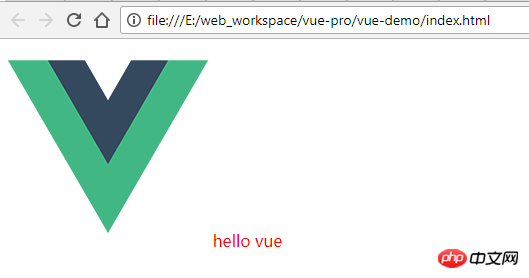
}At this time, run the webpack command to recompile. After compilation, access the index.html page. The page content is as shown below

At this point a vue project based on webpack is built.
Some common configurations of webpack
In the actual development of the project, we will also introduce resource files such as css, images and fonts. The introduction of these files requires corresponding loaders to load them into the project and use them normally.
The following only introduces how to use some of the loaders we need. For more information, please refer to the webpack loader documentation.
css loader
We need to introduce css-loader, and style-loader (the purpose of installing style-loader is to embed css in html with style ).
Execute the command
npm install --save-dev css-loader style-loader
Configure the following in webpack.config.js
module: {
  rules: [{
   test: /\.js$/,
   loader: "babel-loader",
   exclude: /node_modules/
  }, {
   test: /\.css$/,
   loader: 'style-loader!css-loader'
  }]
},Then create a styles folder in the src directory and add a main in it. css file, write the following content
#app{
 color:red;
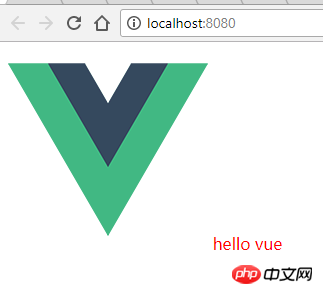
}Then run the webpack command and reload the index.html file. It can be seen that the css has taken effect. The effect is as shown below

Loading of image resources
Use file-loader or url-loader loader to load. They are both used to package files and image resources. The difference between the two is url- The loader is encapsulated based on the file-loader.
If there are many pictures when visiting the website, many http requests will be sent, which will reduce the page performance. This problem can be solved by url-loader. url-loader will encode the imported image and generate dataURl. It is equivalent to translating the image data into a string of characters, and then packaging the string of characters into a file. Finally, you only need to import this file to access the image.
Of course, if the image is larger, encoding will consume performance. Therefore, url-loader provides a limit parameter. Files smaller than the limit bytes will be converted into DataURl, and files larger than the limit will be copied using file-loader.
Here we use url-loader. Since it is based on file-loader encapsulation, file-loader also needs to be introduced.
npm install --save-dev file-loader url-loader
Add the following configuration in the rules of webpack.config.js
{
 test: /\.(png|jpe?g|gif|svg)(\?.*)?$/,
 loader: 'url-loader',
 options: {
  limit: 10000
 }
}The next step is to introduce the image into the code. You need to make the following modifications in main.js and index.html respectively:
main.js
import Vue from 'vue'
import './styles/main.css'
import logo from'./images/logo.png'

var vm = new Vue({
 el:'#app',
 data:{
  logo:logo,
  msg:'hello vue'
 }
})index.html
<!DOCTYPE html>
<html lang="en">
<head>
 <meta charset="UTF-8">
 <title>vue demo</title>
</head>
<body>
 <p id="app">
  <img :src="logo" alt="logo" class="logo">
  {{msg}}
 </p>
 <script src="./dist/demo.js"></script>
</body>
</html>Finally run the webpack command and access index.html, the results are as follows

在测试中发现当图片大于10KB的时候发现加载图片失败,找不到图片,但此时在dist目录下面是能看到已经通过加载器加载成功了的图片,再通过浏览器的开发者工具对图片的引用路径进行检查时,可以发现页面中img的路径不对,路径中只有文件名缺失了前面的dist目录,所以此时我们需要将main.js中的代码进行如下修改
logo:"./dist/"+logo,
重新编译后图片就显示出来了。但是现在新的问题又出来了,由于我们在配置文件中配置了小于10kb的代码将以 base64的形式内联在代码中。所以此时是不需要 "./dist" 这个前缀的。 解决此问题有两种办法:
不使用base64的形式将图片内嵌到代码中
将html文件放到dist目录中 既然用了url-loader加载器则不推荐使用第一种。所以我们使用第二种方式。
将html文件放到dist目录中最简单的办法就是把index.html文件复制到dist目录中,然后将引入就是的代码改为:
<script src="./demo.js" > </script>
main.js中改回原来的设置
logo:logo,
重新编译后图片在两种情况下都可以加载出来了。
还有一中比较常用的方式是在编译时自动在dist的目录中创建一个html文件并将index.html中的内容复制过去。此时我们需要时webpack的 HtmlWebpackPlugin 插件。
HtmlWebpackPlugin 插件
引入插件
npm install --save-dev html-webpack-plugin
webpack.config.js 中增加如下配置
const HtmlWebpackPlugin = require('html-webpack-plugin')
...

plugins:[
  new HtmlWebpackPlugin()
]
重新编译后发现在dist目录下生成了如下内容的html的文件
<!DOCTYPE html>
<html>
 <head>
 <meta charset="UTF-8">
 <title>Webpack App</title>
 </head>
 <body>
 <script type="text/javascript" src="demo.js"></script></body>
</html>
与我们原来自己的写index.html相比,该文件缺少了下面这些这些内容
<p id="app">
  <img :src="logo" alt="logo" class="logo">
  {{msg}}
</p>现在需要对配置文件做稍微的修改,让html文件在创建的时候自动将index.html的中内容复制过去。通过查阅该插件的文档,可知需做如下修改:
plugins:[
  new HtmlWebpackPlugin({
   title: 'vue demo',
   template: 'index.html'
  })
]index.html 文件中 去除 script代码,在重新编译后,即可获取我们需要的html文件
详细参数配置请参考官方文档
webpack-dev-server
在我们实际开发中需要将代码部署在server中,而不是在浏览器中直接打开文件。此时我们需要使用webpack的 webpack-dev-server 。
webpack-dev-server 为我们提供了一个简单的web服务器,并且能够实时重新加载(live reloading)。
npm install --save-dev webpack-dev-server
在webpack.config.js 文件中需要指定一个文件夹,告诉开发服务器需要从哪儿加载文件
const path = require('path')
const HtmlWebpackPlugin = require('html-webpack-plugin')

module.exports = {
  entry: './src/main.js',
  output: {
    path: path.resolve(__dirname, 'dist'),
    filename: "demo.js"
  },
  plugins: [
    new HtmlWebpackPlugin({
      title: 'vue demo',
      template: 'index.html'
    })
  ],
  devServer:{
    contentBase:"./dist"
  },
  module: {
    rules: [{
        test: /\.js$/,
        loader: "babel-loader",
        exclude: /node_modules/
      }, {
        test: /\.css$/,
        loader: 'style-loader!css-loader'
      }, {
        test: /\.(png|jpe?g|gif|svg)(\?.*)?$/,
        loader: 'url-loader',
        options: {
          limit: 10000
        }
      },
      {
        test: /\.(woff2?|eot|ttf|otf)(\?.*)?$/,
        loader: 'url-loader',
        options: {
          limit: 10000
        }
      }
    ]
  },
  resolve: {
    alias: {
      'vue$': 'vue/dist/vue.esm.js' // 'vue/dist/vue.common.js' for webpack 1
    }
  }
}上面红色字体的配置信息是告知webpack-dev-server, 在localhost:8080 下建立服务,将 dist 目录下的文件,作为可访问文件。
让我们在package.json中添加一个script脚本,可以直接运行开发服务器(dev server):
"scripts": {
  "test": "echo \"Error: no test specified\" && exit 1",
  "dev":"webpack-dev-server --open",
  "build": "webpack"
},然后输入如下命令
npm run dev
启动完成后,浏览器会自动打开一个访问 http://localhost:8080/ 的页面

此时服务已启动成功。
字体的加载
字体的加载方式与图片的一样也是用url-loader,配置如下
{
  test: /\.(woff2?|eot|ttf|otf)(\?.*)?$/,
  loader: 'url-loader',
  options: {
    limit: 10000
  }
}vue-loader
在vue的开发过程中,通常我们需要写.vue结尾的文件即组件,如app.vue
<template>
<p id="app">
<img src="./images/logo2.jpg" alt="logo" >
{{msg}}
</p>
</template>
<script>
export default {
name:'app',
data(){
return {
msg:"hello vue !!"
}
}
}
</script>该文件需要通过vue-loader来进行加载,现在我们需要做如下配置。通过 vue-loader 和vue-template-compiler来加载并编译.vue文件
npm install --save-dev vue-loader vue-template-compiler
webpack.config.js 中
{
  test: /\.vue$/,
  loader: 'vue-loader'
}为了在vue中引入对.vue的使用,我们需进行如下修改
index.html
<!DOCTYPE html>
<html lang="en">
<head>
  <meta charset="UTF-8">
  <title>vue demo</title>
</head>
<body>
  <p id="app">
  </p>
</body>
</html>
main.js
import Vue from 'vue'
import './styles/main.css'
import App from './app.vue'
new Vue({
el: '#app',
template: '<App/>',
components: { App }
})app.vue
<template>
<p id="app">
<img src="./images/logo.png" alt="logo" >
{{msg}}
</p>
</template>
<script>
export default {
name:'app',
data(){
return {
msg: 'hello vue !!'
}
}
}
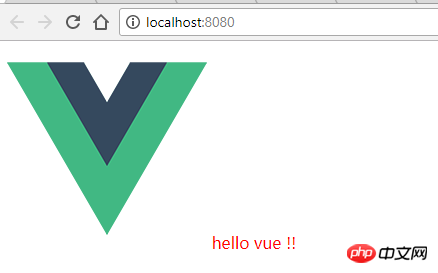
</script>修改完成后 运行 npm run dev 命令 ,获得如下效果的页面

热部署
在上一步中,如果我们修改app.vue文件中的msg的参数,可以看到页面会自动刷新。但是此时是页面全局刷新的,如果我们只想局部刷新即只刷新修改的部分,需要使用webpack的HotModuleReplacementPlugin插件,在webpack.config.js的plugins中添加下面的信息:
new webpack.HotModuleReplacementPlugin()
然后去package.json中,script 里面dev的值中加上 --hot -only
"dev": "webpack-dev-server --hot-only --open",
然后重启服务,再修改 msg 的值,会发现此时值的改变是局部刷新的。
生产环境
如果我们在浏览器的控制台中发现有如下提示

意思时说项目现在运行在开发环境中,在部署到正式环境下时,要确保它是处于production的模式。需要将代码打包部署到生产环境时需要进行如下配置:
var webpack = require('webpack')
module.exports = {
// ...
plugins: [
// ...
  new webpack.DefinePlugin({
    'process.env': {
      NODE_ENV: '"production"'
    }
  }),
  new webpack.optimize.UglifyJsPlugin({
    compress: {
      warnings: false
    }
  })
]}上面是我整理给大家的,希望今后会对大家有帮助。
相关文章:
The above is the detailed content of How to build a vue project on webpack. For more information, please follow other related articles on the PHP Chinese website!


