This article summarizes the usage methods and lessons learned of cropperjs in .vue files. Interested friends can learn together.
In projects using vue, images need to be cropped, so use I have used cropperjs, and I have also encountered some pitfalls in the process of using it. The following is the usage method and lessons learned of cropperjs in the .vue file:
Before using it, introduce it first:

In the project, run:
npm install cropperjs -save
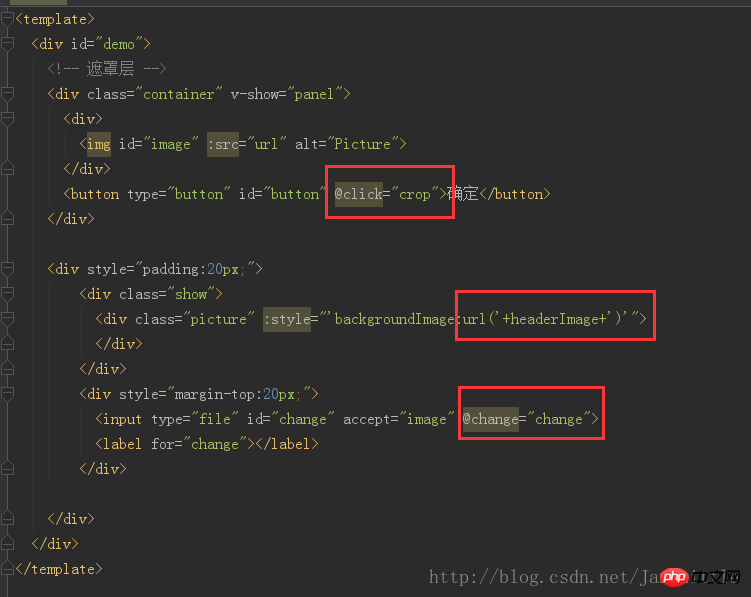
In the template:
<p id="demo">
<!-- 遮罩层 -->
<p class="container" v-show="panel">
<p>
<img id="image" :src="url" alt="Picture">
</p>
<button type="button" id="button" @click="crop">确定</button>
</p>
<p style="padding:20px;">
<p class="show">
<p class="picture" :style="'backgroundImage:url('+headerImage+')'">
</p>
</p>
<p style="margin-top:20px;">
<input type="file" id="change" accept="image" @change="change">
<label for="change"></label>
</p>
</p>
</p>
import Cropper from 'cropperjs'
export default {
 components: {
 },
 data () {
  return {
   headerImage:'',
   picValue:'',
   cropper:'',
   croppable:false,
   panel:false,
   url:''
  }
 },
 mounted () {
  //初始化这个裁剪框
  var self = this;
  var image = document.getElementById('image');
  this.cropper = new Cropper(image, {
   aspectRatio: 1,
   viewMode: 1,
   background:false,
   zoomable:false,
   ready: function () {
    self.croppable = true;
   }
  });
 },
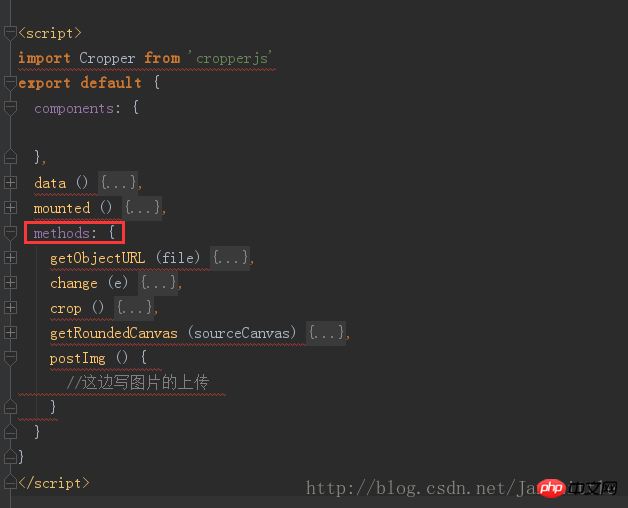
 methods: {
  getObjectURL (file) {
   var url = null ;
   if (window.createObjectURL!=undefined) { // basic
    url = window.createObjectURL(file) ;
   } else if (window.URL!=undefined) { // mozilla(firefox)
    url = window.URL.createObjectURL(file) ;
   } else if (window.webkitURL!=undefined) { // webkit or chrome
    url = window.webkitURL.createObjectURL(file) ;
   }
   return url ;
  },
  change (e) {
   let files = e.target.files || e.dataTransfer.files;
   if (!files.length) return;
   this.panel = true;
   this.picValue = files[0];
   this.url = this.getObjectURL(this.picValue);
   //每次替换图片要重新得到新的url
   if(this.cropper){
    this.cropper.replace(this.url);
   }
   this.panel = true;
  },
  crop () {
    this.panel = false;
    var croppedCanvas;
    var roundedCanvas;
    if (!this.croppable) {
     return;
    }
    // Crop
    croppedCanvas = this.cropper.getCroppedCanvas();
    console.log(this.cropper)
    // Round
    roundedCanvas = this.getRoundedCanvas(croppedCanvas);
    this.headerImage = roundedCanvas.toDataURL();
    this.postImg()
  },
  getRoundedCanvas (sourceCanvas) {
   var canvas = document.createElement('canvas');
   var context = canvas.getContext('2d');
   var width = sourceCanvas.width;
   var height = sourceCanvas.height;
   canvas.width = width;
   canvas.height = height;
   context.imageSmoothingEnabled = true;
   context.drawImage(sourceCanvas, 0, 0, width, height);
   context.globalCompositeOperation = 'destination-in';
   context.beginPath();
   context.arc(width / 2, height / 2, Math.min(width, height) / 2, 0, 2 * Math.PI, true);
   context.fill();
   return canvas;
  },
  postImg () {
   //这边写图片的上传
  }
 }
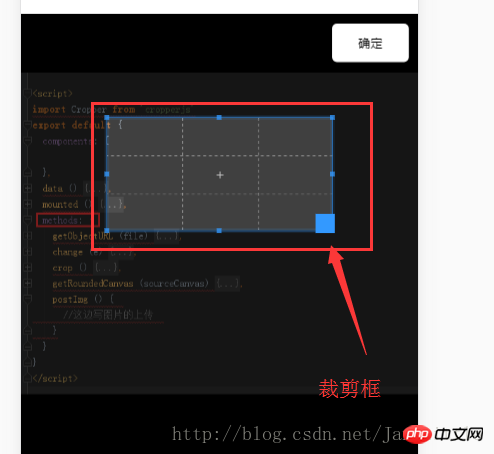
}Overall effect:
 ##css code (it’s quite long, I didn’t want to post it at first, But in order to make children’s shoes run the demo directly, I posted it anyway. It’s too long, so I hope you’ll forgive me):
*{
margin: 0;
padding: 0;
}
#demo #button {
position: absolute;
right: 10px;
top: 10px;
width: 80px;
height: 40px;
border:none;
border-radius: 5px;
background:white;
}
#demo .show {
width: 100px;
height: 100px;
overflow: hidden;
position: relative;
border-radius: 50%;
border: 1px solid #d5d5d5;
}
#demo .picture {
width: 100%;
height: 100%;
overflow: hidden;
background-position: center center;
background-repeat: no-repeat;
background-size: cover;
}
#demo .container {
z-index: 99;
position: fixed;
padding-top: 60px;
left: 0;
top: 0;
right: 0;
bottom: 0;
background:rgba(0,0,0,1);
}
#demo #image {
max-width: 100%;
}
.cropper-view-box,.cropper-face {
border-radius: 50%;
}
/*!
* Cropper.js v1.0.0-rc
* https://github.com/fengyuanchen/cropperjs
*
* Copyright (c) 2017 Fengyuan Chen
* Released under the MIT license
*
* Date: 2017-03-25T12:02:21.062Z
*/
.cropper-container {
font-size: 0;
line-height: 0;
position: relative;
-webkit-user-select: none;
-moz-user-select: none;
-ms-user-select: none;
user-select: none;
direction: ltr;
-ms-touch-action: none;
touch-action: none
}
.cropper-container img {
/* Avoid margin top issue (Occur only when margin-top <= -height) */
display: block;
min-width: 0 !important;
max-width: none !important;
min-height: 0 !important;
max-height: none !important;
width: 100%;
height: 100%;
image-orientation: 0deg
}
.cropper-wrap-box,
.cropper-canvas,
.cropper-drag-box,
.cropper-crop-box,
.cropper-modal {
position: absolute;
top: 0;
right: 0;
bottom: 0;
left: 0;
}
.cropper-wrap-box {
overflow: hidden;
}
.cropper-drag-box {
opacity: 0;
background-color: #fff;
}
.cropper-modal {
opacity: .5;
background-color: #000;
}
.cropper-view-box {
display: block;
overflow: hidden;
width: 100%;
height: 100%;
outline: 1px solid #39f;
outline-color: rgba(51, 153, 255, 0.75);
}
.cropper-dashed {
position: absolute;
display: block;
opacity: .5;
border: 0 dashed #eee
}
.cropper-dashed.dashed-h {
top: 33.33333%;
left: 0;
width: 100%;
height: 33.33333%;
border-top-width: 1px;
border-bottom-width: 1px
}
.cropper-dashed.dashed-v {
top: 0;
left: 33.33333%;
width: 33.33333%;
height: 100%;
border-right-width: 1px;
border-left-width: 1px
}
.cropper-center {
position: absolute;
top: 50%;
left: 50%;
display: block;
width: 0;
height: 0;
opacity: .75
}
.cropper-center:before,
.cropper-center:after {
position: absolute;
display: block;
content: ' ';
background-color: #eee
}
.cropper-center:before {
top: 0;
left: -3px;
width: 7px;
height: 1px
}
.cropper-center:after {
top: -3px;
left: 0;
width: 1px;
height: 7px
}
.cropper-face,
.cropper-line,
.cropper-point {
position: absolute;
display: block;
width: 100%;
height: 100%;
opacity: .1;
}
.cropper-face {
top: 0;
left: 0;
background-color: #fff;
}
.cropper-line {
background-color: #39f
}
.cropper-line.line-e {
top: 0;
right: -3px;
width: 5px;
cursor: e-resize
}
.cropper-line.line-n {
top: -3px;
left: 0;
height: 5px;
cursor: n-resize
}
.cropper-line.line-w {
top: 0;
left: -3px;
width: 5px;
cursor: w-resize
}
.cropper-line.line-s {
bottom: -3px;
left: 0;
height: 5px;
cursor: s-resize
}
.cropper-point {
width: 5px;
height: 5px;
opacity: .75;
background-color: #39f
}
.cropper-point.point-e {
top: 50%;
right: -3px;
margin-top: -3px;
cursor: e-resize
}
.cropper-point.point-n {
top: -3px;
left: 50%;
margin-left: -3px;
cursor: n-resize
}
.cropper-point.point-w {
top: 50%;
left: -3px;
margin-top: -3px;
cursor: w-resize
}
.cropper-point.point-s {
bottom: -3px;
left: 50%;
margin-left: -3px;
cursor: s-resize
}
.cropper-point.point-ne {
top: -3px;
right: -3px;
cursor: ne-resize
}
.cropper-point.point-nw {
top: -3px;
left: -3px;
cursor: nw-resize
}
.cropper-point.point-sw {
bottom: -3px;
left: -3px;
cursor: sw-resize
}
.cropper-point.point-se {
right: -3px;
bottom: -3px;
width: 20px;
height: 20px;
cursor: se-resize;
opacity: 1
}
@media (min-width: 768px) {
.cropper-point.point-se {
width: 15px;
height: 15px
}
}
@media (min-width: 992px) {
.cropper-point.point-se {
width: 10px;
height: 10px
}
}
@media (min-width: 1200px) {
.cropper-point.point-se {
width: 5px;
height: 5px;
opacity: .75
}
}
.cropper-point.point-se:before {
position: absolute;
right: -50%;
bottom: -50%;
display: block;
width: 200%;
height: 200%;
content: ' ';
opacity: 0;
background-color: #39f
}
.cropper-invisible {
opacity: 0;
}
.cropper-bg {
background-image: url('data:image/png;base64,iVBORw0KGgoAAAANSUhEUgAAABAAAAAQAQMAAAAlPW0iAAAAA3NCSVQICAjb4U/gAAAABlBMVEXMzMz////TjRV2AAAACXBIWXMAAArrAAAK6wGCiw1aAAAAHHRFWHRTb2Z0d2FyZQBBZG9iZSBGaXJld29ya3MgQ1M26LyyjAAAABFJREFUCJlj+M/AgBVhF/0PAH6/D/HkDxOGAAAAAElFTkSuQmCC');
}
.cropper-hide {
position: absolute;
display: block;
width: 0;
height: 0;
}
.cropper-hidden {
display: none !important;
}
.cropper-move {
cursor: move;
}
.cropper-crop {
cursor: crosshair;
}
.cropper-disabled .cropper-drag-box,
.cropper-disabled .cropper-face,
.cropper-disabled .cropper-line,
.cropper-disabled .cropper-point {
cursor: not-allowed;
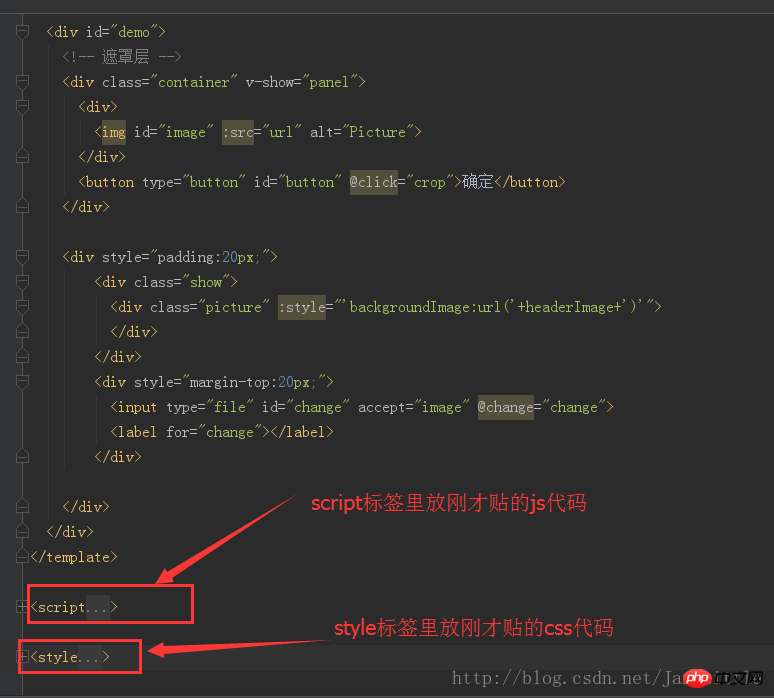
}Overall picture:
 Put the above together Put the code into your project, or create a separate .vue and put it into the project, you can achieve this effect:
 The above is what I compiled for everyone, I hope it will be better in the future Helpful to everyone.
Related articles:
Vue.js custom event form input component methodSummary of several ways to register components in vueUse use to register Vue global components and global directivesThe above is the detailed content of How to use cropperjs in vue (detailed tutorial). For more information, please follow other related articles on the PHP Chinese website!


