Cet article présente principalement le partage de code de certains styles CSS Checkbox checkbox Pour la conception de quelques contrôles de page simples, les amis dans le besoin peuvent s'y référer
La case à cocher est un Dans ce tutoriel, nous allons créer 5 boîtes de sélection différentes que vous pourrez utiliser sur votre site Web.
Adresse de démonstration
/**
 * 隐藏默认的checkbox
 */
input[type=checkbox] {
 visibility: hidden;
}for , l'étiquette correspondante. La case à cocher sera cochée. Cela signifie que nous pouvons gérer notre Checkbox via l'événement de clic du label .
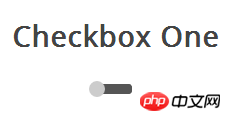
Style 1 Ce style de case à cocher est comme un curseur de déverrouillage, avec le curseur coché et décoché
sera affichés à différents endroits. Lorsque vous cliquez sur le bouton du curseur (étiquette d'étiquette), la case à cocher sera cochée et le curseur se déplacera vers la position ON. Nous commençons par créer le code HTML pour la zone des cases à cocher.
En raison de ce style de case à cocher, une étiquette ne suffit pas pour terminer la tâche, nous utilisons un élément p pour contenir la case à cocher, nous devons les utiliser pour créer la bande noire et les coins arrondis.<section>
<!-- Checbox One -->
<h3>Checkbox One</h3>
<p class="checkboxOne">
<input type="checkbox" value="1" id="checkboxOneInput" name="" />
<label for="checkboxOneInput"></label>
</p>
</section>/**
* Create the slider bar
*/
.checkboxOne {
width: 40px;
height: 10px;
background: #555;
margin: 20px 80px;
position: relative;
border-radius: 3px;
}/**
* Create the slider from the label
*/
.checkboxOne label {
display: block;
width: 16px;
height: 16px;
border-radius: 50%;
-webkit-transition: all .5s ease;
-moz-transition: all .5s ease;
-o-transition: all .5s ease;
-ms-transition: all .5s ease;
transition: all .5s ease;
cursor: pointer;
position: absolute;
top: -3px;
left: -3px;
background: #ccc;
}/**
* Move the slider in the correct position if the checkbox is clicked
*/
.checkboxOne input[type=checkbox]:checked + label {
left: 27px;
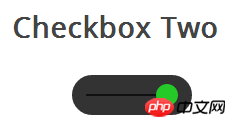
} Ce style de case à cocher est comme le style, mais la différence est que ce bouton coulissant change de couleur. Lorsque vous cliquez sur le bouton du curseur, il se déplace de l'autre côté de la bande et change la couleur du bouton.
Le code HTML est exactement le même que celui du style.
Ce p deviendra une bande plus grande que le style. L'étiquette sera toujours utilisée comme curseur. Utilisez le CSS suivant pour le définir.<section>
<!-- Checbox Two -->
<h3>Checkbox Two</h3>
<p class="checkboxTwo">
<input type="checkbox" value="1" id="checkboxTwoInput" name="" />
<label for="checkboxTwoInput"></label>
</p>
</section>/**
* Checkbox Two
*/
.checkboxTwo {
width: 120px;
height: 40px;
background: #333;
margin: 20px 60px;
border-radius: 50px;
position: relative;
}pseudo Classe crée un nouvel élément.
Identique au style 1, nous écrivons ensuite un style CSS pour l'étiquette et l'utilisons comme curseur./**
* Create the line for the circle to move across
*/
.checkboxTwo:before {
content: '';
position: absolute;
top: 19px;
left: 14px;
height: 2px;
width: 90px;
background: #111;
}/**
* Create the circle to click
*/
.checkboxTwo label {
display: block;
width: 22px;
height: 22px;
border-radius: 50%;
-webkit-transition: all .5s ease;
-moz-transition: all .5s ease;
-o-transition: all .5s ease;
-ms-transition: all .5s ease;
transition: all .5s ease;
cursor: pointer;
position: absolute;
top: 9px;
z-index: 1;
left: 12px;
background: #ddd;
}/**
* Create the click event for the checkbox
*/
.checkboxTwo input[type=checkbox]:checked + label {
left: 84px;
background: #26ca28;
}样式三
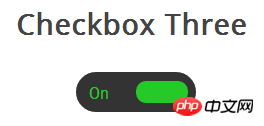
这个复选框的样式比样式二更复杂一些,它和前面的例子一样会左右滑动,并且当改变选中和未选中的状态时,滑块滑动到另一侧并且在原位置显示对应的文本。
首先,我们写HTML代码,这和前面是相同的。
<section>
  <!-- Checbox Three -->
  <h3>Checkbox Three</h3>
   <p class="checkboxThree">
    <input type="checkbox" value="1" id="checkboxThreeInput" name="" />
    <label for="checkboxThreeInput"></label>
   </p>
</section>然后,我们用相同的方式把p作为滑块,下面的代码会创建一个黑色圆角的条带,我们可以把滑块和文本放到里面。
/**
 * Checkbox Three
 */
.checkboxThree {
 width: 120px;
 height: 40px;
 background: #333;
 margin: 20px 60px;

 border-radius: 50px;
 position: relative;
}当滑块处于未选中状态时,滑块会在左侧,并且右边显示”OFF”,当点击的时候,滑块移动到右侧,左侧显示”ON”。
但是元素数量不足以让我们实现这些功能,所以我们要用:before和:after两个伪类创建两个元素,分别放置”ON”和”OFF”。
/**
 * Create the text for the On position
 */
.checkboxThree:before {
 content: 'On';
 position: absolute;
 top: 12px;
 left: 13px;
 height: 2px;
 color: #26ca28;
 font-size: 16px;
}
/**
 * Create the label for the off position
 */
.checkboxThree:after {
 content: 'Off';
 position: absolute;
 top: 12px;
 left: 84px;
 height: 2px;
 color: #ddd;
 font-size: 16px;
}和前面一样,我们来添加滑块的样式,当被点击时它会移动到另一侧,并且改变颜色。
/**
 * Create the pill to click
 */
.checkboxThree label {
 display: block;
 width: 52px;
 height: 22px;
 border-radius: 50px;

 -webkit-transition: all .5s ease;
 -moz-transition: all .5s ease;
 -o-transition: all .5s ease;
 -ms-transition: all .5s ease;
 transition: all .5s ease;
 cursor: pointer;
 position: absolute;
 top: 9px;
 z-index: 1;
 left: 12px;
 background: #ddd;
}

/**
 * Create the checkbox event for the label
 */
.checkboxThree input[type=checkbox]:checked + label {
 left: 60px;
 background: #26ca28;
}样式四
在这个样式中,我们会创建两个圆形,当点击时改变里面的圆形的颜色表示选中与未选中的状态。
和前面一样的HTML代码。
<section>
  <!-- Checbox Four -->
  <h3>Checkbox Four</h3>
   <p class="checkboxFour">
    <input type="checkbox" value="1" id="checkboxFourInput" name="" />
    <label for="checkboxFourInput"></label>
   </p>
</section>接下来我们要为checkbox创建外面的圆形,使用CSS的border-radius属性,并且设置为100%就可以创建一个正圆形。
<section>
  <!-- Checbox Four -->
  <h3>Checkbox Four</h3>
   <p class="checkboxFour">
    <input type="checkbox" value="1" id="checkboxFourInput" name="" />
    <label for="checkboxFourInput"></label>
   </p>
</section>然后我们用label元素来创建一个小一点的圆形,它会根据checkbox状态来改变颜色。
/**
 * Create the checkbox button
 */
.checkboxFour label {
 display: block;
 width: 30px;
 height: 30px;
 border-radius: 100px;

 -webkit-transition: all .5s ease;
 -moz-transition: all .5s ease;
 -o-transition: all .5s ease;
 -ms-transition: all .5s ease;
 transition: all .5s ease;
 cursor: pointer;
 position: absolute;
 top: 5px;
 left: 5px;
 z-index: 1;

 background: #333;

 -webkit-box-shadow:inset 0px 1px 3px rgba(0,0,0,0.5);
 -moz-box-shadow:inset 0px 1px 3px rgba(0,0,0,0.5);
 box-shadow:inset 0px 1px 3px rgba(0,0,0,0.5);
}当复选框被选中的时候,我们要改变内圈的背景颜色来表示选中状态。
/**
 * Create the checked state
 */
.checkboxFour input[type=checkbox]:checked + label {
 background: #26ca28;
}样式五
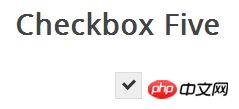
这个复选框的样式有些不同,它看起来只是比浏览器默认的checkbox样式稍微好了些,但是不同的是我们可以根据自己的需要来定义它的样式了。
首先还是一样的HTML代码
<section>
  <!-- Checbox Five -->
  <h3>Checkbox Five</h3>
   <p class="checkboxFive">
    <input type="checkbox" value="1" id="checkboxFiveInput" name="" />
    <label for="checkboxFiveInput"></label>
   </p>
</section>在前面的例子中,我们把p作为checkbox的滑动条带或者外部的圆圈,但是这一次我们不需要了,可以使用p元素来设置复选框的区域。
/**
 * Checkbox Five
 */
.checkboxFive {
 width: 25px;
 margin: 20px 100px;
 position: relative;
}label标签用于Click事件和我们要定义的复选框的方框样式。
/**
 * Create the box for the checkbox
 */
.checkboxFive label {
 cursor: pointer;
 position: absolute;
 width: 25px;
 height: 25px;
 top: 0;
   left: 0;
 background: #eee;
 border:1px solid #ddd;
}接下来,我们要创建方框中的对勾,对于这一点,我们可以使用:after伪类创建一个新的元素,为了实现这个样式,我们可以创建一个5px x 9px的长方形并给他加上边框。这时候我们去掉上面和右边的边框之后,它会看起来像一个字母L。然后我们可以使用CSS的transform属性让它旋转一下,这样看起来就像是一个对勾。
/**
 * Display the tick inside the checkbox
 */
.checkboxFive label:after {
 opacity: 0.2;
 content: '';
 position: absolute;
 width: 9px;
 height: 5px;
 background: transparent;
 top: 6px;
 left: 7px;
 border: 3px solid #333;
 border-top: none;
 border-right: none;

 -webkit-transform: rotate(-45deg);
 -moz-transform: rotate(-45deg);
 -o-transform: rotate(-45deg);
 -ms-transform: rotate(-45deg);
 transform: rotate(-45deg);
}在上面的CSS中,我们已经设置它的透明度为0.2,所以你会看到的复选框有一个半透明的对勾。你可以在悬停的时候加深一点,在选中时,可以把设置为不透明。
/**
 * Create the hover event of the tick
 */
.checkboxFive label:hover::after {
 opacity: 0.5;
}

/**
 * Create the checkbox state for the tick
 */
.checkboxFive input[type=checkbox]:checked + label:after {
 opacity: 1;
}Ce qui précède est le contenu détaillé de. pour plus d'informations, suivez d'autres articles connexes sur le site Web de PHP en chinois!