


php editor Youzi carefully explains how to enable the vertical synchronization function of Win11. The vertical synchronization function of Win11 can help users improve screen smoothness, but how to turn it on correctly is a technical task. In this article, we will introduce in detail the steps and techniques to enable the vertical synchronization function of Win11, so that you can easily master this practical function, improve system performance, and enjoy a smoother operating experience.
What is windows vertical synchronization?
Vertical synchronization, also known as vertical synchronization, is a function used to ensure that the refresh rate of the monitor is synchronized with the frame rate generated by the graphics card, thereby avoiding screen tearing and frame skipping. .
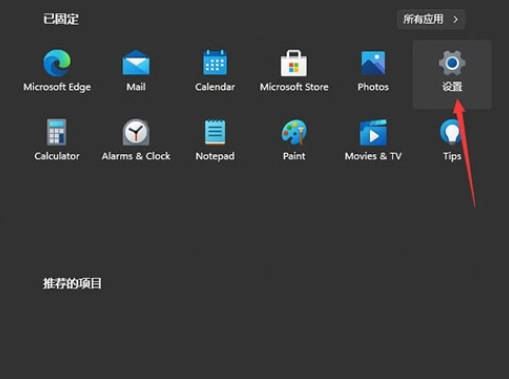
Step 1: We need to find the start icon in the lower left corner of the desktop and click to enter, open the menu bar and select the settings option.
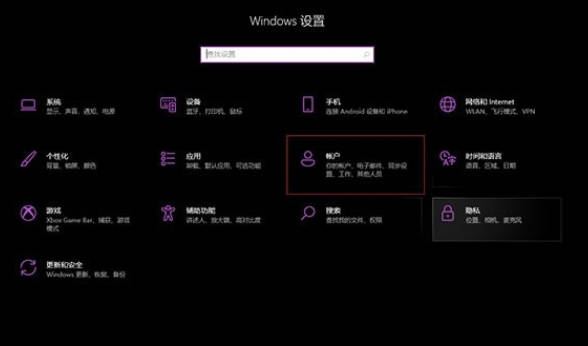
Step 2: Go to the settings page and click to open the account.
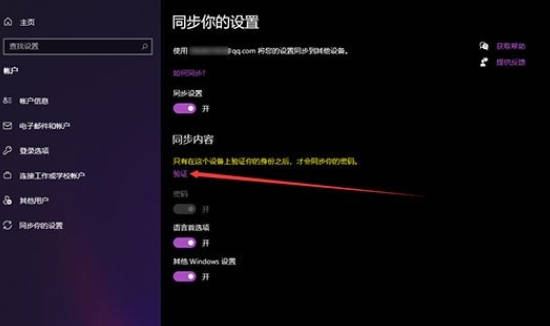
Step 3: Enter the account page, select the Sync your settings option in the options bar on the left side of the page, and click Verify under the synchronized content on the right side.
Step 4: Then we need to select the email address that needs to be verified.

Step 5: After receiving the verification code by email, enter it on the code input page and perform login verification.

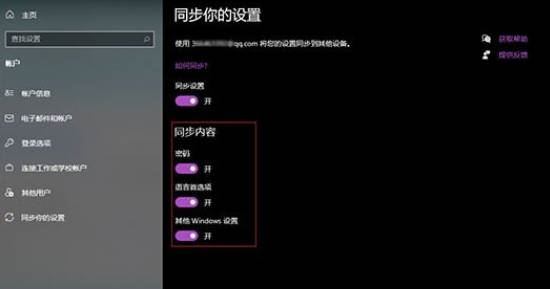
Step 6: Successful verification means the synchronization setting is successful.
1. Right-click a blank space on the desktop and select "NVIDIA Control Panel".
2. In the NVIDIA control panel, click the "3D Settings" option.
3. In the 3D settings, find the "Vertical Sync" option and select "On".
4. Click the "Apply" button to save the settings.
Summary:
Through the above methods, we can easily enable the Win11 vertical synchronization function to improve the display effect and user experience. Whether it is through the settings interface of Windows 11 or the NVIDIA control panel, it can be easily set up. I hope this article will be helpful to you and allow you to better use the Win11 vertical synchronization function. I hope you all like it, and please continue to pay attention to this site.
The above is the detailed content of Where to turn on vertical synchronization in win11? Tips for turning on vertical synchronization in win11. For more information, please follow other related articles on the PHP Chinese website!
 There is no WLAN option in win11
 How to skip online activation in win11
 Win11 skips the tutorial to log in to Microsoft account
 How to open win11 control panel
 Introduction to win11 screenshot shortcut keys
 Windows 11 my computer transfer to the desktop tutorial
 Solution to the problem of downloading software and installing it in win11
 How to skip network connection during win11 installation


![[Web front-end] Node.js quick start](https://img.php.cn/upload/course/000/000/067/662b5d34ba7c0227.png)


