php editor Xiaoxin will explain to you how to enable the network discovery function in Windows 10 system. The network discovery function can help you quickly find and access other devices on the network, and implement functions such as sharing files and printers. The following are simple and easy-to-understand steps for you to easily set up network discovery and enjoy a convenient network experience.
1. "Win R" shortcut key to start running, enter "control" in the window, and press Enter to enter the control panel interface.
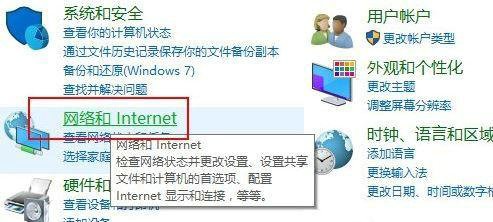
2. Then click the "Network and Internet" option in the interface.

3. Then click the "Network and Sharing Center" option.

#4. Then click "Change advanced sharing settings" in the left column.

#5. In the given interface, find "Enable network discovery" and check it.

#6. Finally, click "Save Changes".

| Network settings | |||
| ##Wi-Fi function disappears | Enable graphics card hardware acceleration | optimization service occupancy | |
The above is the detailed content of How to enable network discovery in Windows 10. For more information, please follow other related articles on the PHP Chinese website!
 win10 bluetooth switch is missing
 Why do all the icons in the lower right corner of win10 show up?
 The difference between win10 sleep and hibernation
 Win10 pauses updates
 What to do if the Bluetooth switch is missing in Windows 10
 win10 connect to shared printer
 Clean up junk in win10
 How to share printer in win10


