When using the WIN10 operating system, it is crucial to protect hard disk data. PHP editor Apple has brought you an operation tutorial on how to use the built-in functions of WIN10 to protect hard drive data. With simple steps and setup, you can easily keep your data safe and secure. Follow our guidance to make your hard drive data safer and your computer use more secure!
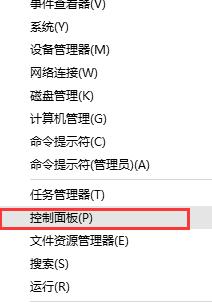
1. Right-click the Start menu in the lower left corner of the desktop and select [Control Panel].

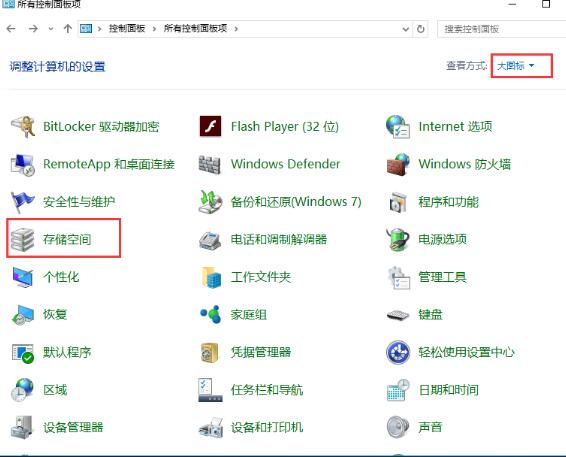
2. View the control panel options in [Large Icon] mode, find and click the [Storage Space] option.

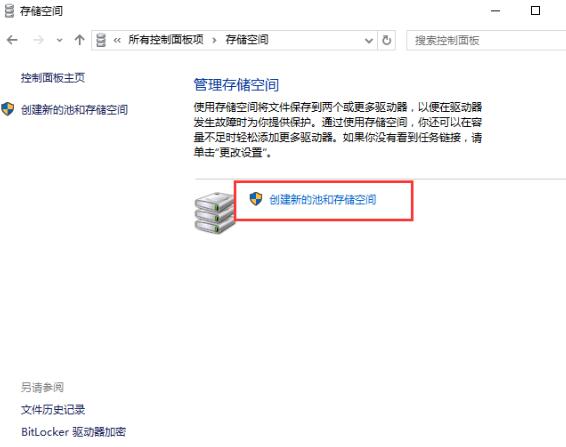
3. In the creation window of [Storage Space], click [Create New Pool and Storage Space], as shown in the figure: (Tip: If you do not see the task link, Please click [Change Settings] to set.).

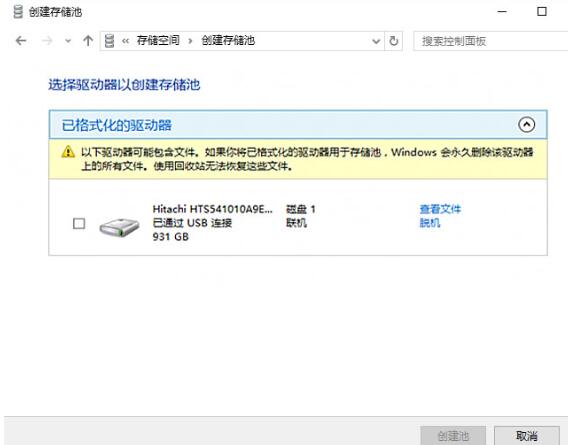
4. Select the drive to be used to create a storage pool, then click [Create Pool], specify the drive name and drive letter, select a layout, and specify the storage space size, and then Click [Create Storage Space].

Special tip: Before creating a storage pool, you must first connect an external storage device, otherwise it cannot be created. The drive will be formatted every time it is created, so if there is data in the connected drive, be sure to back up the data first.
The above is the detailed content of Tutorial on how to protect hard drive data using the built-in functions of WIN10. For more information, please follow other related articles on the PHP Chinese website!
 win10 bluetooth switch is missing
 Why do all the icons in the lower right corner of win10 show up?
 The difference between win10 sleep and hibernation
 Win10 pauses updates
 What to do if the Bluetooth switch is missing in Windows 10
 win10 connect to shared printer
 Clean up junk in win10
 How to share printer in win10


